First Parameters
Group Parameters
Before adding parameters to CONTROL, we recommend organizing them into logical groups. This section demonstrates how to group device information parameters as an example.
Step 1: Identify Parameters in Your Spreadsheet
Begin by locating the parameters you want to group. For this example, we'll group four device information parameters:
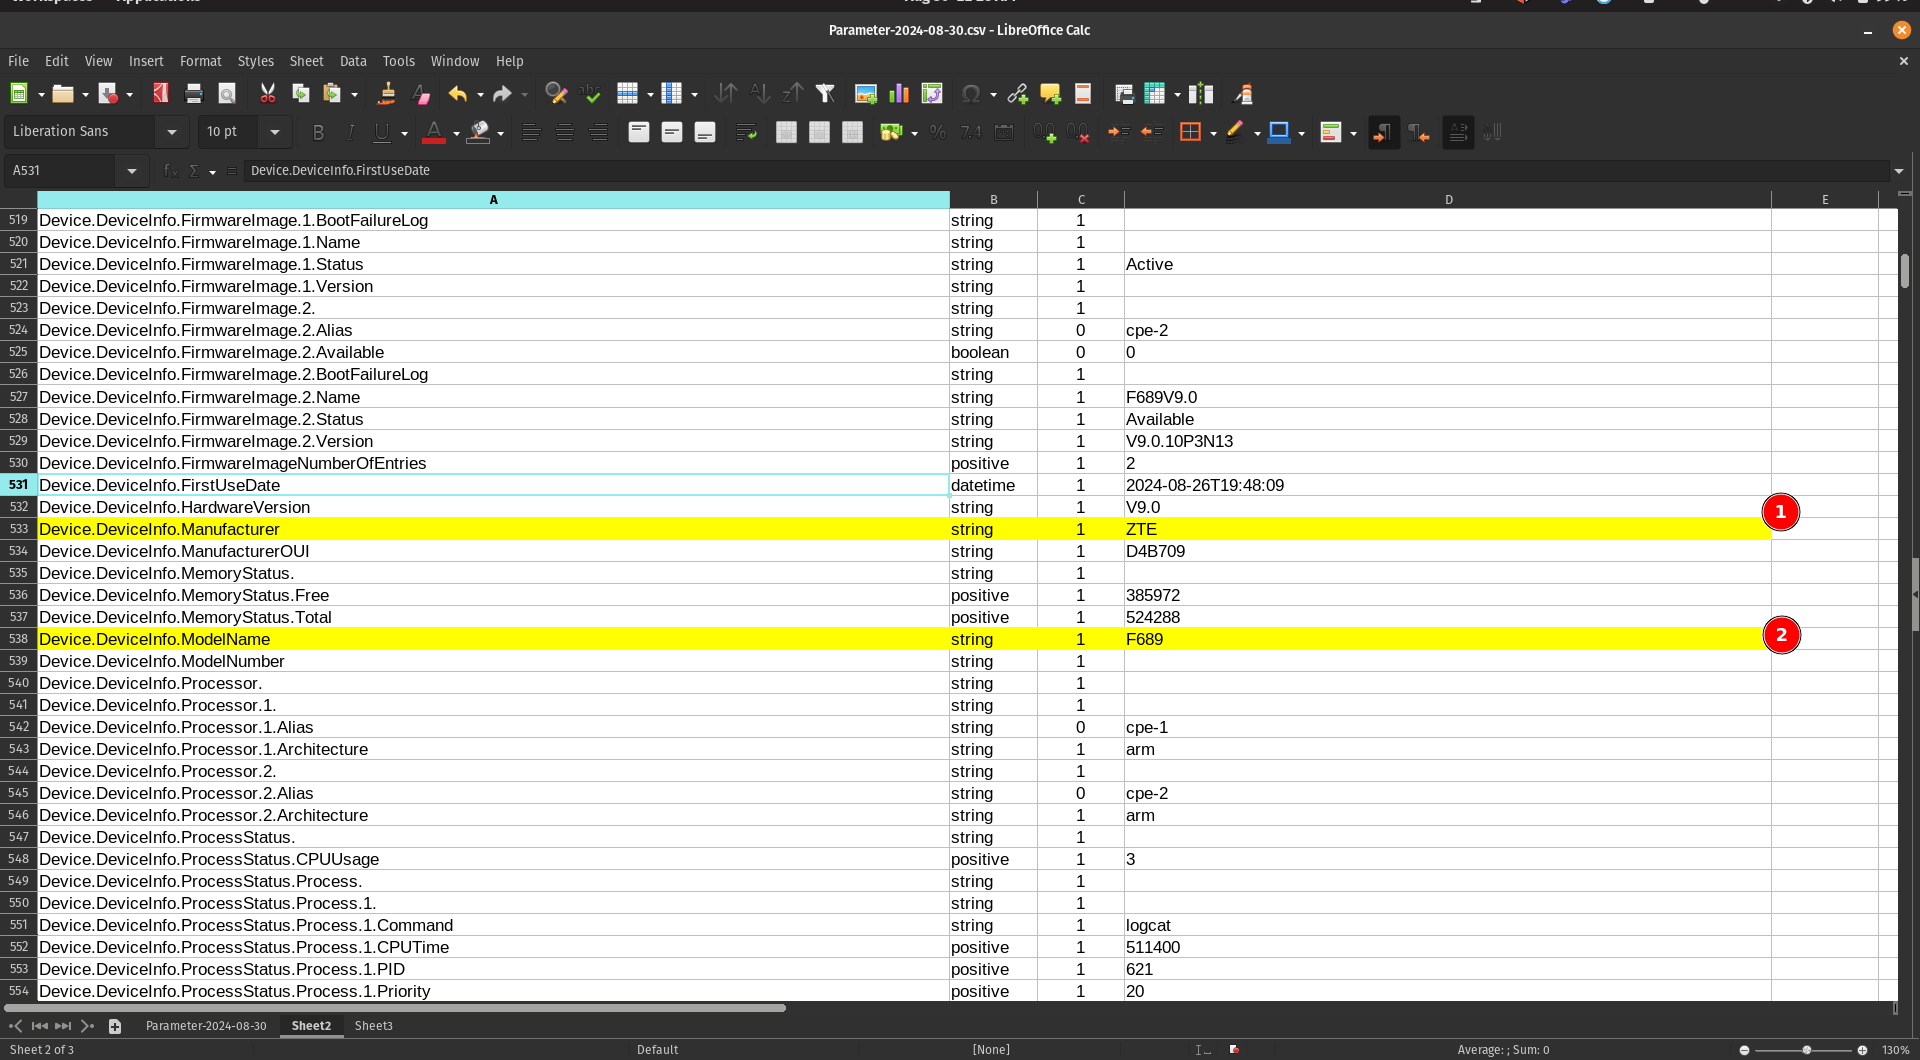
- Locate the Manufacturer parameter
- Locate the ModelName parameter
Step 2: Copy Parameters to a New Sheet
When you mark or find the parameters you need, copy them to a separate sheet for easier organization:
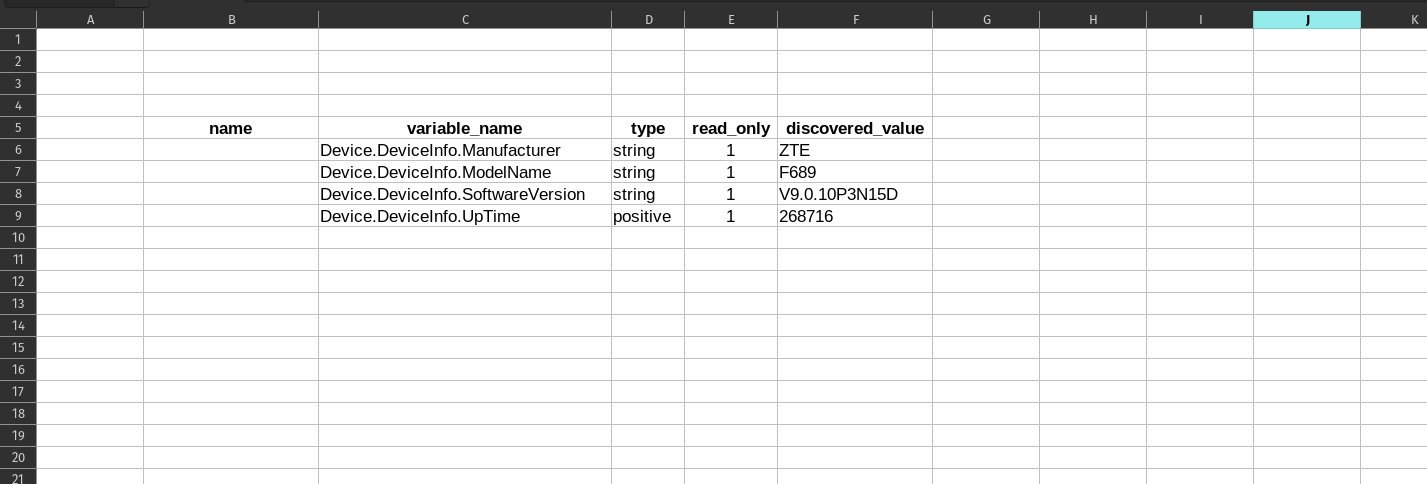
Step 3: Add Friendly Names
Add a new "name" column to create user-friendly labels for each parameter:

You can assign a short, descriptive name for each "variable_name" to establish a clear relationship between the technical parameter name and its display name.
Add Parameters to a Profile
Now that you've organized your parameters, it's time to add them to your device profile in CONTROL.
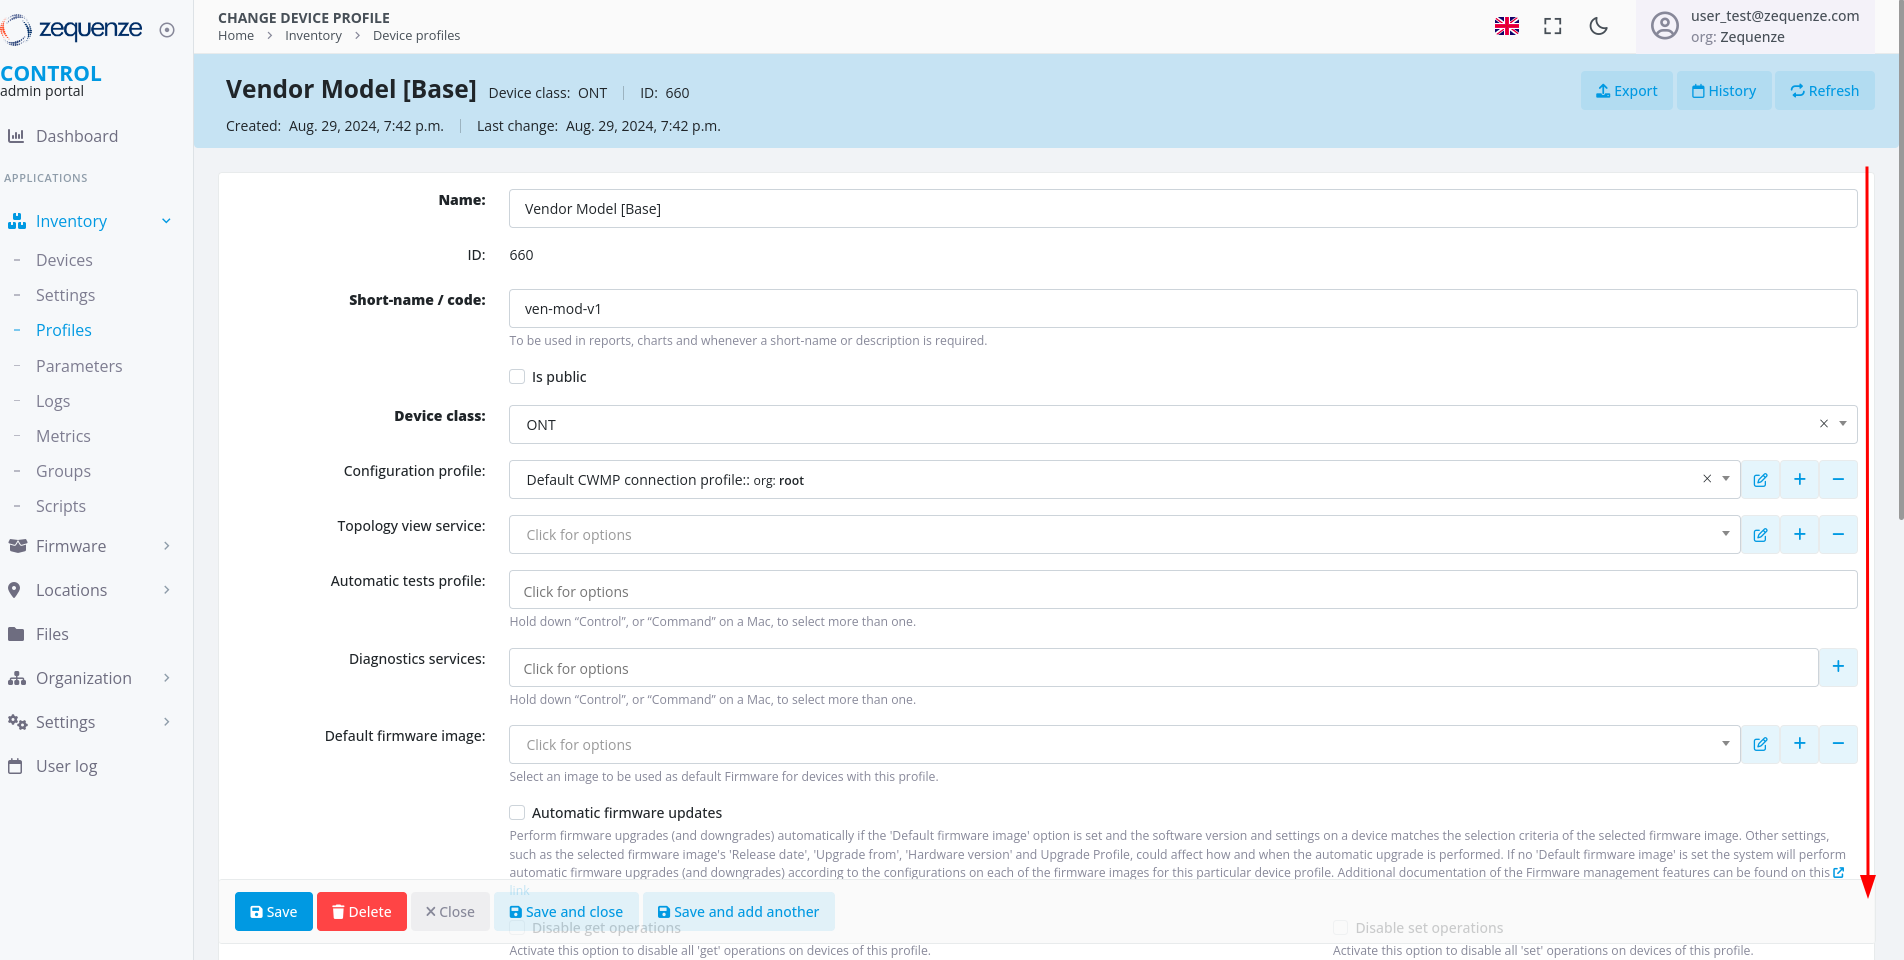
Step 1: Navigate to Parameter Groups Section
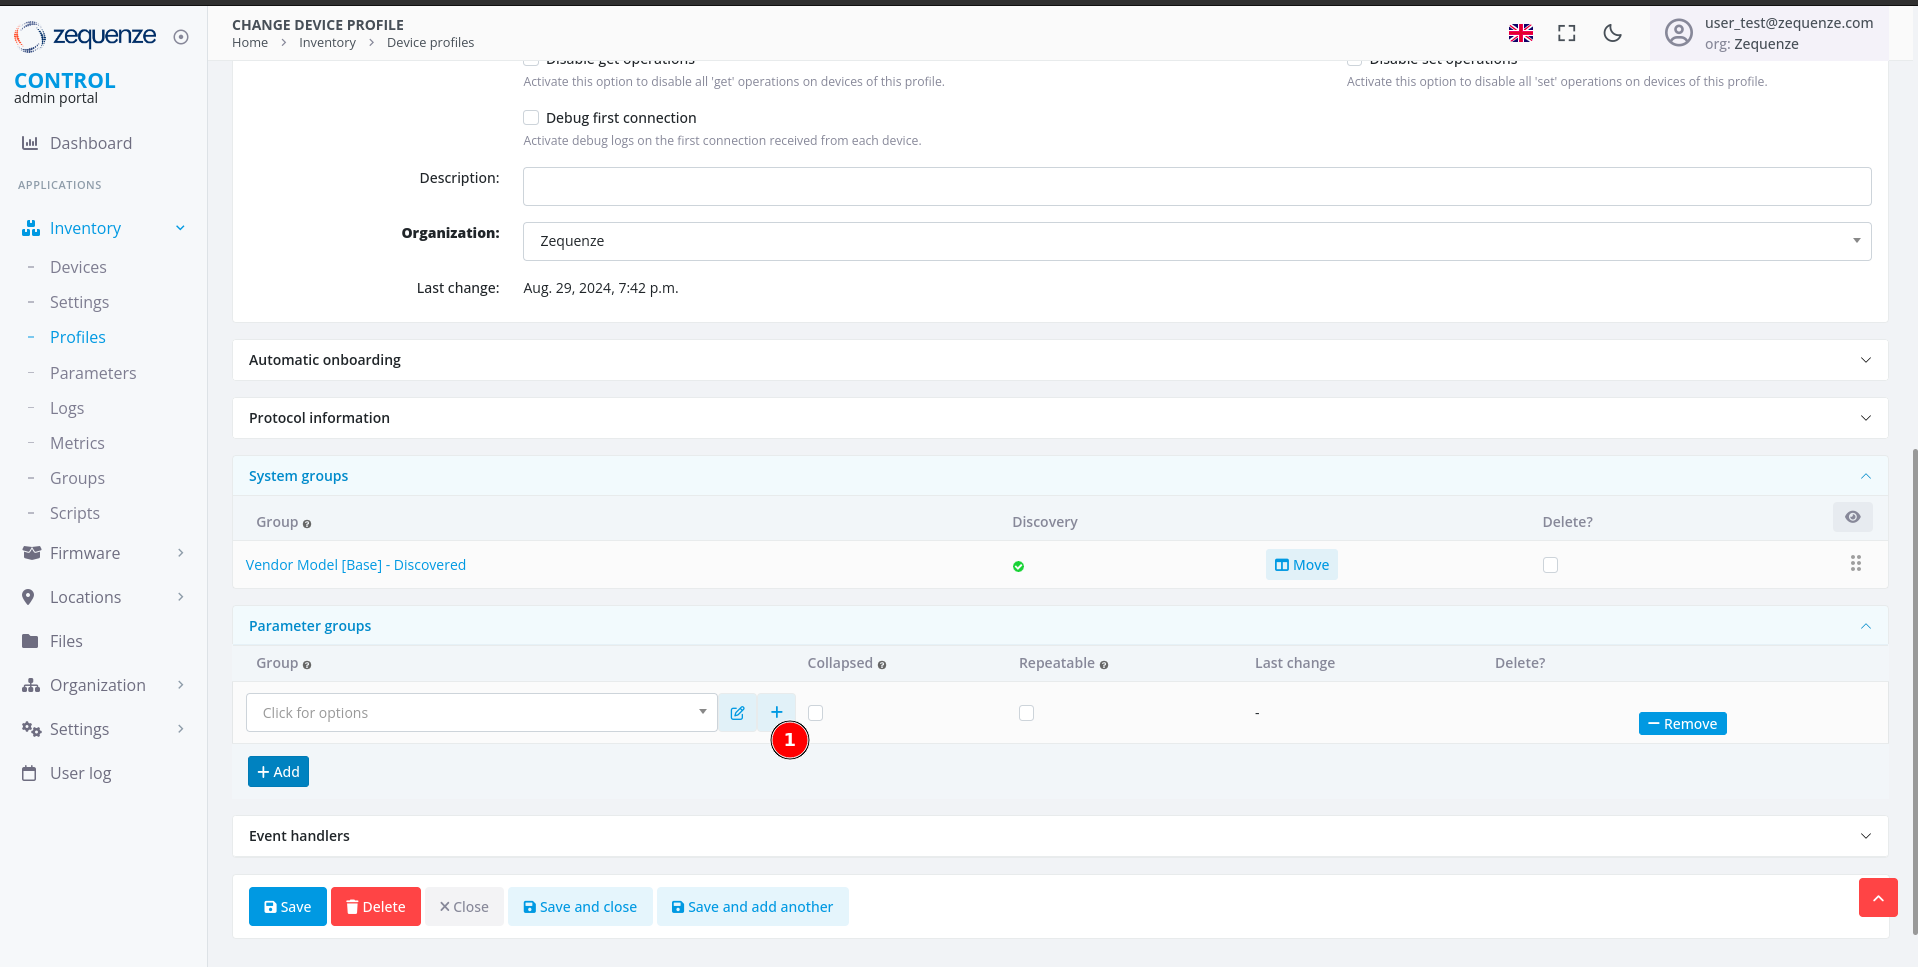
Return to the profile you created previously and scroll down to the bottom of the page:
Locate the "Parameter groups" section:
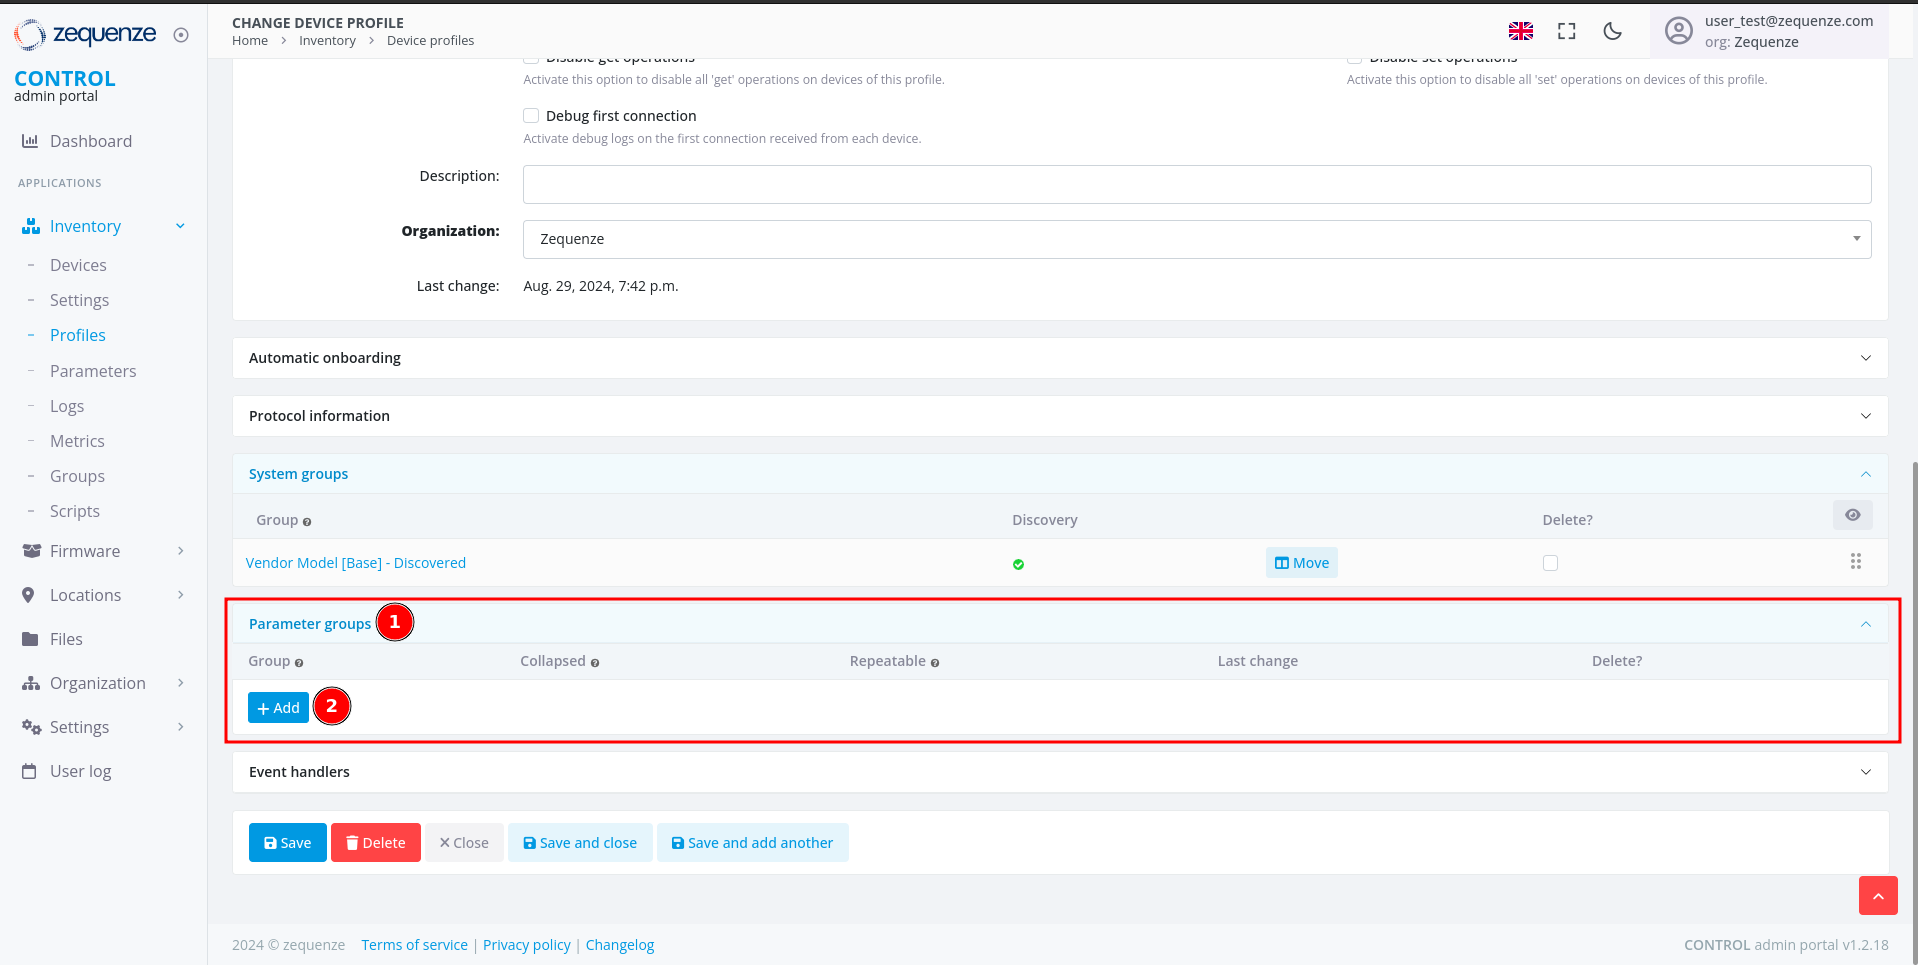
- Parameter groups - This section allows you to create and organize parameter groups
- Add - Click this button to create a new parameter group
Step 2: Create a New Parameter Group
After clicking Add, you'll see the following interface:
- Click the + icon to open the parameter group configuration window
Step 3: Configure the Parameter Group
A new window will open where you can configure your parameter group:
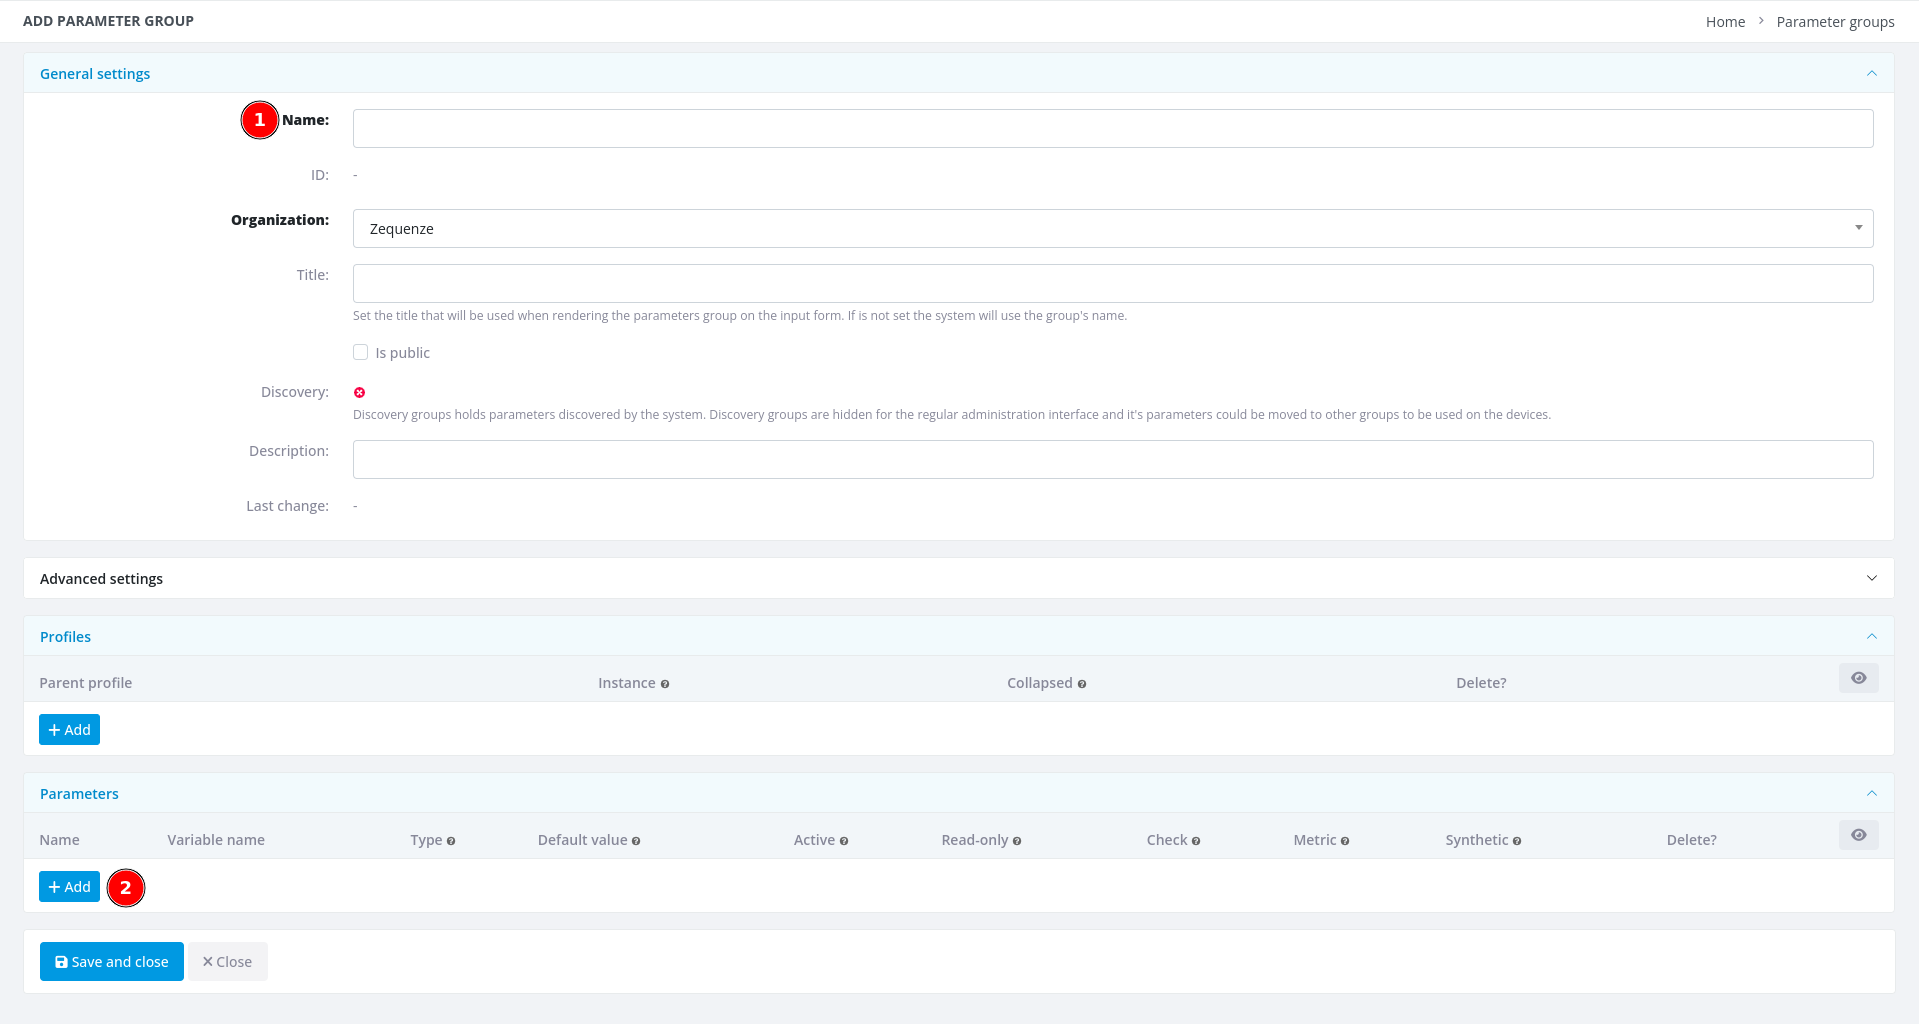
- Name - Enter a descriptive name for this group (e.g., "Model | Device Info")
- + Add - Click this button once for each parameter you want to add (in this example, we need 4 parameters)
Step 4: Add Parameter Details
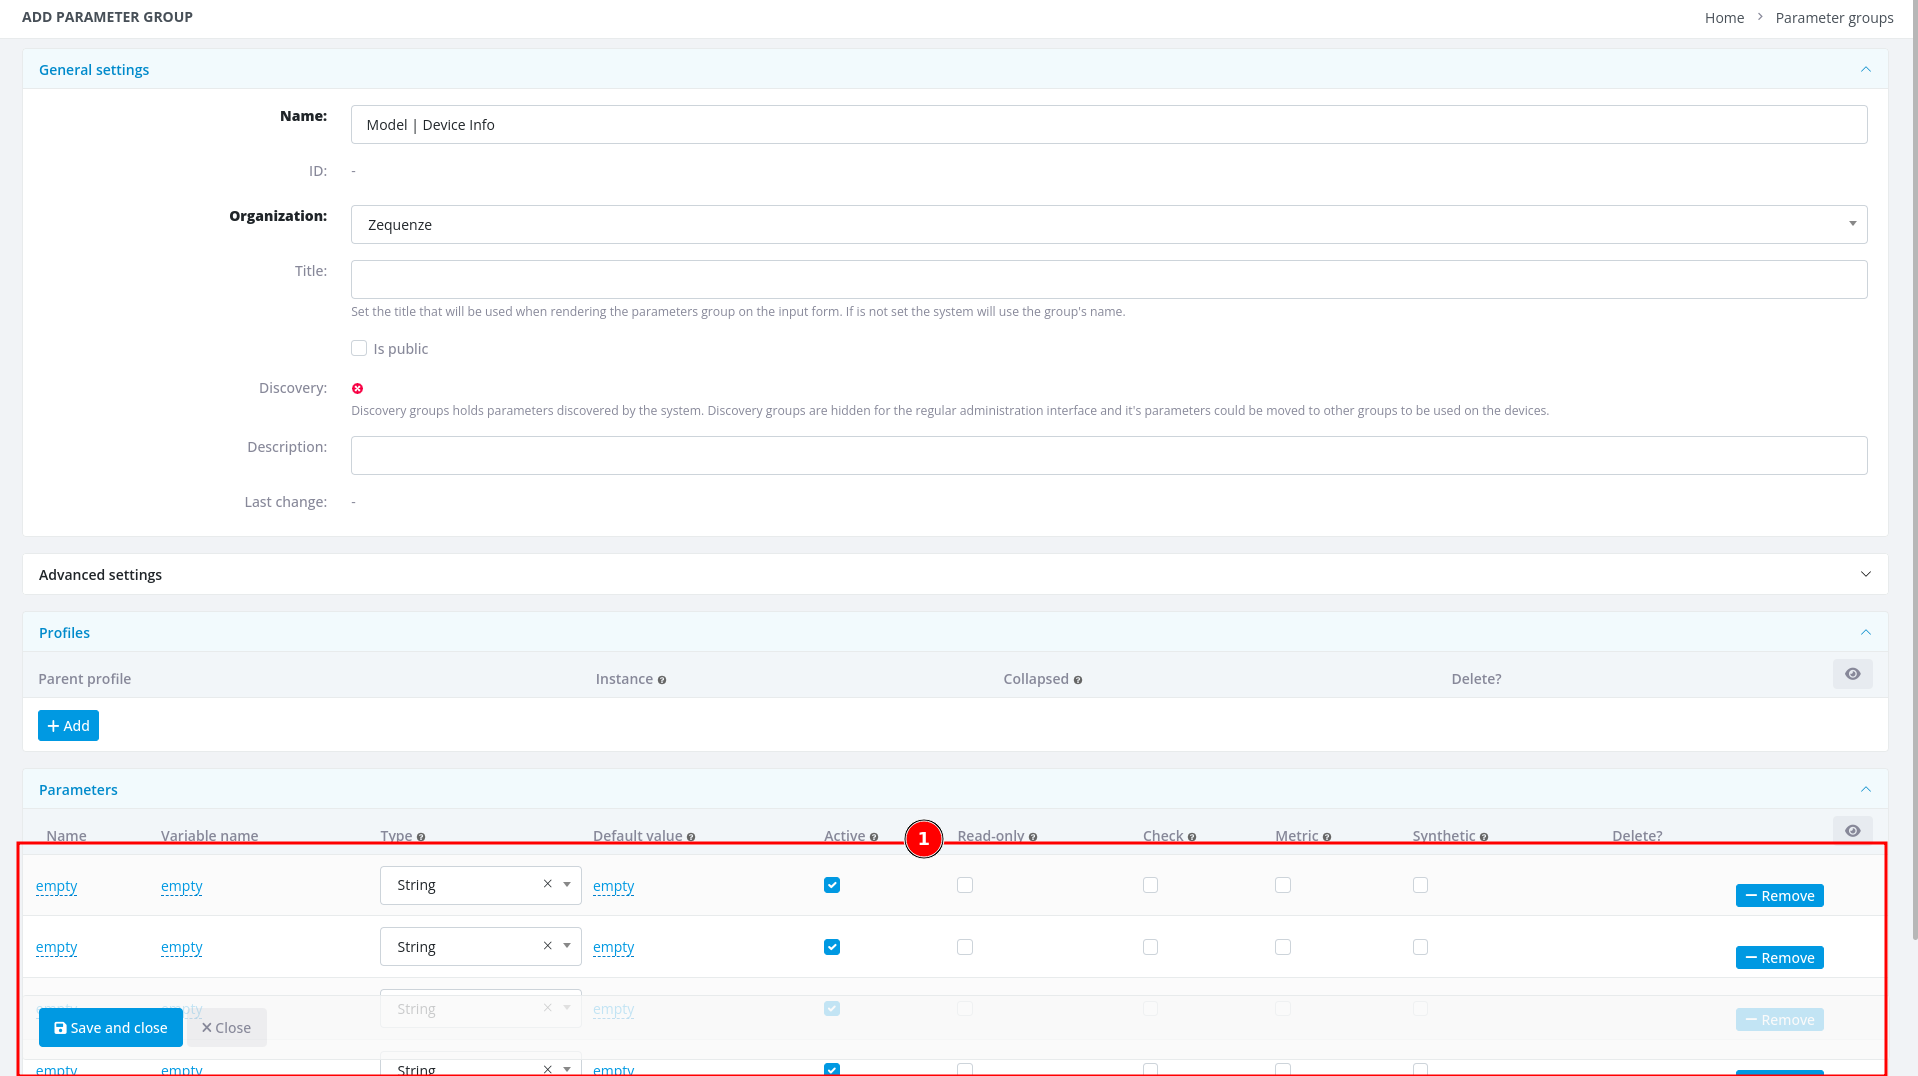
- After entering the group name and adding 4 parameter slots, you're ready to fill in the parameter details
Now transfer the parameter information from your Excel or LibreOffice Calc spreadsheet into CONTROL:
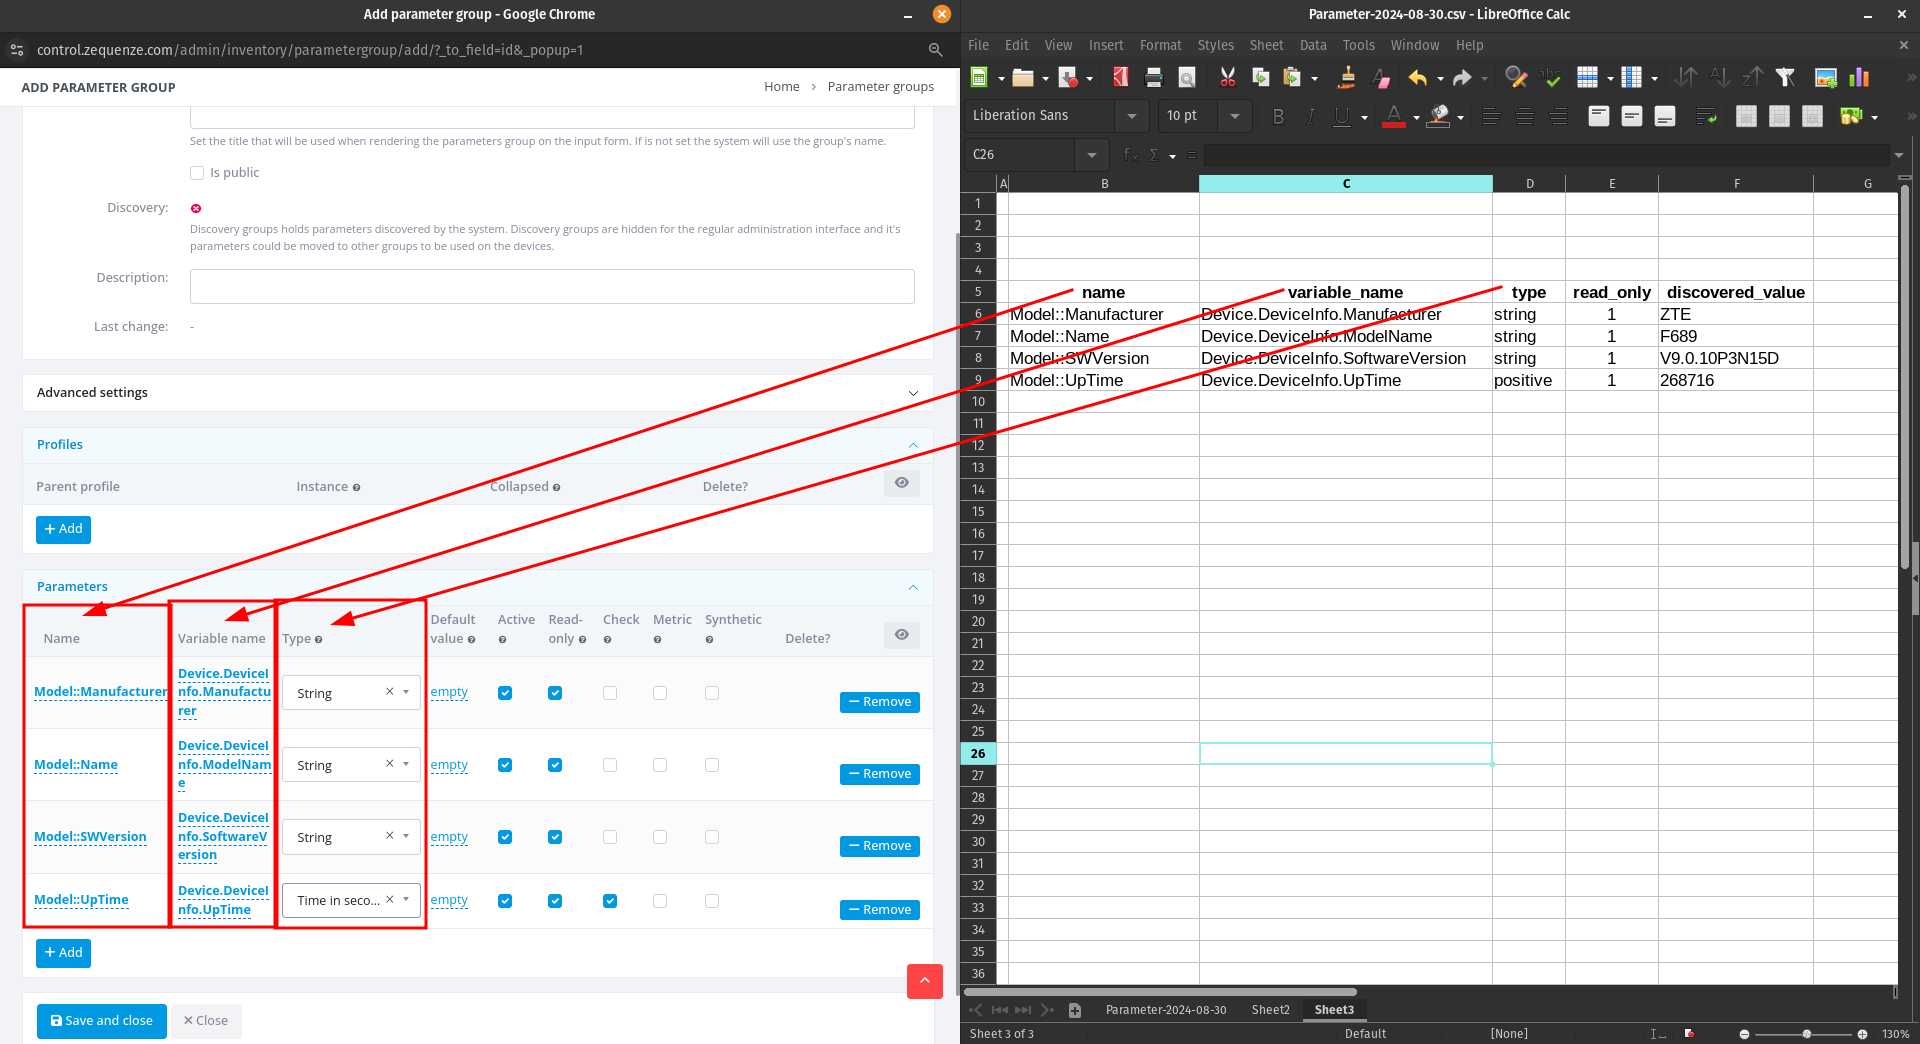
As you can see, there's now a clear correspondence between your spreadsheet and the CONTROL interface. When you've finished entering all parameters, click "Save and close".
Step 5: Save the Parameter Group
You'll now see your newly created parameter group:
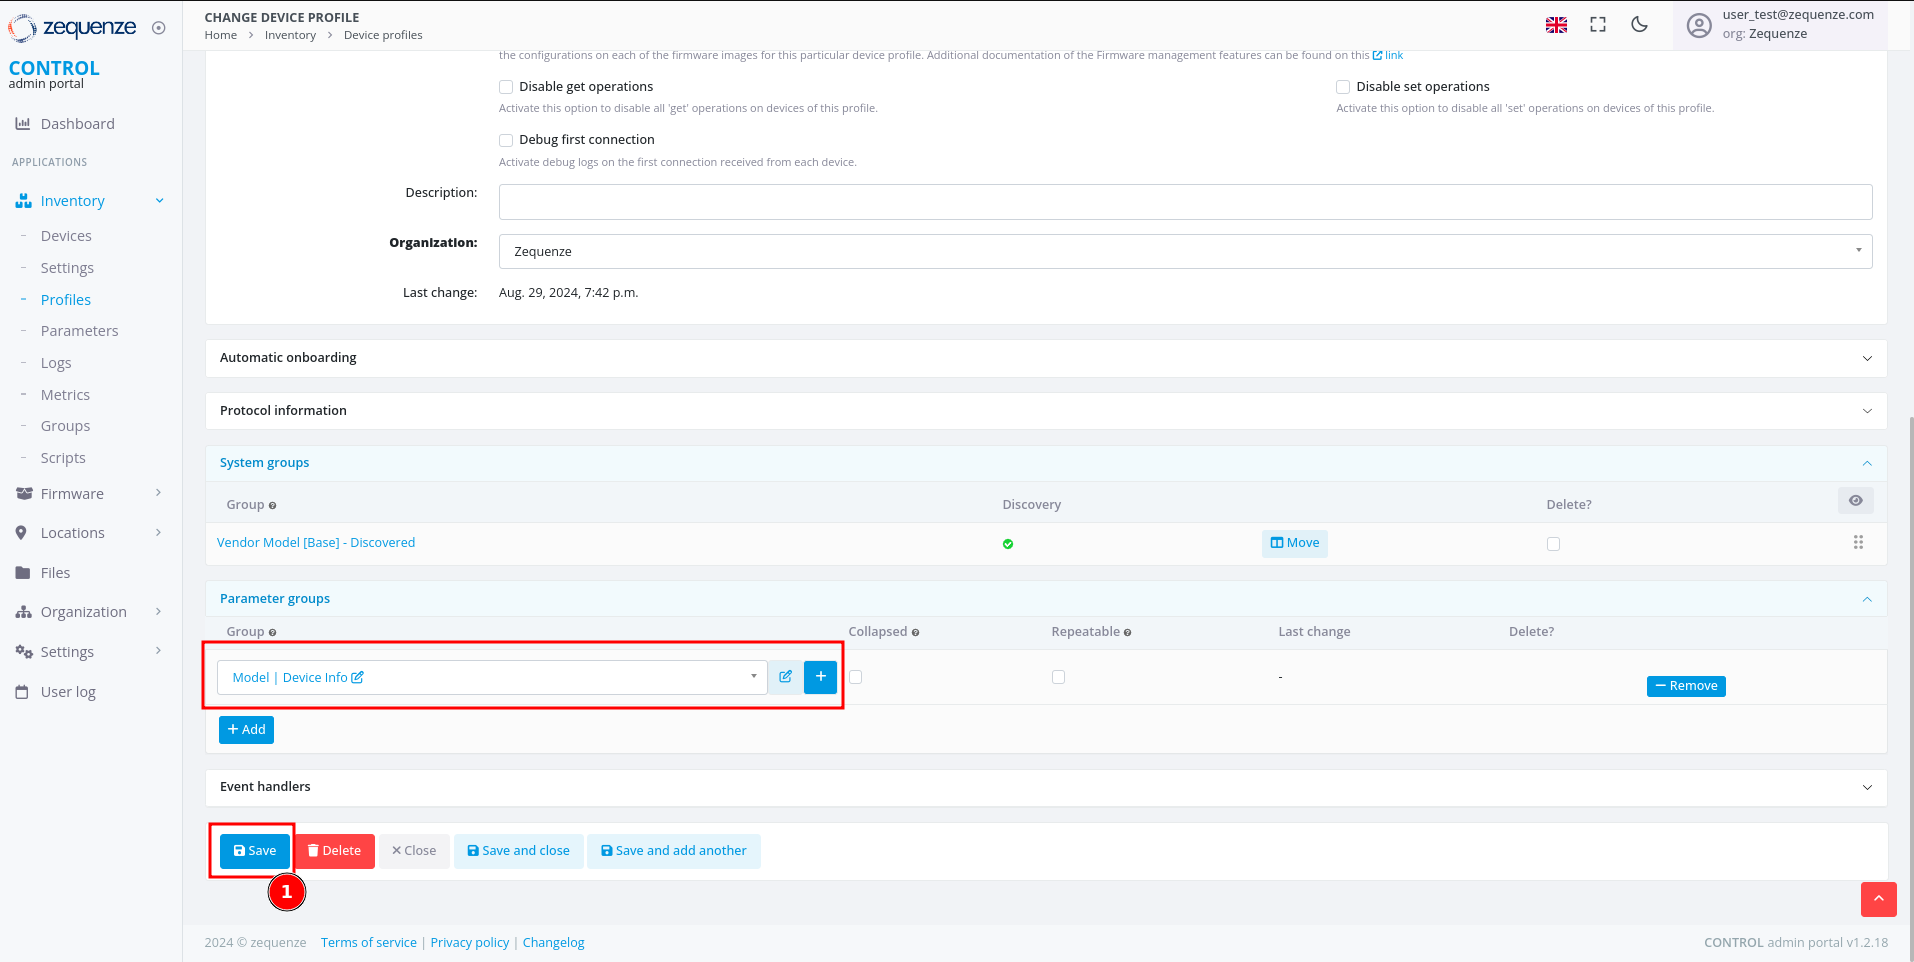
- Click the Save button to save your changes to the profile
After saving, you'll see the organization name displayed in the parameter groups section:
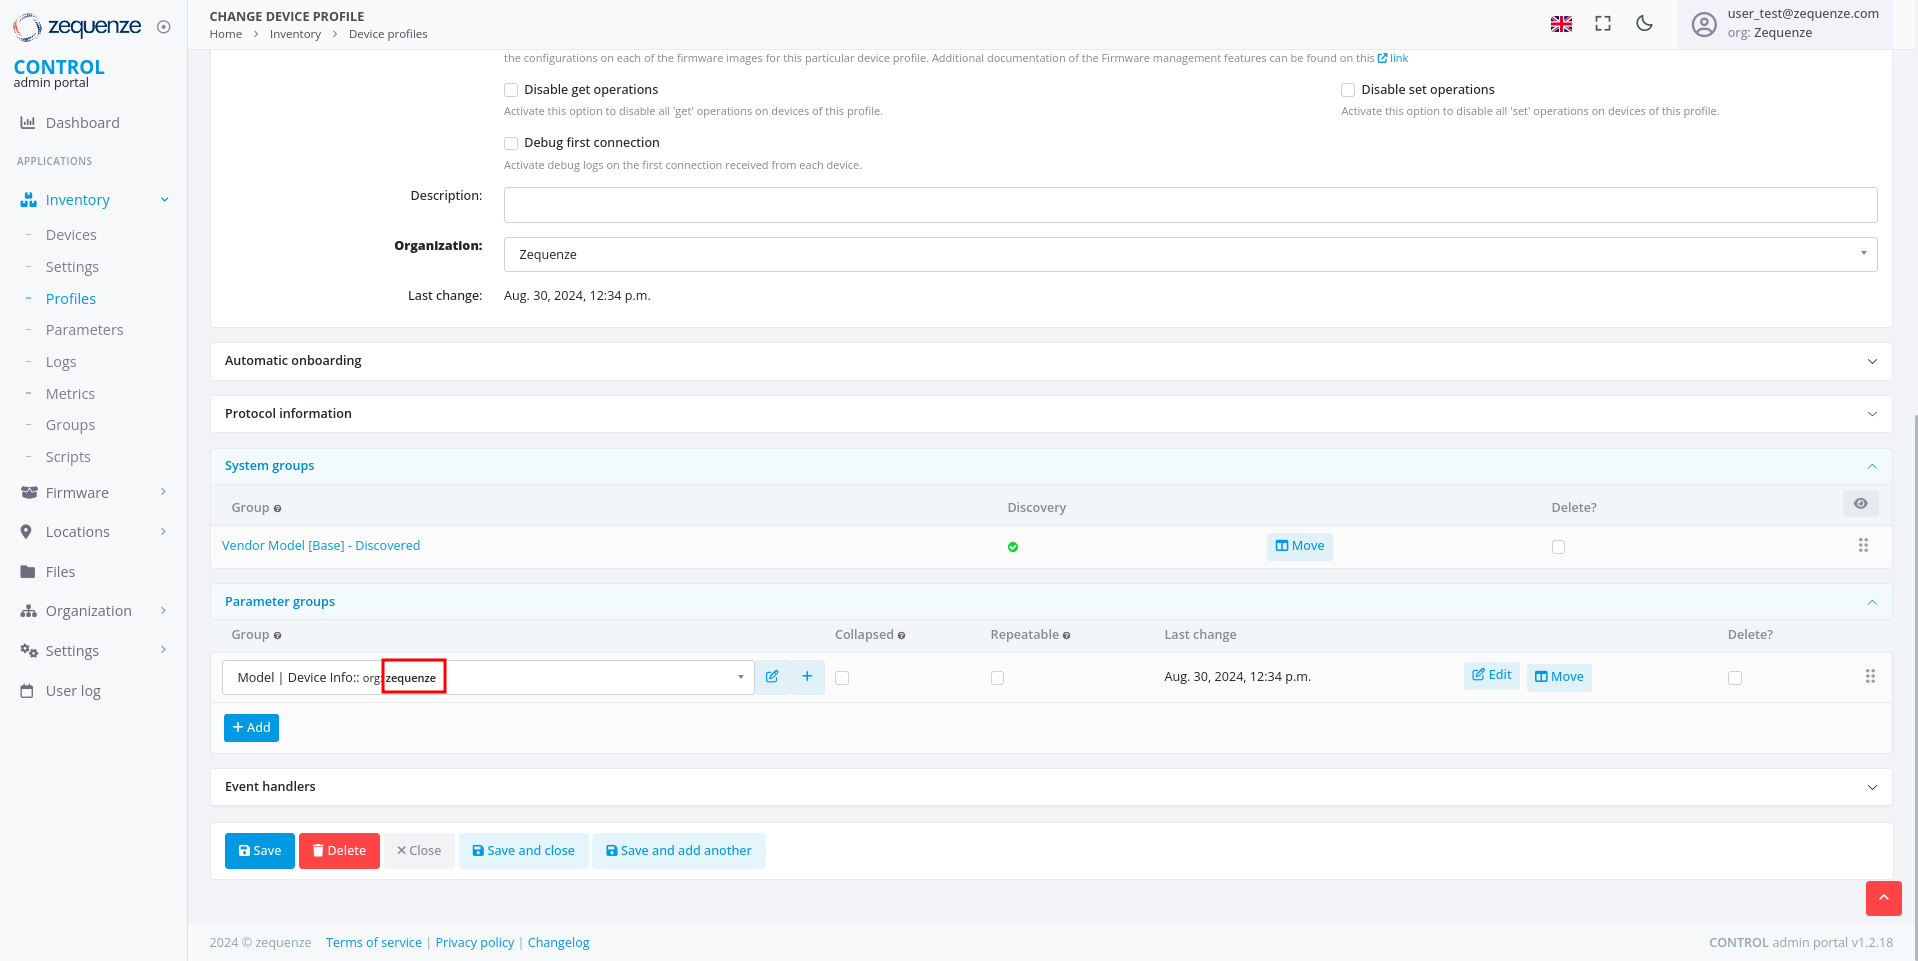
You can repeat this process to add additional parameter groups or parameters as needed.
View Parameters on a Device
Now that you've configured your parameter groups, let's verify that they appear correctly on the device page.
Step 1: Navigate to the Device
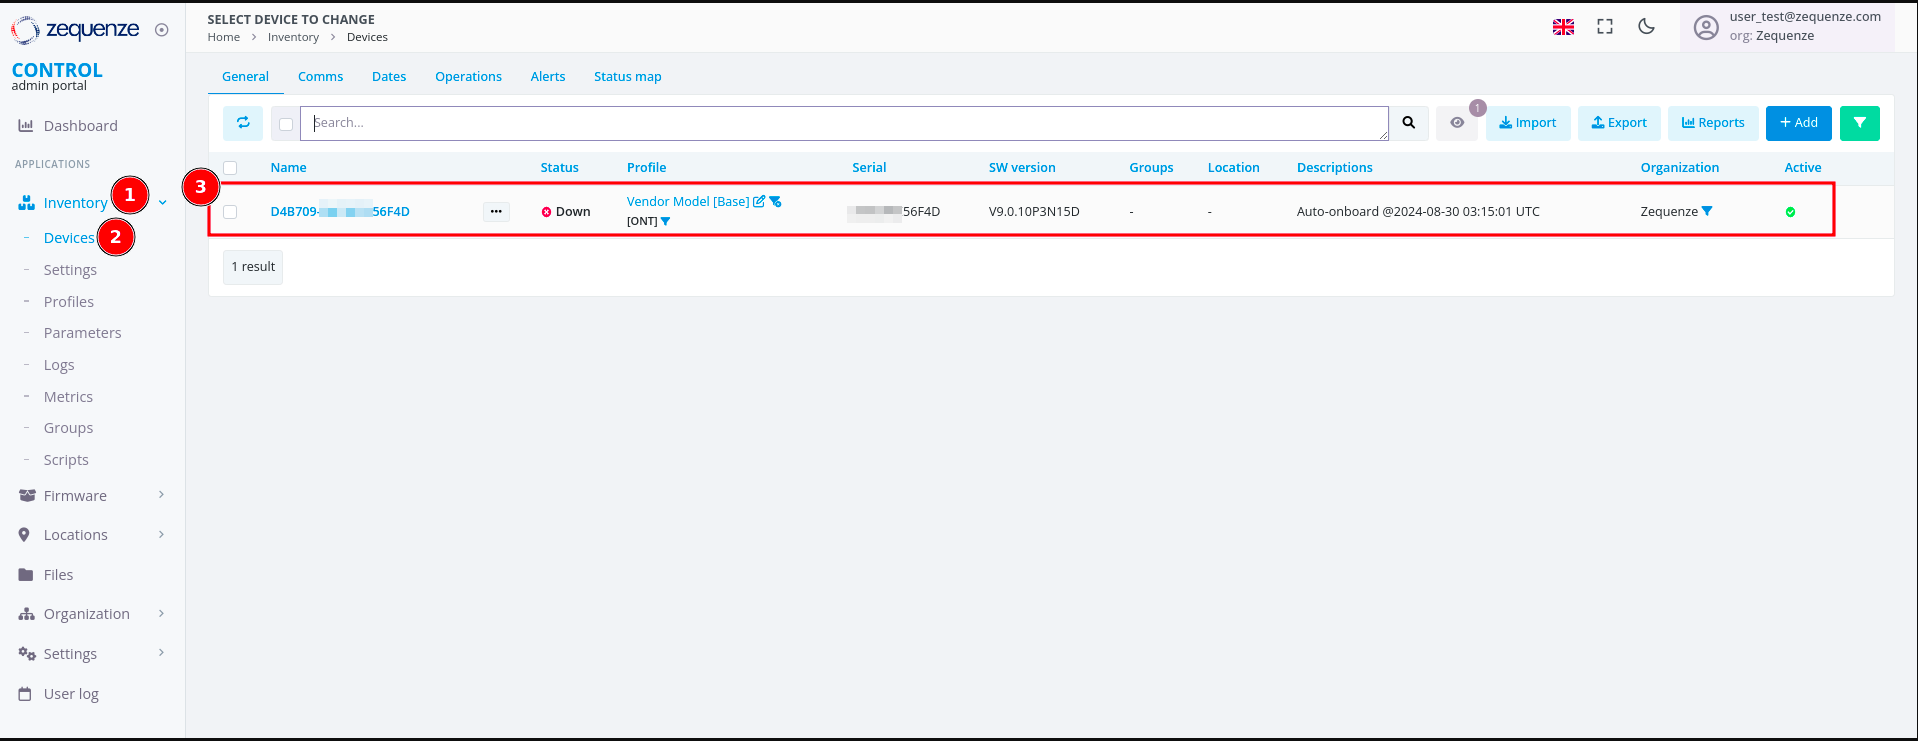
- Click on Inventory
- Select Devices
- You'll see your previously connected devices. In this screenshot, the device shows as Down because it was powered off for this demonstration
Click on the device name to view its details:
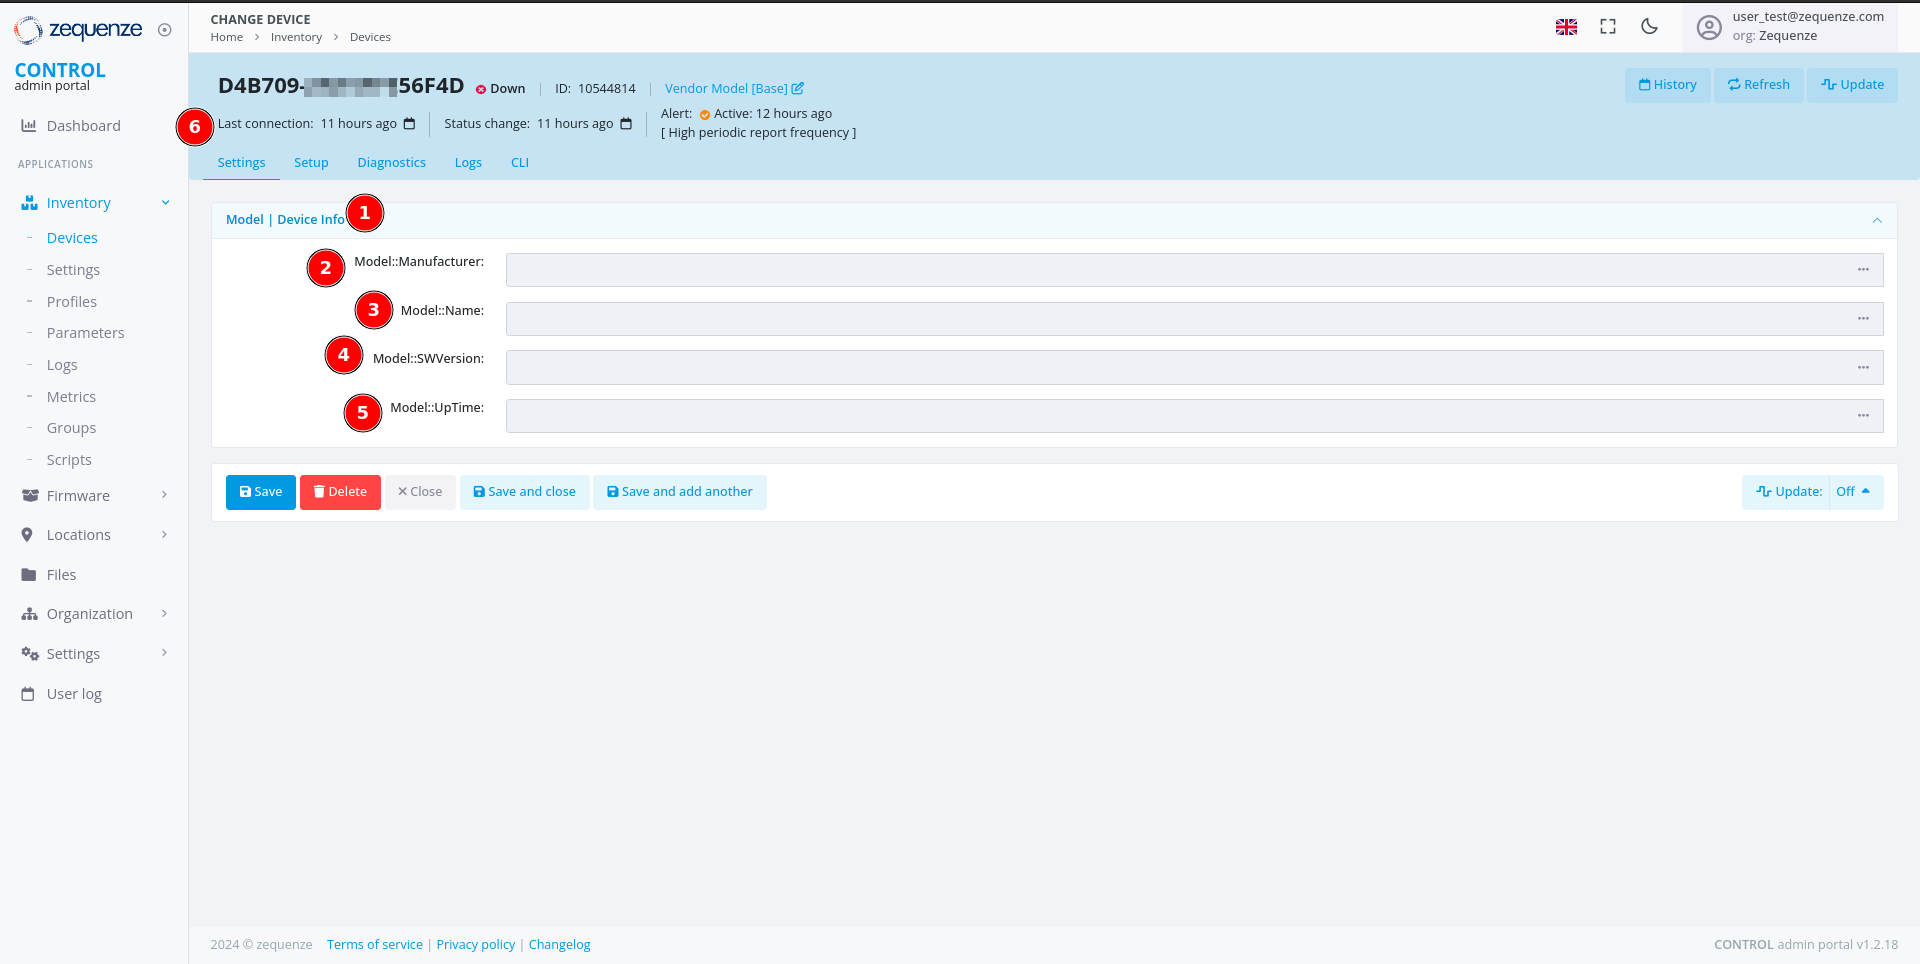
On the device page, you can now see:
- The parameter group name you created
- The first parameter: "Model::Manufacturer"
- The second parameter: "Model::Name"
- The third parameter: "Model::SWVersion"
- The fourth parameter: "Model::UpTime"
- The Last connection timestamp for this device in CONTROL
Step 2: Wait for Parameter Values
It's normal for the parameter values to be empty at this stage. CONTROL will request and populate these values once the device connects to the platform.
After connecting the device:
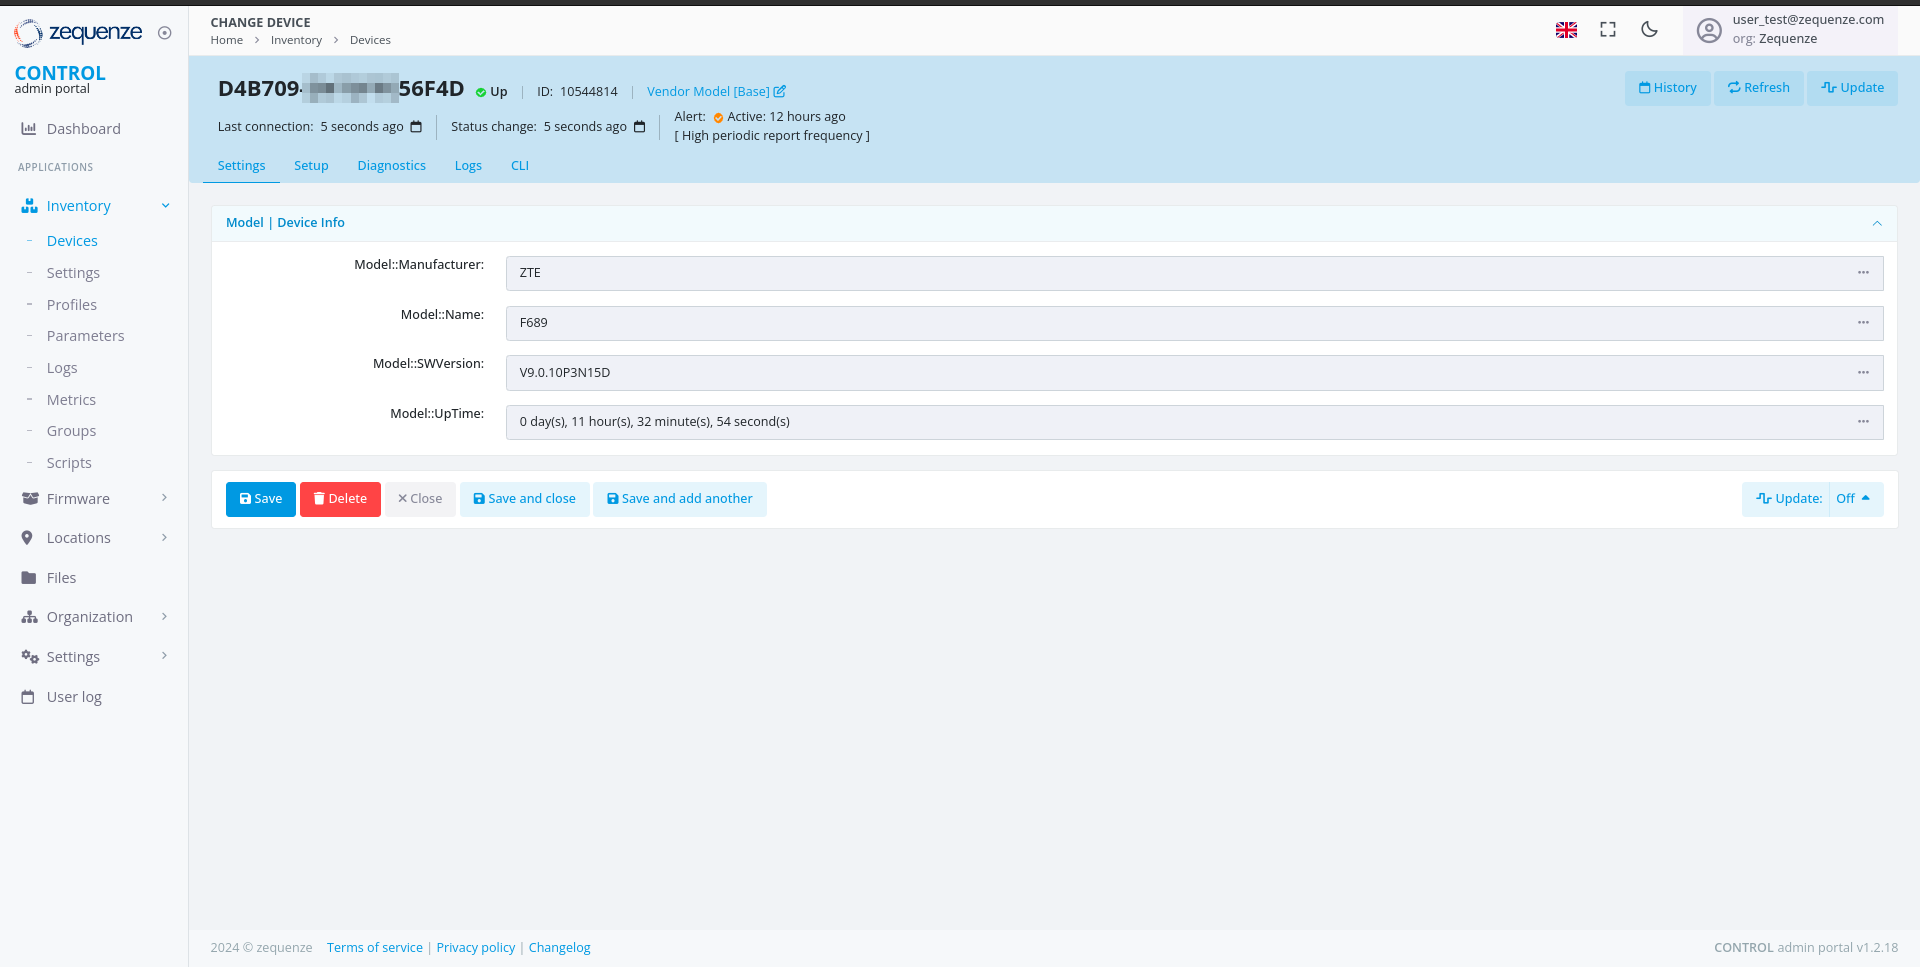
The parameter values are automatically retrieved and displayed once the device establishes a connection to CONTROL.
You can now create additional parameter groups or add more parameters to existing groups as needed for your deployment.
No comments to display
No comments to display