Discovering the parameters
Confirm Device Connection
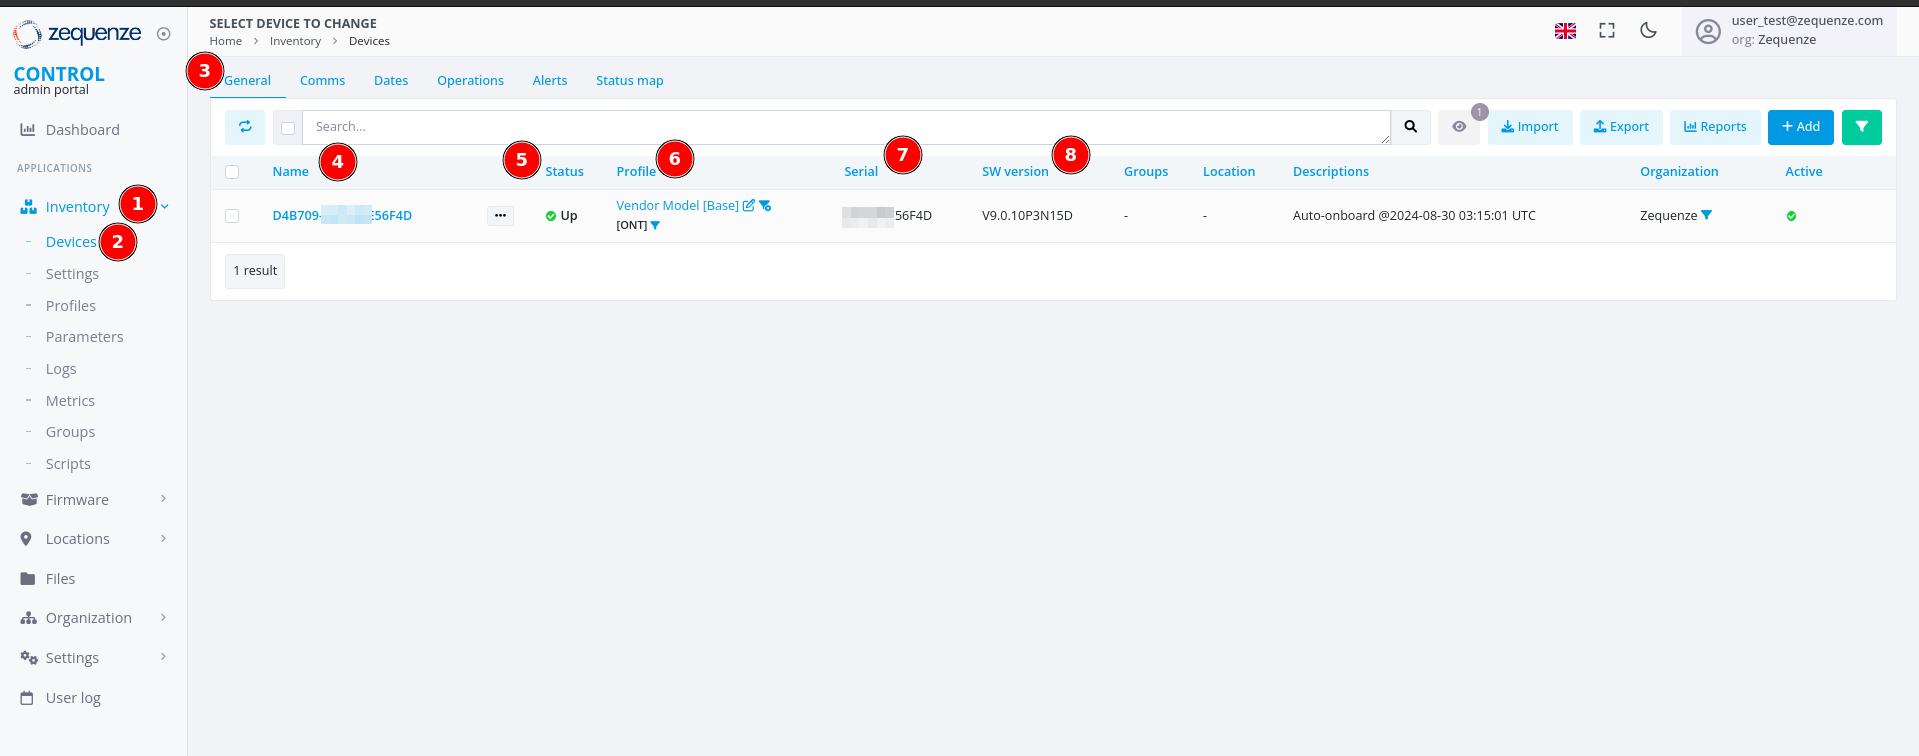
At this point, you should have a device successfully connected to the CONTROL platform, similar to the example shown below:
Note: If the device list is empty, perform the following troubleshooting steps locally on the device:
Try HTTP instead of HTTPS: Change the CONTROL URL from
https://control.zequenze.com/cwmp/tohttp://control.zequenze.com/cwmp/. If this works, the device does not support HTTPS or encrypted communication.Use IP address instead of domain: Replace the domain
control.zequenze.comwith the CONTROL platform's IP address (e.g.,https://35.171.123.57/cwmp/orhttp://35.171.123.57/cwmp/). If this works, verify the device's DNS configuration.Verify TR069 service: Validate that the WAN interface has the TR069 service enabled to achieve connectivity to the CONTROL platform.
Understanding the Interface
The screenshot above displays the following elements:
- Inventory — Located on the left sidebar, this section contains devices, profiles, and other resources.
- Devices — Displays the list of connected devices, showing their status as online or offline (with reasons for offline status).
- General — The default section view when accessing a device.
- Name — Automatically assigned by CONTROL as a unique identifier using the ONT's OUI-FSAN or serial number.
- Status — Shows whether the device is UP or DOWN. Devices have a configured "Periodic Inform Interval" (e.g., 180 seconds). If the device fails to report within this interval, its status changes to DOWN.
- Profile — Indicates which profile the device is assigned to.
- Serial — Displays the serial number or FSAN reported by the device.
- SW Version — Shows the current software version running on the device.
Enable Parameter Discovery
To discover all available parameters from a device on the CONTROL platform, follow these steps:
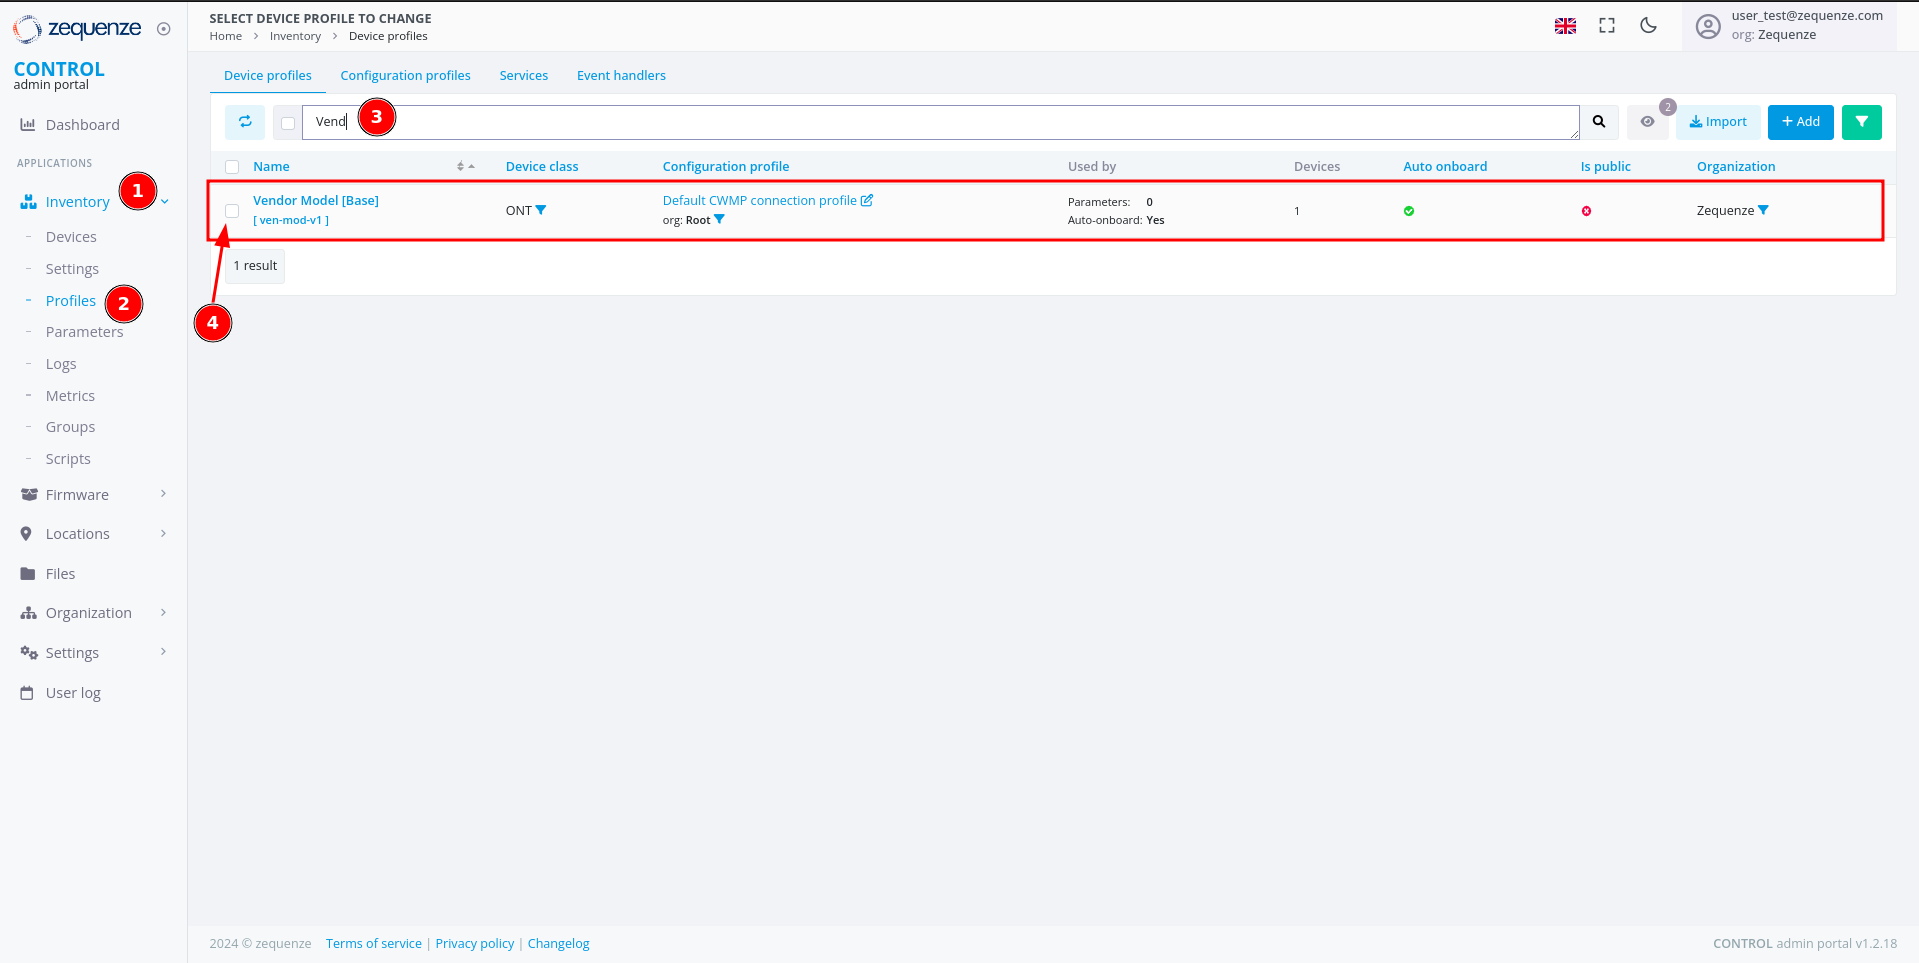
Step 1: Navigate to Profiles
- Click Inventory in the left sidebar.
- Select Profiles from the menu.
- (Optional) Use the filter to search for a specific profile name and press Enter.
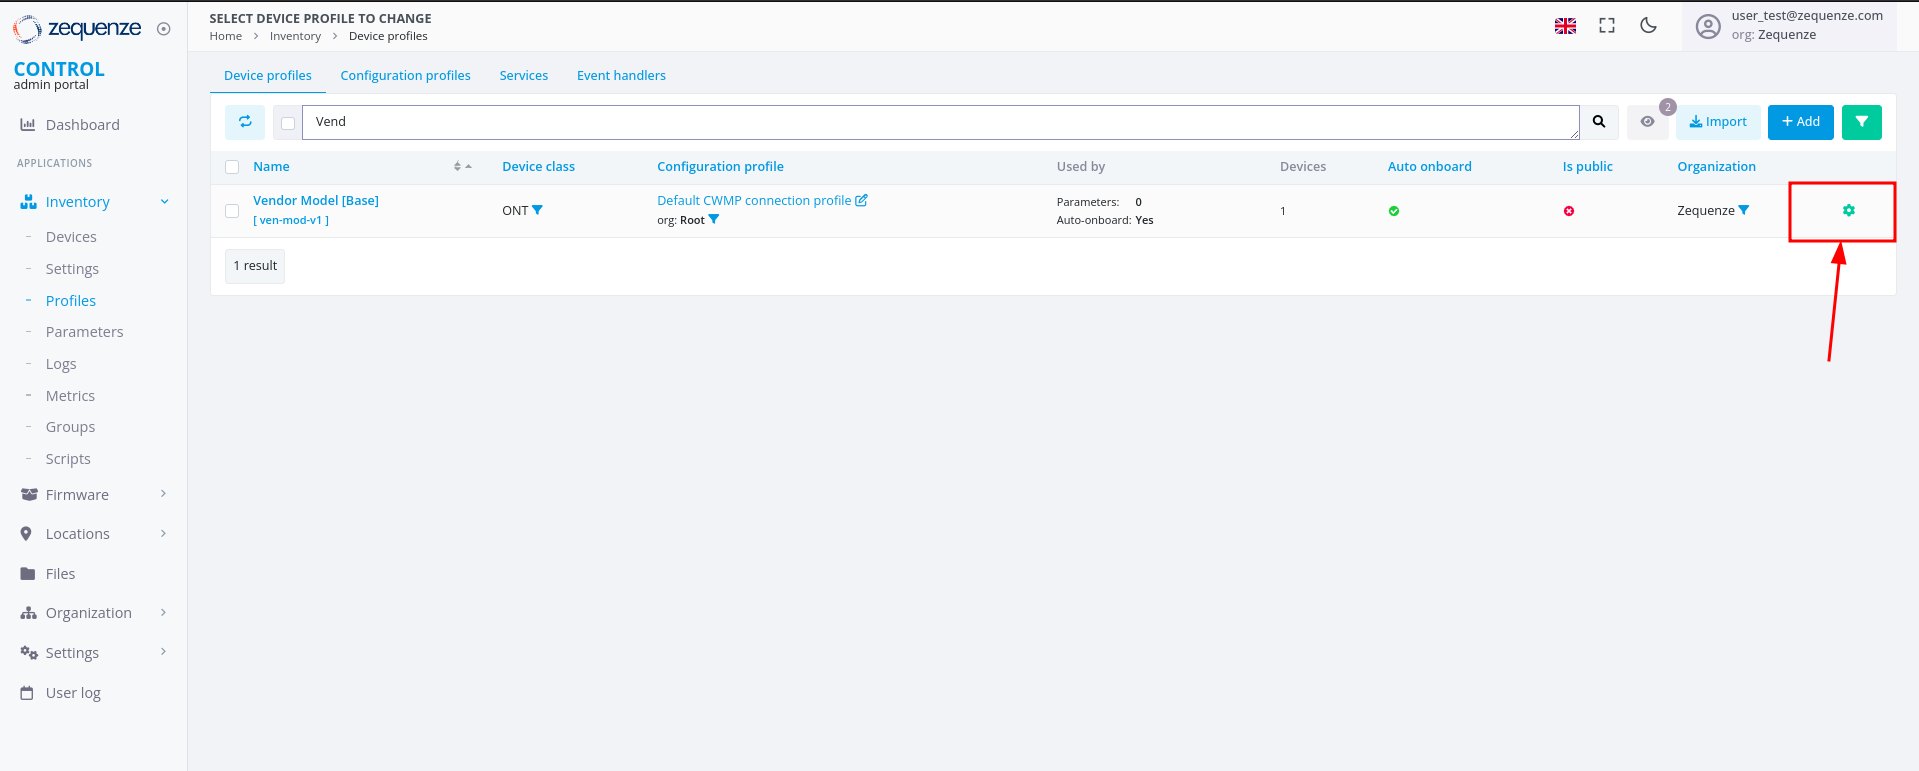
- Check the checkbox next to the desired profile to reveal additional options.
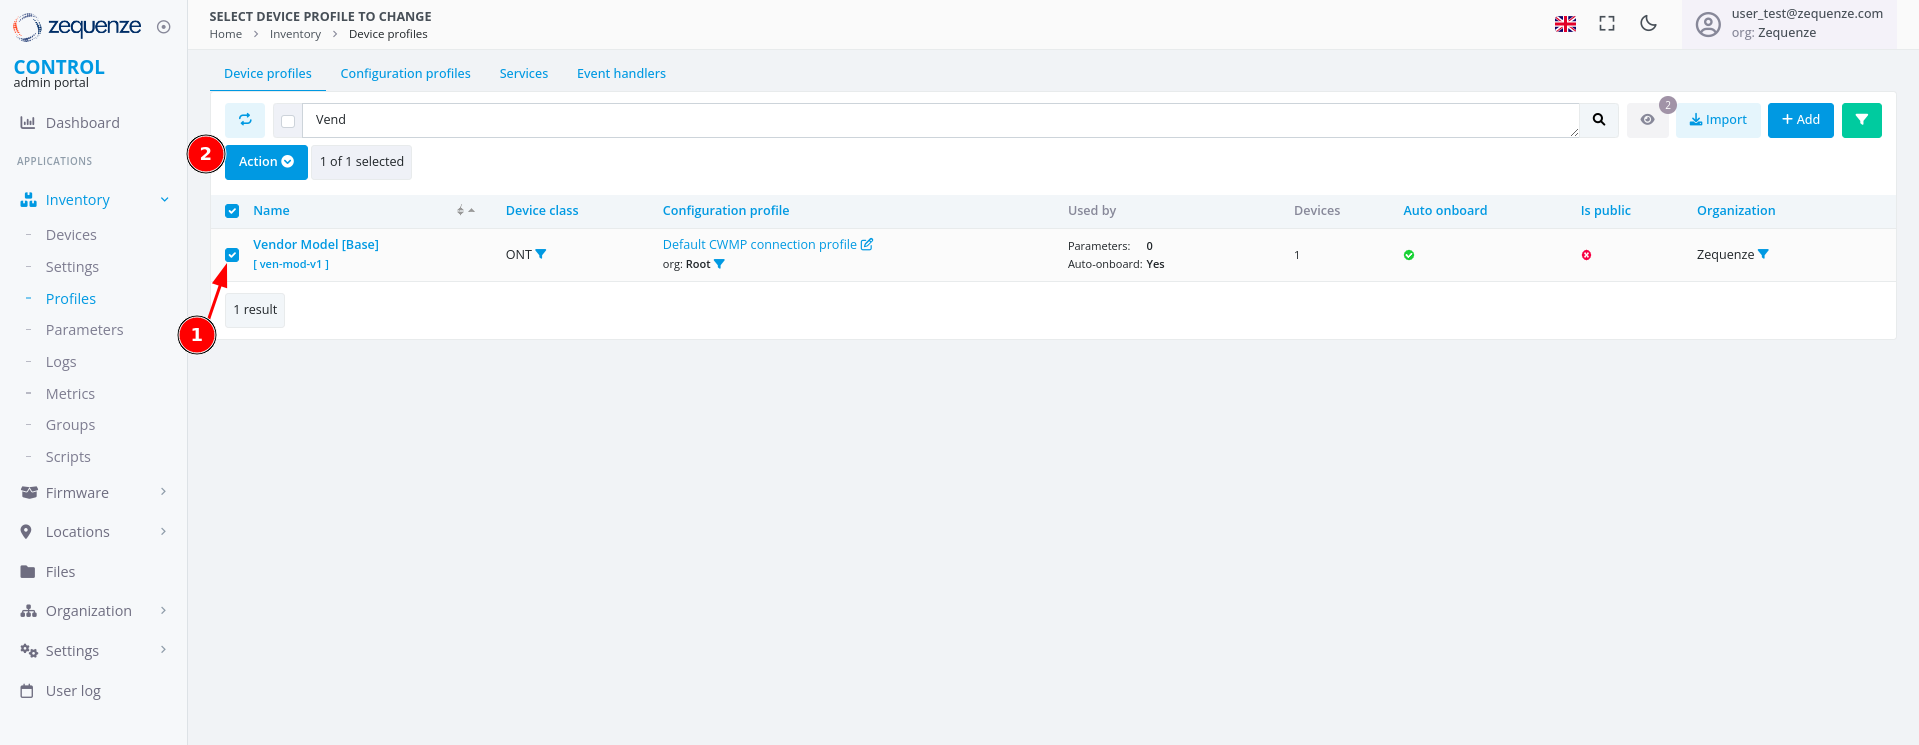
Once you check the checkbox:
- The checkbox is marked and selected.
- A new "Action" button appears.
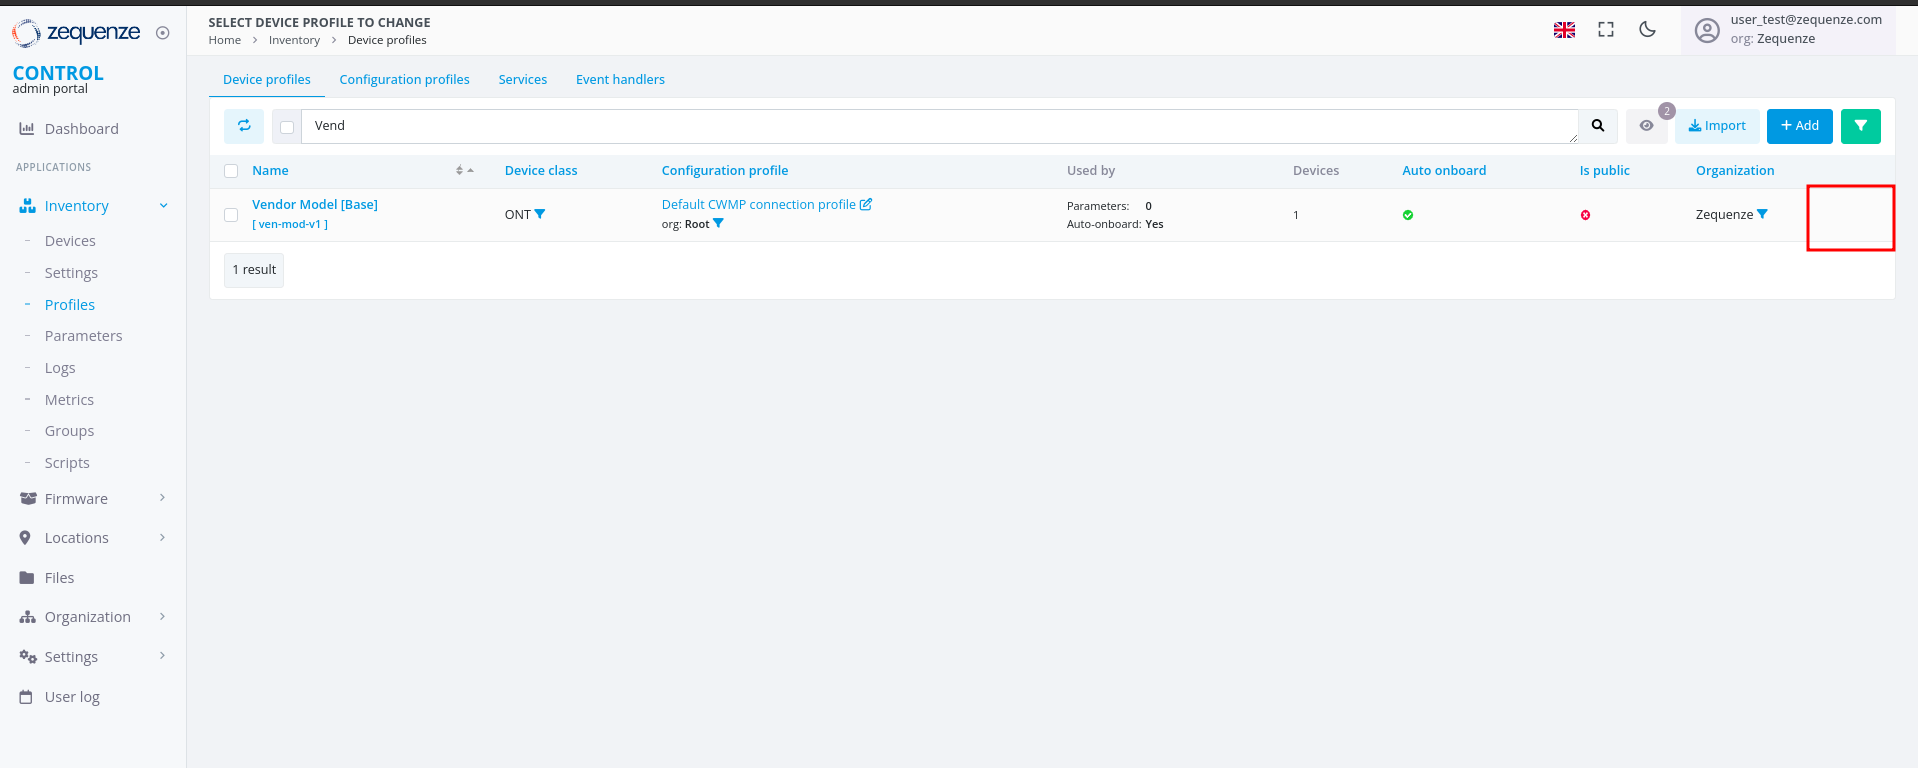
Step 2: Toggle Discovery
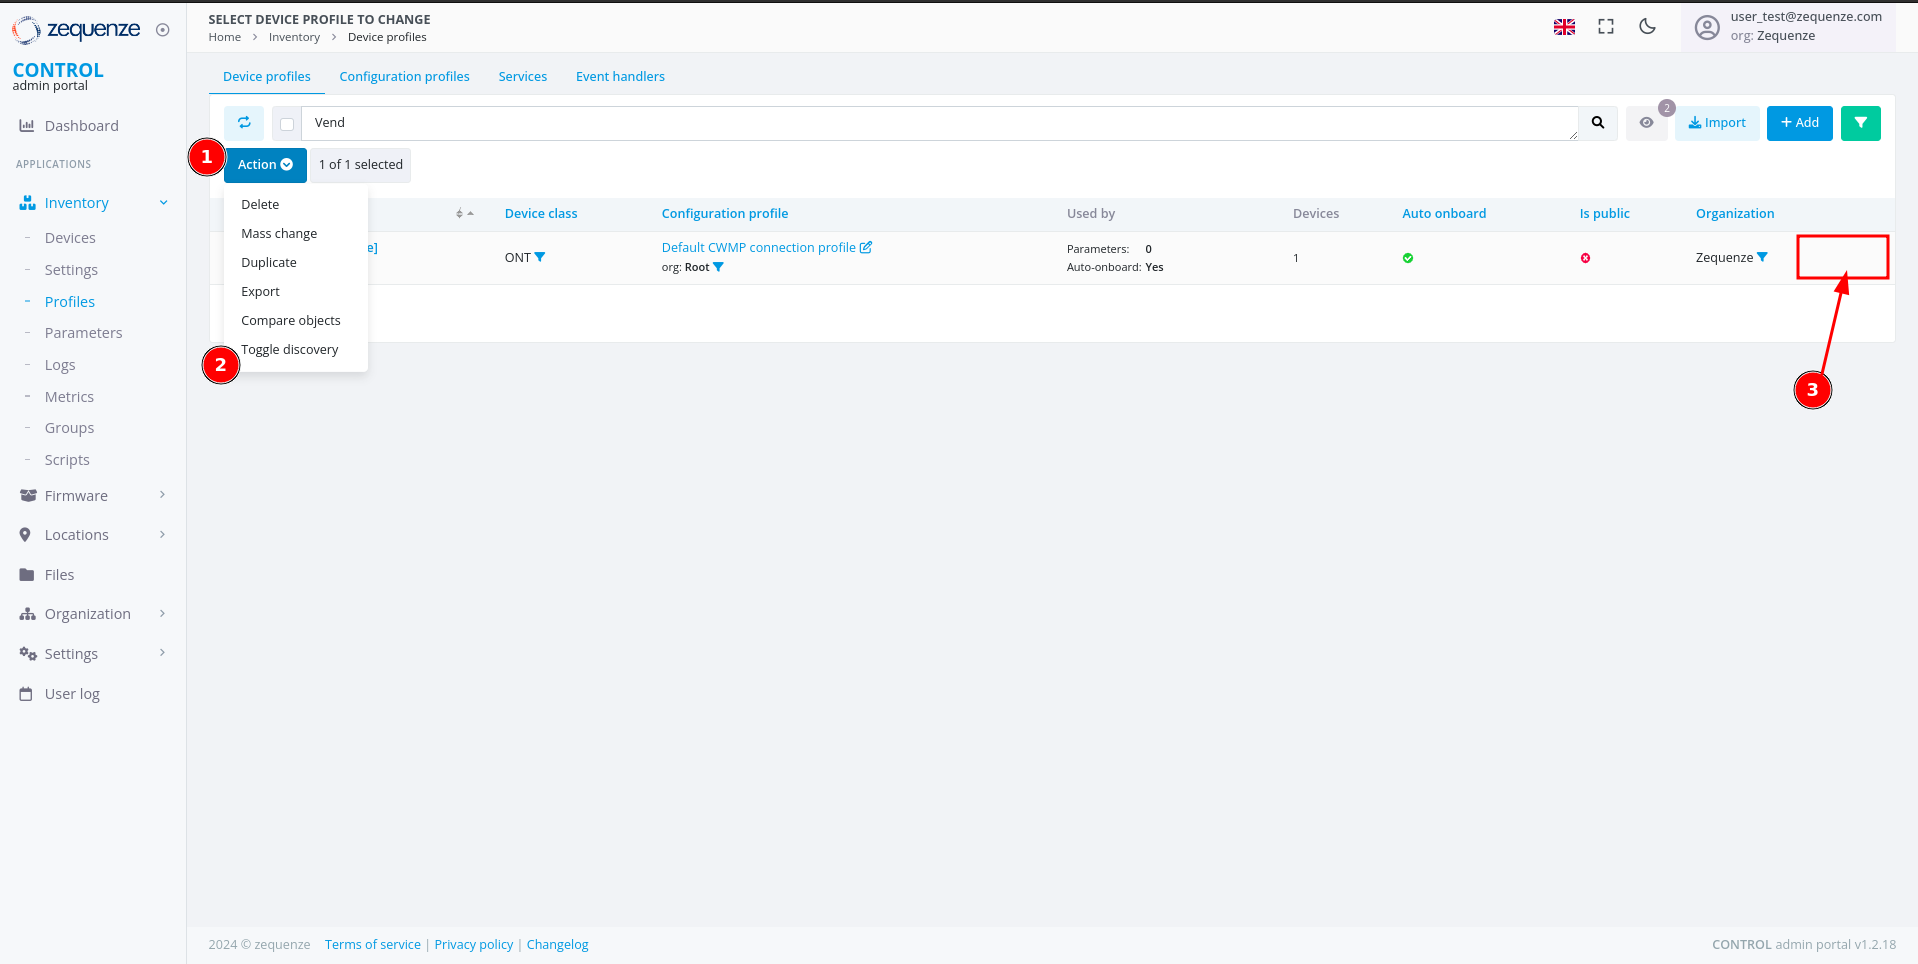
- Click the "Action" button.
- Select "Toggle Discovery" from the dropdown menu.
- A green gear icon will appear, confirming that the discovery process has started.
The CONTROL platform will now wait for the device to connect and retrieve all available parameters.
Step 3: Monitor Discovery Progress
The green gear icon indicates that the platform is waiting to obtain all parameters from the device. Refresh the webpage to check when the gear icon disappears, signaling that discovery is complete.
View Discovered Parameters
Once discovery is complete, you can view all discovered parameters.
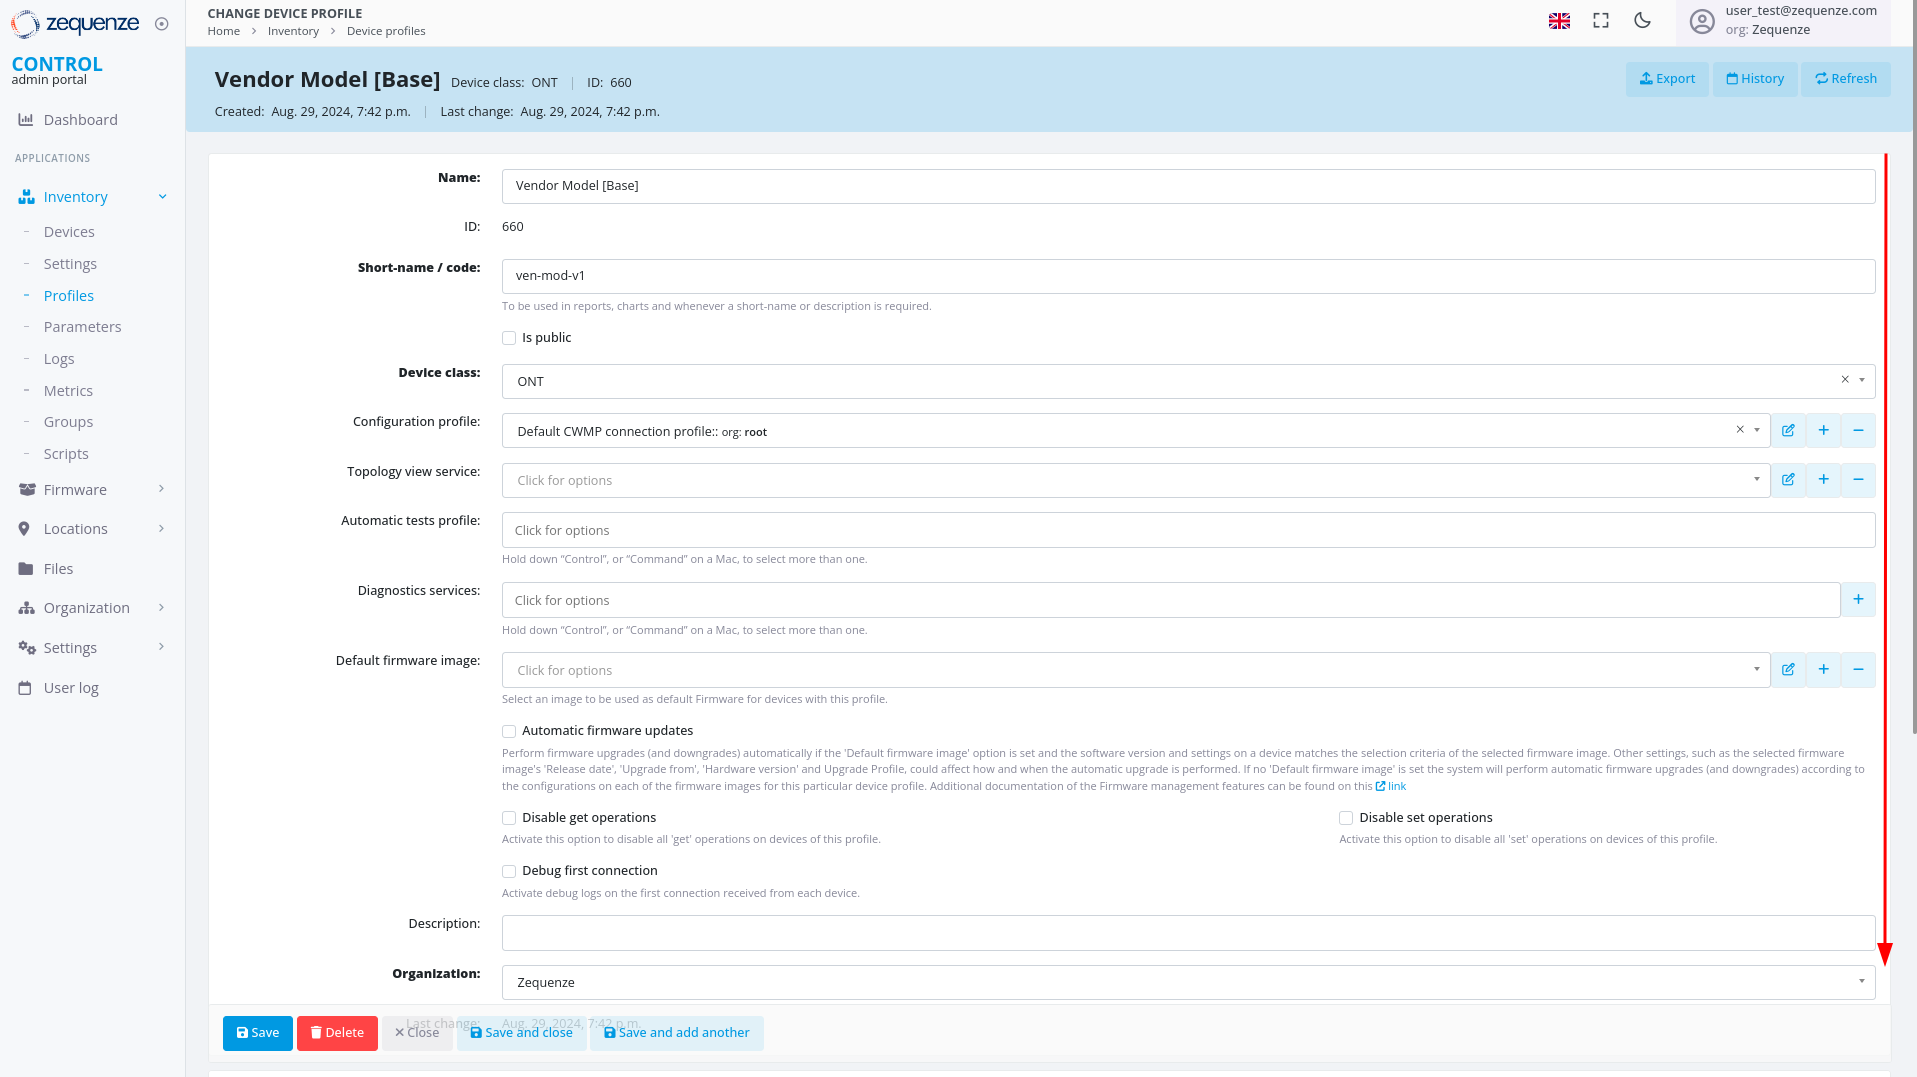
Access the Profile
Click on the profile name to open its details:
Locate System Groups
Inside the profile, scroll down to the bottom of the page to find the System groups section:
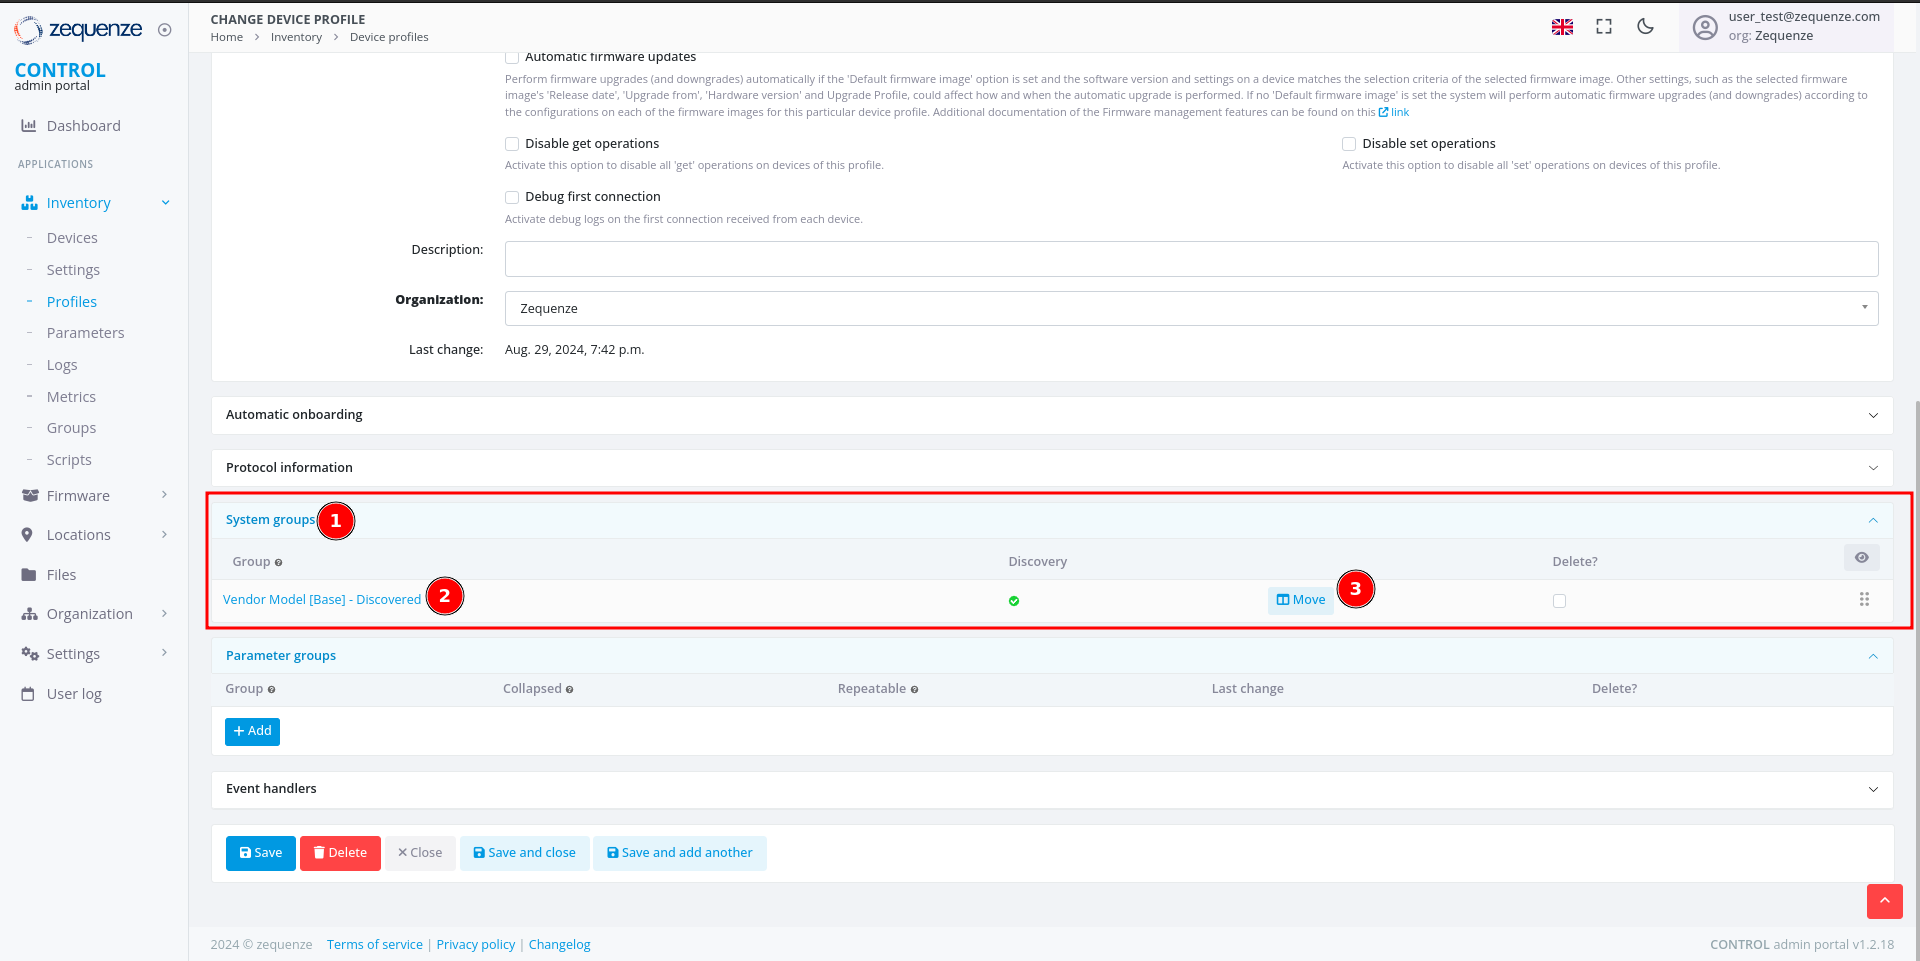
This section contains:
- System groups — Where discovered parameters are stored.
- Group — The name of the parameter group. For discovered parameters, this is typically the profile name followed by "Discovered".
- Move — A button that displays the parameters and their count.
View Parameter Details
Click the "Move" button to open the parameter viewer:
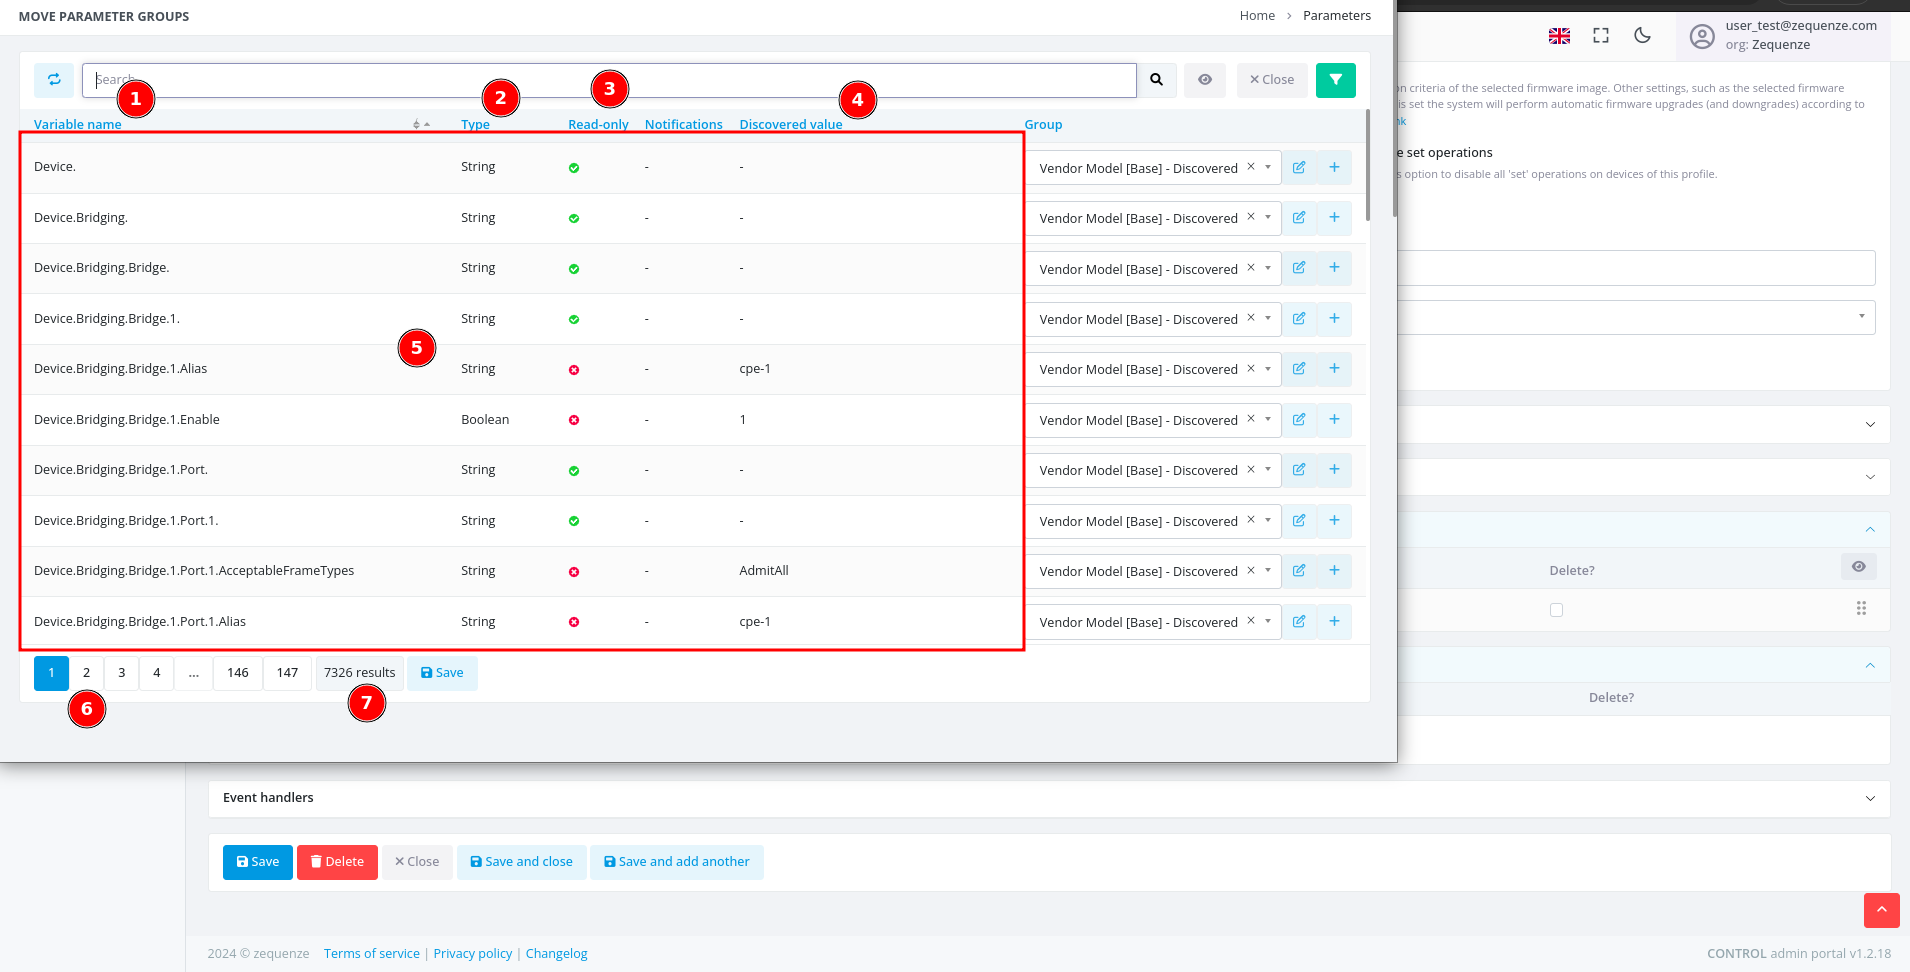
This window displays:
- Variable name — The name of each discovered parameter.
- Type — The parameter data type (e.g., string, integer, date, etc.).
- Read-only — Indicates whether the parameter is read-only or writable.
- Discovered value — The value discovered from the example device.
- Values — A table containing all parameter information.
- Pages — Navigation controls for browsing multiple pages of parameters.
- Quantity — The total number of parameters available for this device with its current firmware or software version.
Reference: For detailed information about parameters, consult the standard documentation for TR-098 or TR-181.
Next Steps
You can now export all discovered parameters to Excel or other formats for local analysis. This process will be covered in the next section.
No comments to display
No comments to display