Add Device to CONTROL
Overview
This guide walks you through configuring a device to connect to the CONTROL platform. In this example, we'll configure an ONT from an oriental vendor with TR069 credentials created in a previous step.
Prerequisites
Before beginning, ensure you have:
- Valid TR069 credentials created in CONTROL (see the Profile chapter)
- Network access from the device to the CONTROL platform URL
- Administrative access to your device
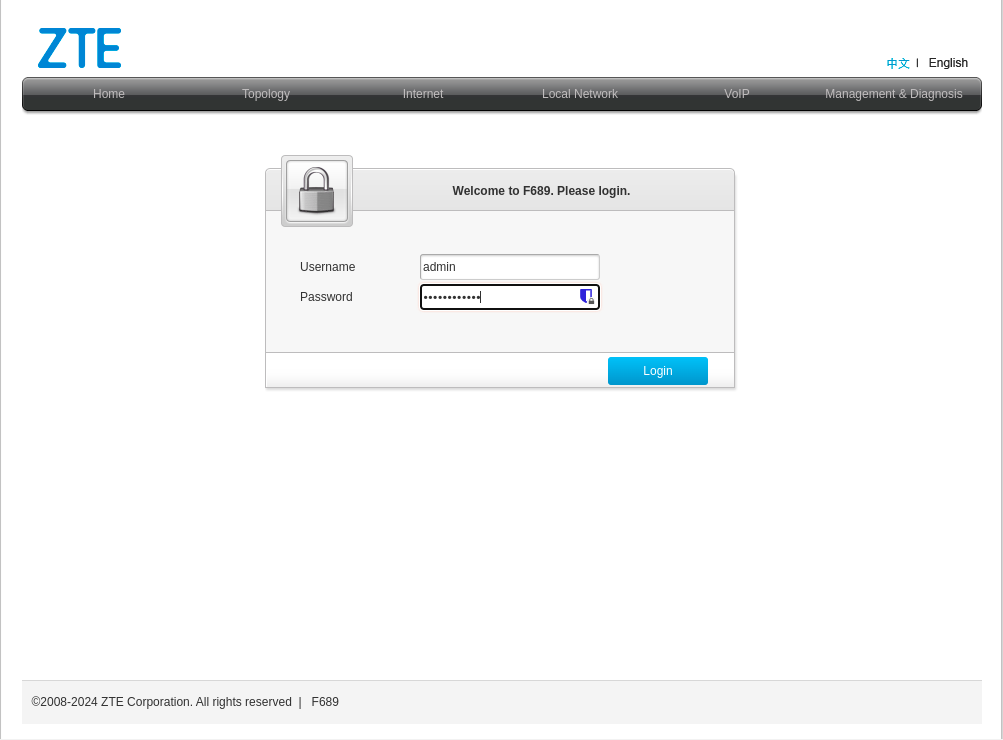
Step 1: Access Device Configuration
Log in to your device's web interface.
Step 2: Review Existing WAN Interfaces
After logging in, verify the existing WAN interfaces. This device has a pre-configured interface, but we'll examine the configuration and create a new one for demonstration purposes.
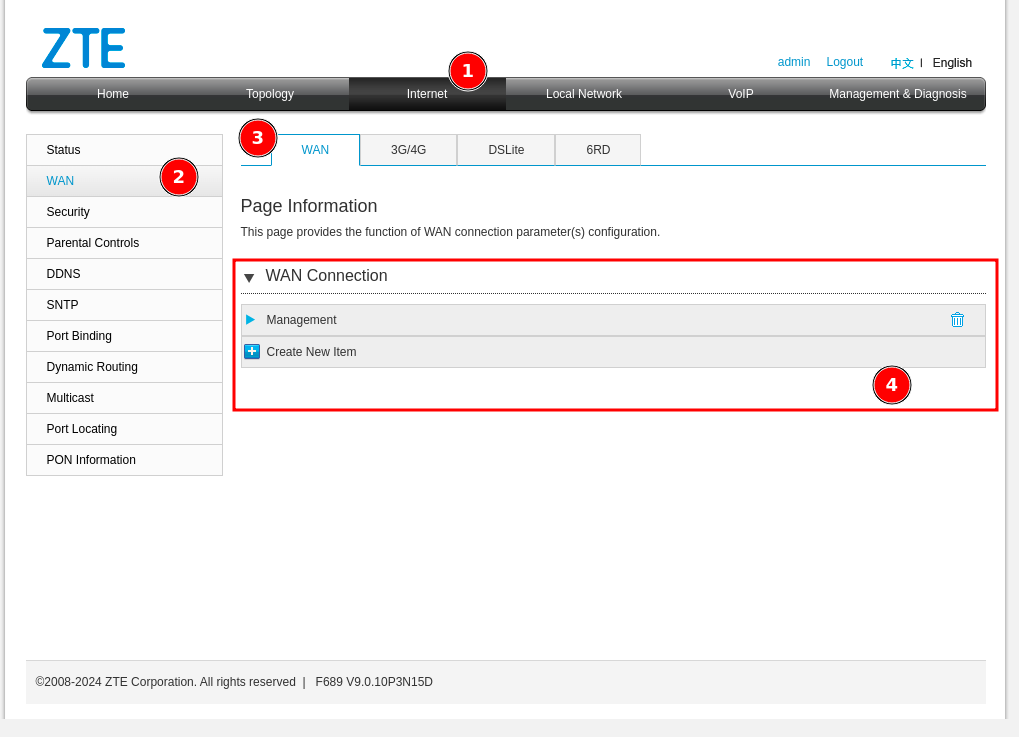
- Click "Internet"
- Click "WAN"
- Click "WAN" again
- In the displayed list, you'll see existing WAN interfaces (in this example, an interface named "Management")
Step 3: Create a New WAN Interface
Create a new WAN interface for TR069 connectivity:
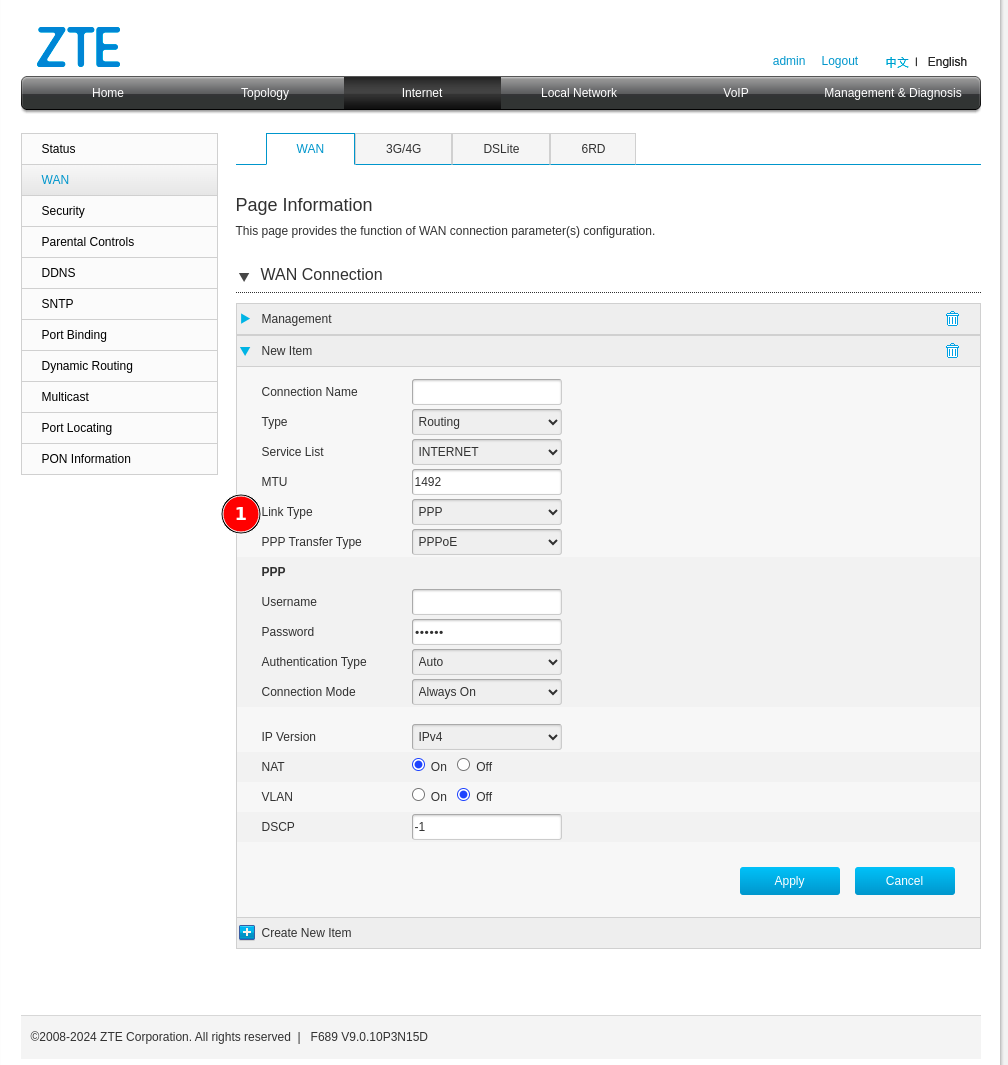
- Change the connection type from "PPP" to "IP":
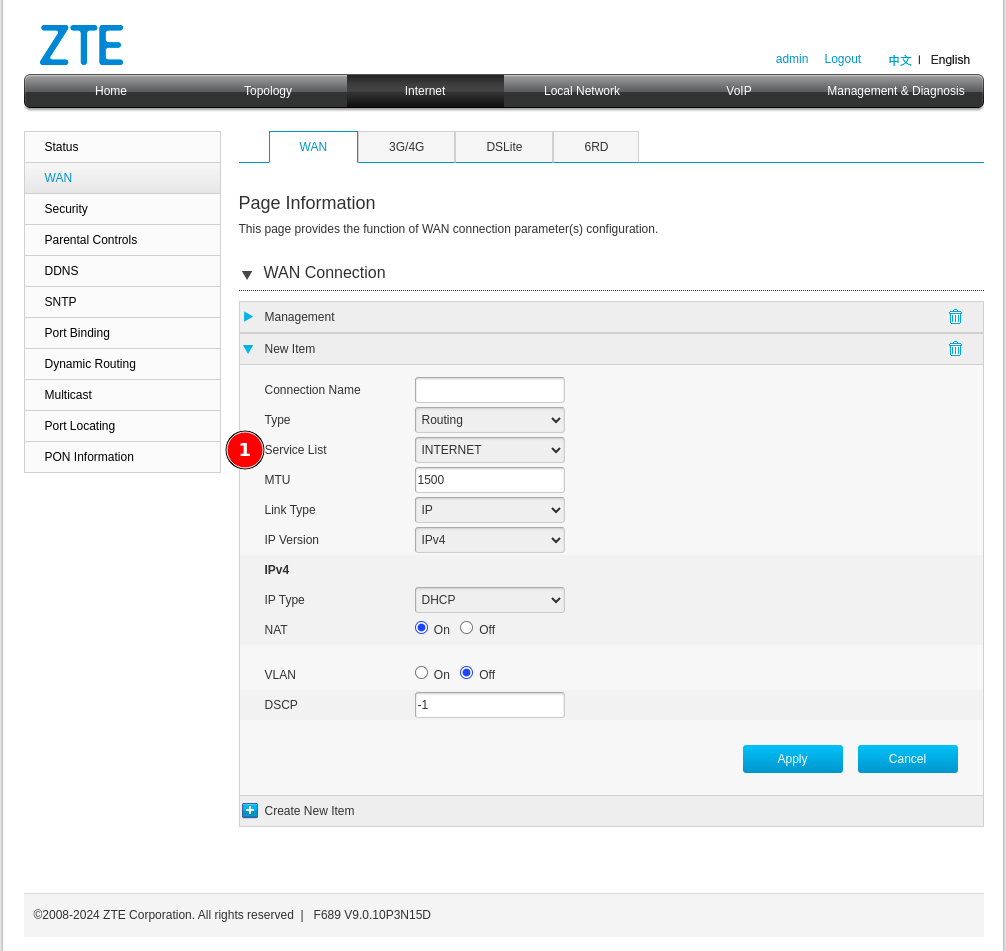
Step 4: Configure Service List Options
Next, configure the "Service List" type. Change it from Internet to one that includes TR069.
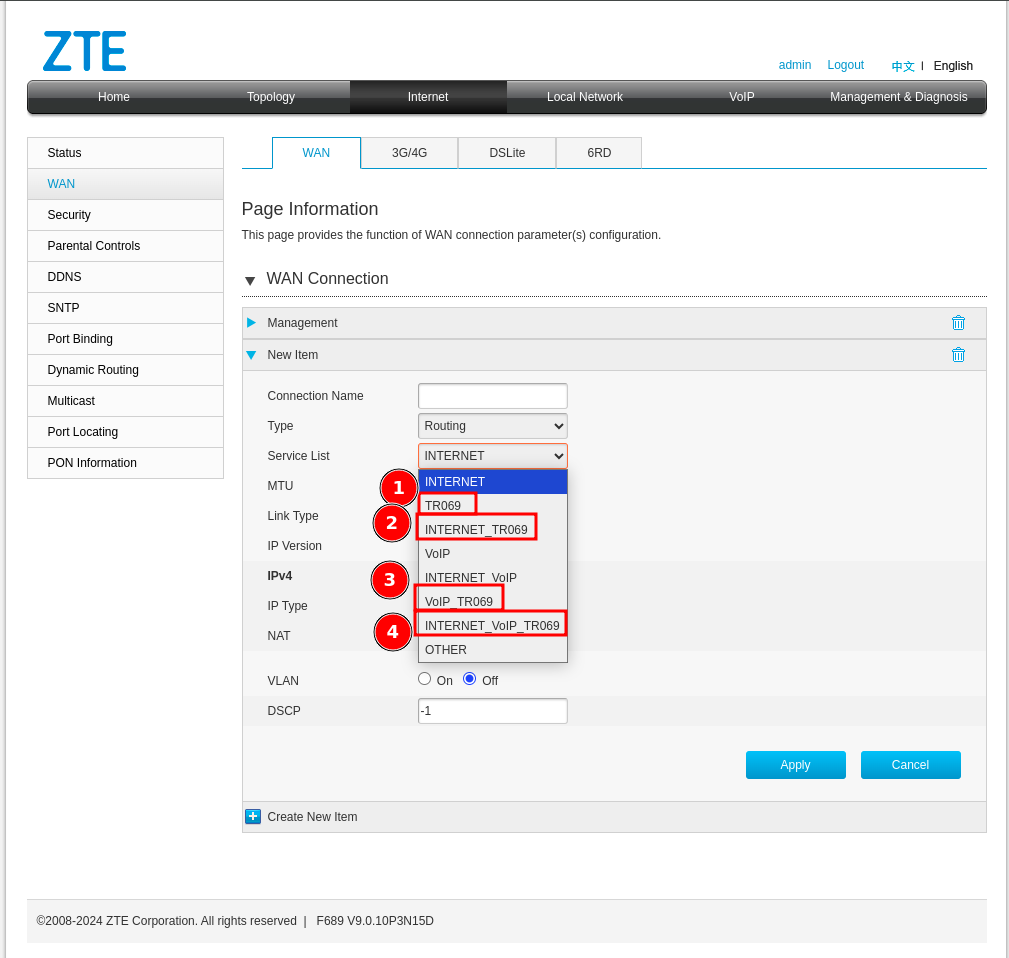
Understanding Service List Combinations
You may encounter several service list options. Here's what each means:
-
TR069 — A dedicated WAN interface exclusively for device management through the CONTROL platform. This is the ideal configuration but may not be feasible due to existing network design constraints.
-
INTERNET_TR069 — Shares the Internet service with device administration. Not recommended because suspending the service may result in losing access to the CONTROL platform, limiting communication until service is restored.
-
VOIP_TR069 — Shares the TR069 service with VoIP. This is potentially a good option as it won't affect existing Internet services.
-
INTERNET_VoIP_TR069 — Manages all services in a single VLAN or WAN interface. This configuration is rare but functional when needed.
Step 5: Configure WAN Interface Parameters
Configure your WAN interface with the following settings:
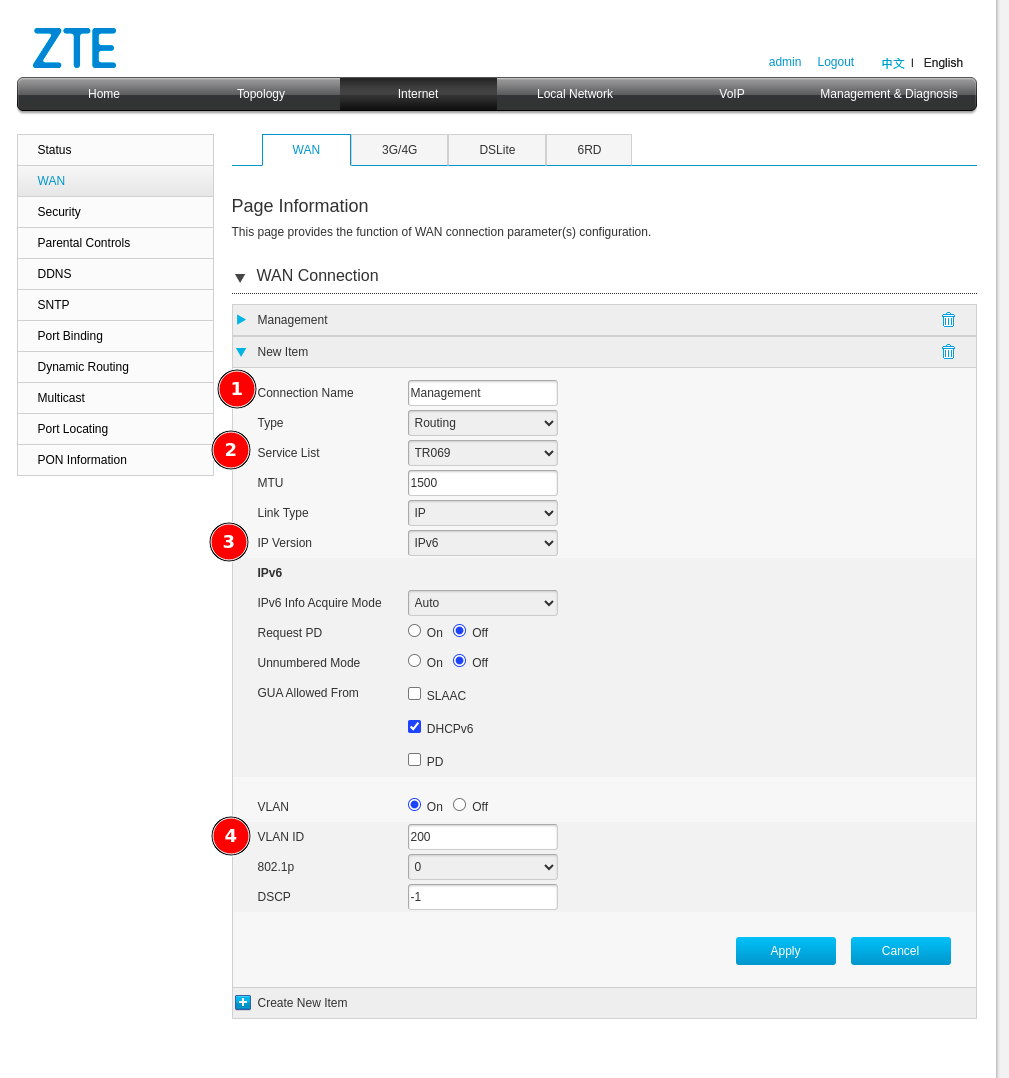
- Connection name — Enter a descriptive name to identify this connection
- Service List — Select TR069
- IP Version — Select the appropriate IP version (IPv4 or IPv6)
- VLAN ID — Enter the VLAN ID for this service
Important: Ensure your network configuration allows the device to reach the CONTROL platform URL through this WAN interface with the TR069 service enabled.
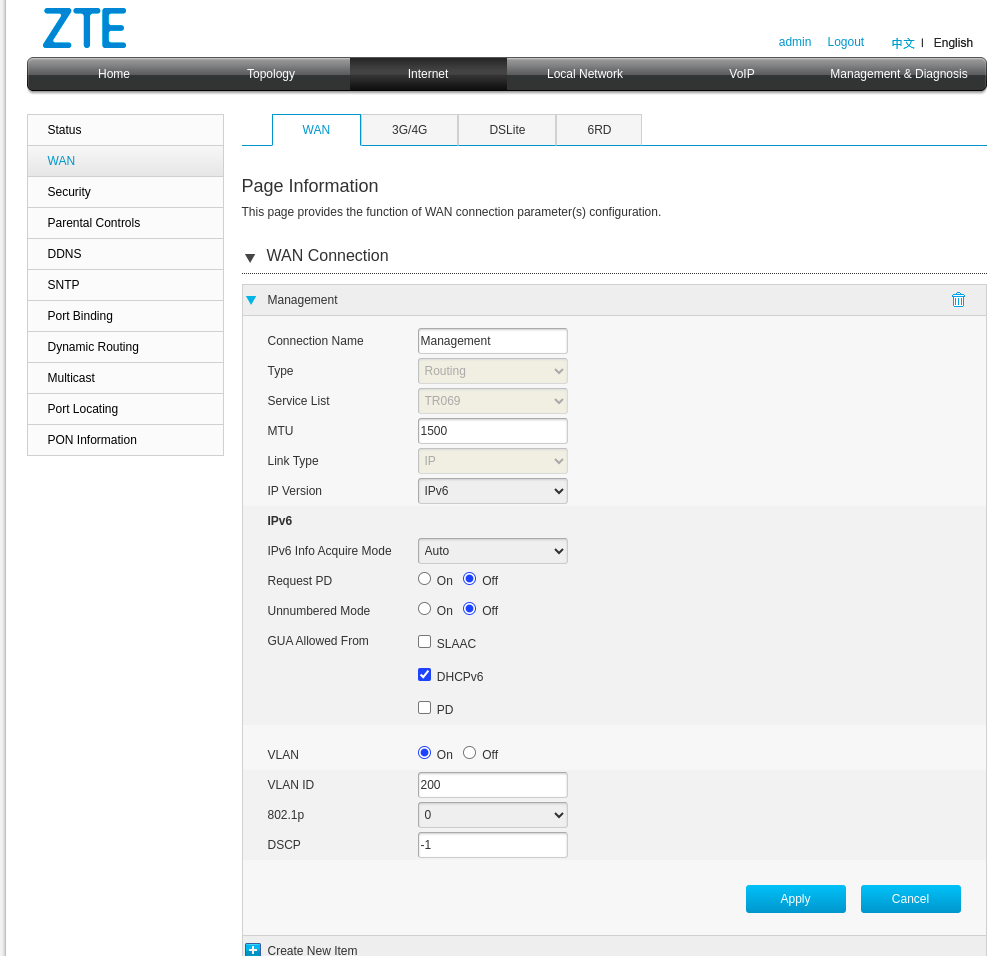
After clicking Apply, verify your configuration:
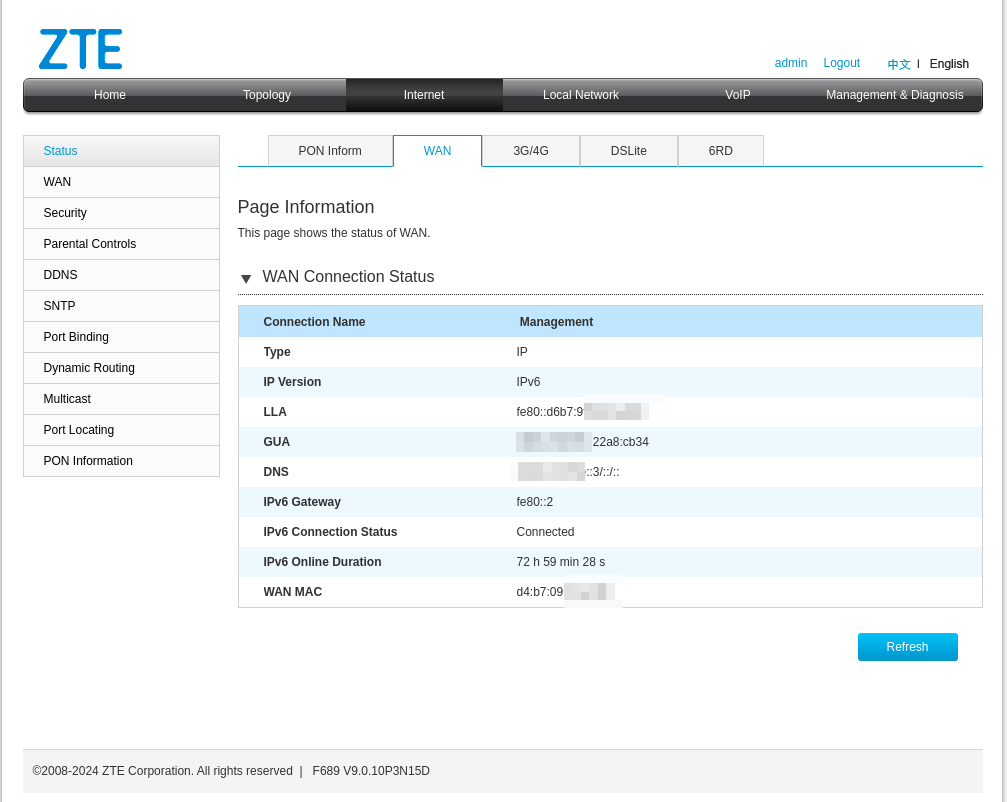
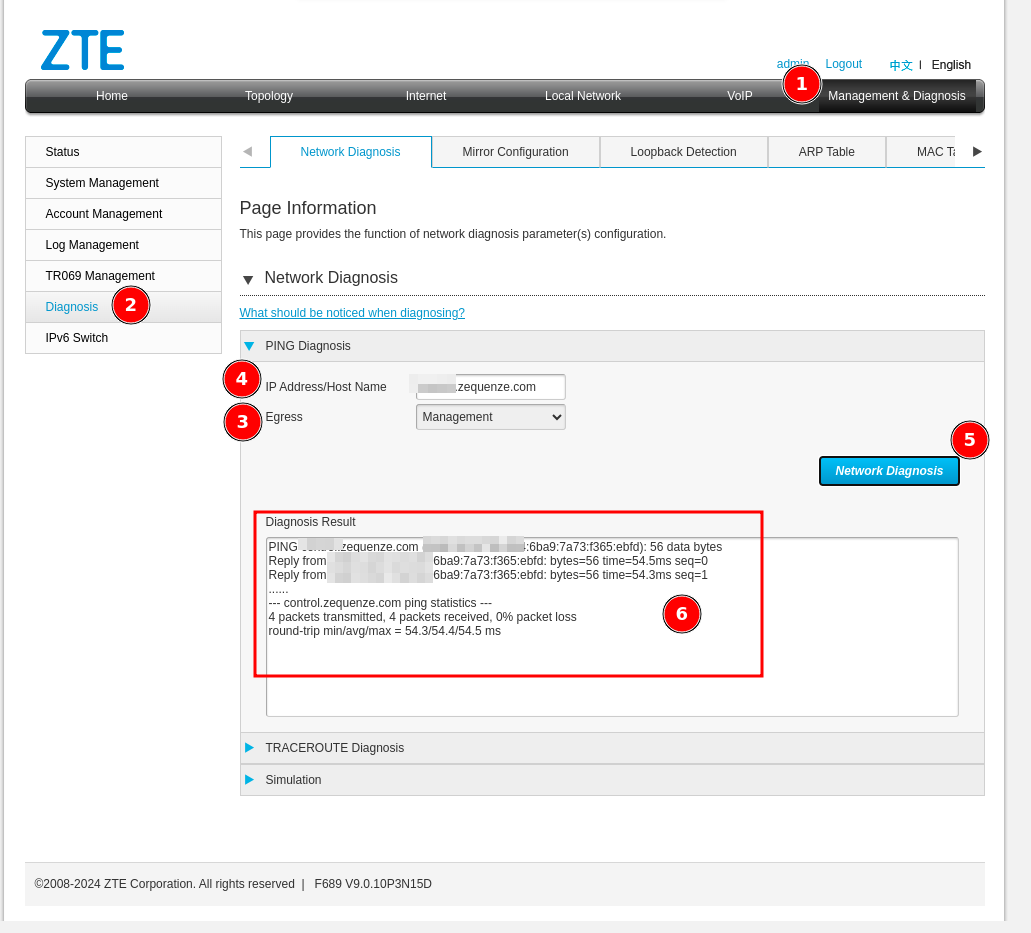
Step 6: Verify Network Connectivity
Confirm that the WAN interface has a valid IP address and can reach the CONTROL platform:
Optional: Test CONTROL Platform Connectivity
You can optionally verify connectivity using the device's built-in ping utility:
Step 7: Configure TR069 Settings
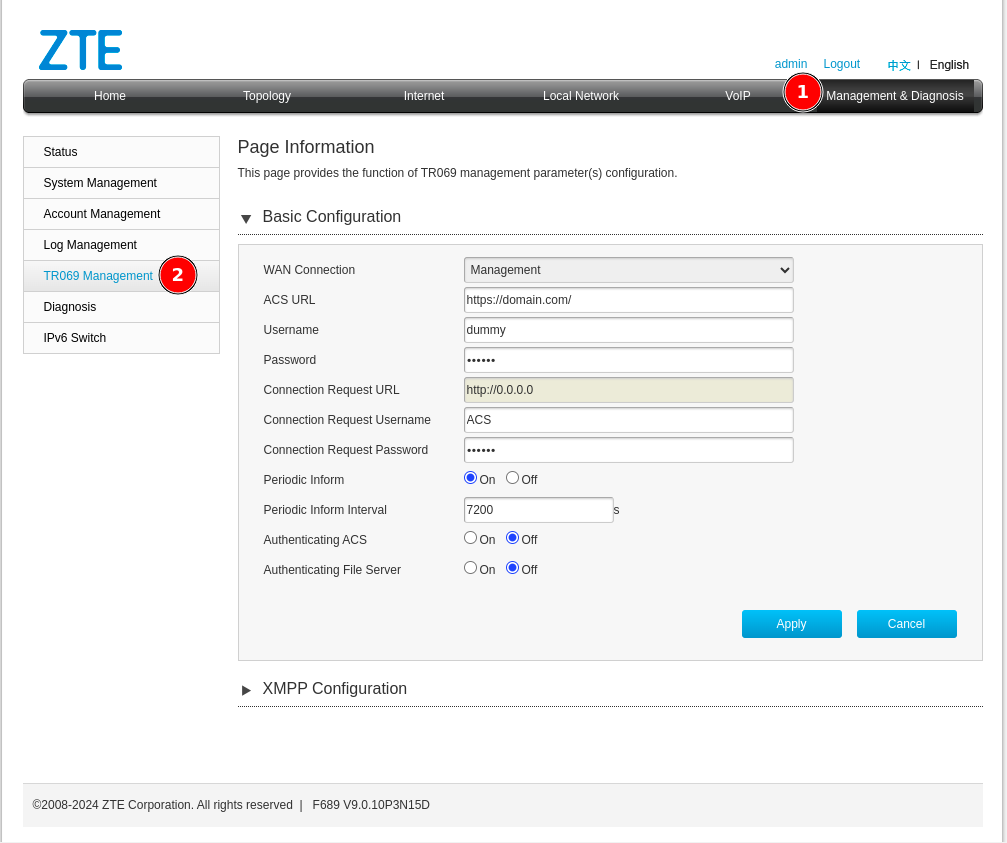
- Click "Management & Diagnosis"
- Click "TR069 Management"
Step 8: Connect Device to CONTROL
Configure the TR069 parameters to establish connection with CONTROL:
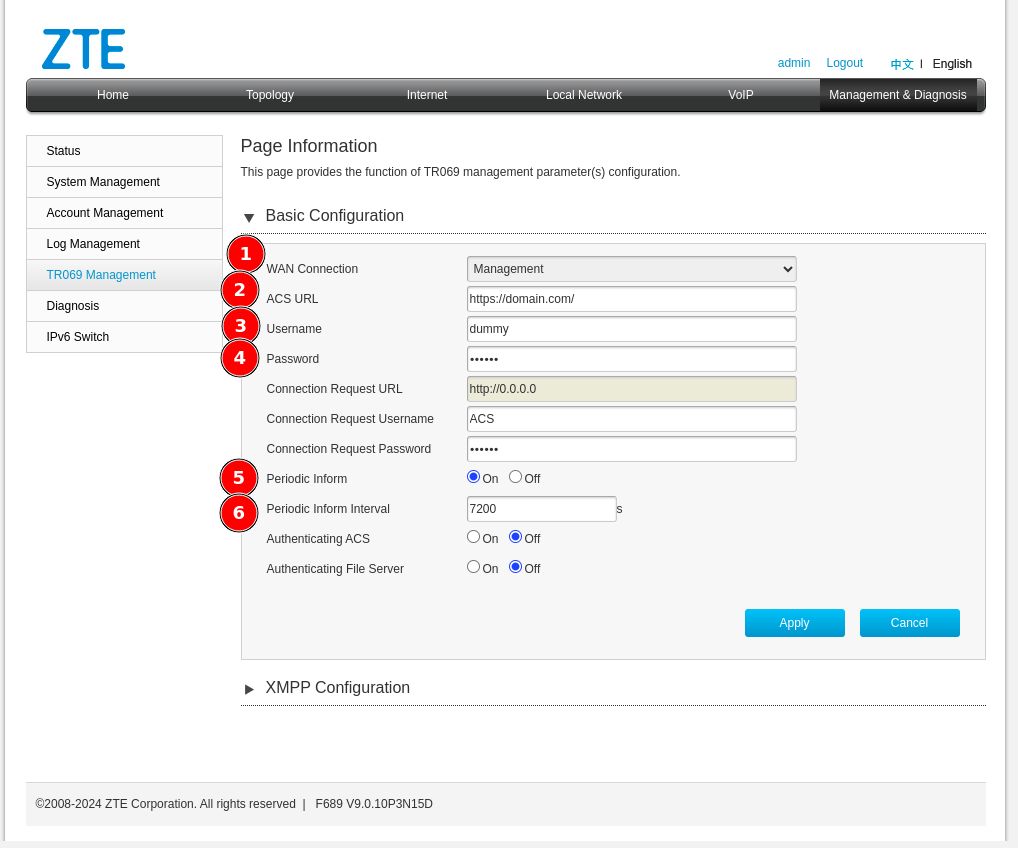
Configure the following parameters:
-
WAN Connection — Select the interface created for TR069 (e.g., Management)
-
ACS URL — Enter:
https://control.zequenze.com/cwmp/
Note: Confirm the correct URL with Zequenze staff before proceeding. -
Username — Enter the username created in the Profile chapter
-
Password — Enter the password created in the Profile chapter
-
Periodic Inform — Enable this option to allow the device to report periodically to CONTROL
-
Periodic Inform Interval — For initial setup, set this to 180 seconds
Step 9: Apply Configuration
Review your final configuration:
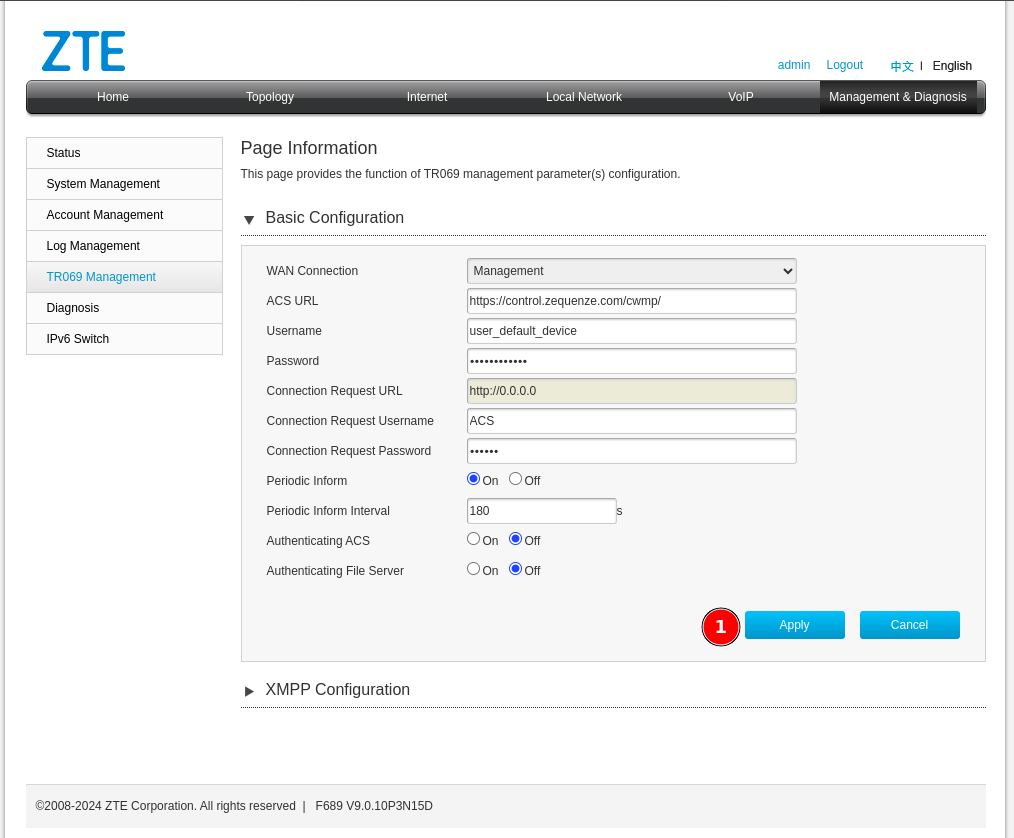
Click the Apply button to save your changes.
Next Steps
Device configuration is now complete. The device should appear in the CONTROL platform within the configured periodic inform interval. You can now proceed to manage and monitor your device through CONTROL.