IPsec Configuration
Overview
This guide explains how to configure an IPsec VPN tunnel between RouterOS and CONTROL. The configuration process involves setting up both endpoints to establish a secure site-to-site connection.
Part 1: RouterOS Configuration
Initial Access
- Log in to RouterOS using your default credentials
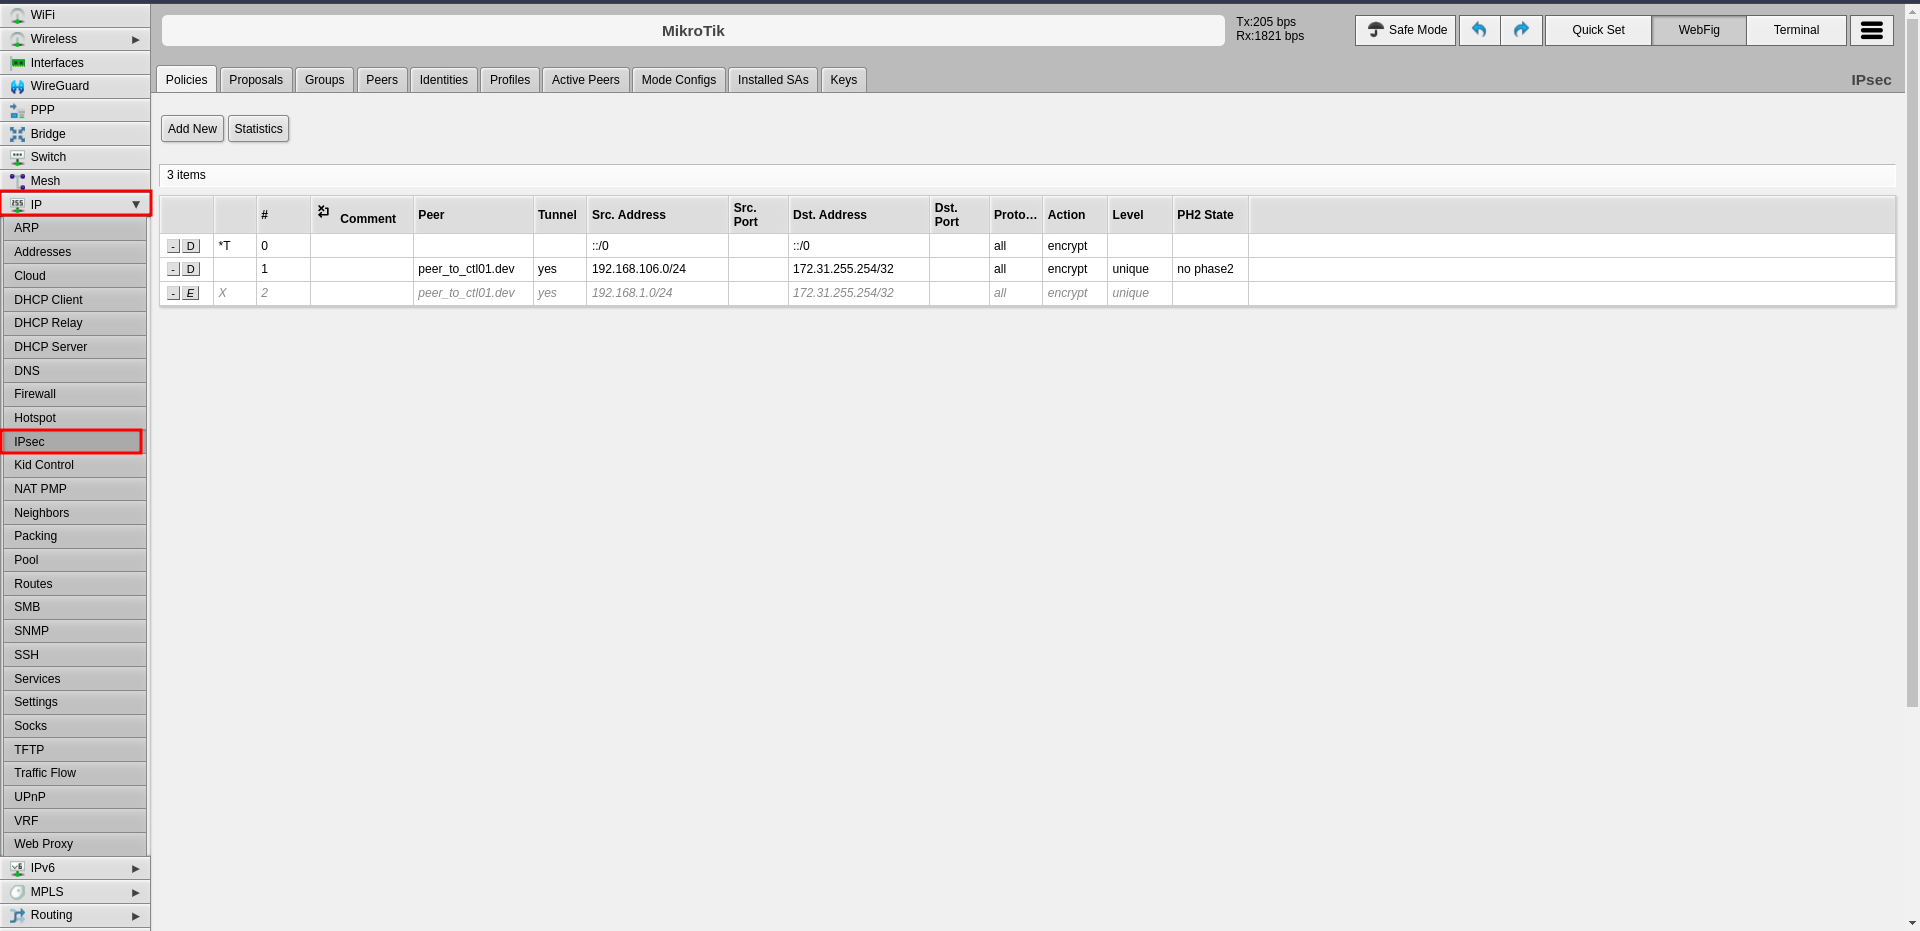
- Navigate to IP → IPsec in the left-side menu
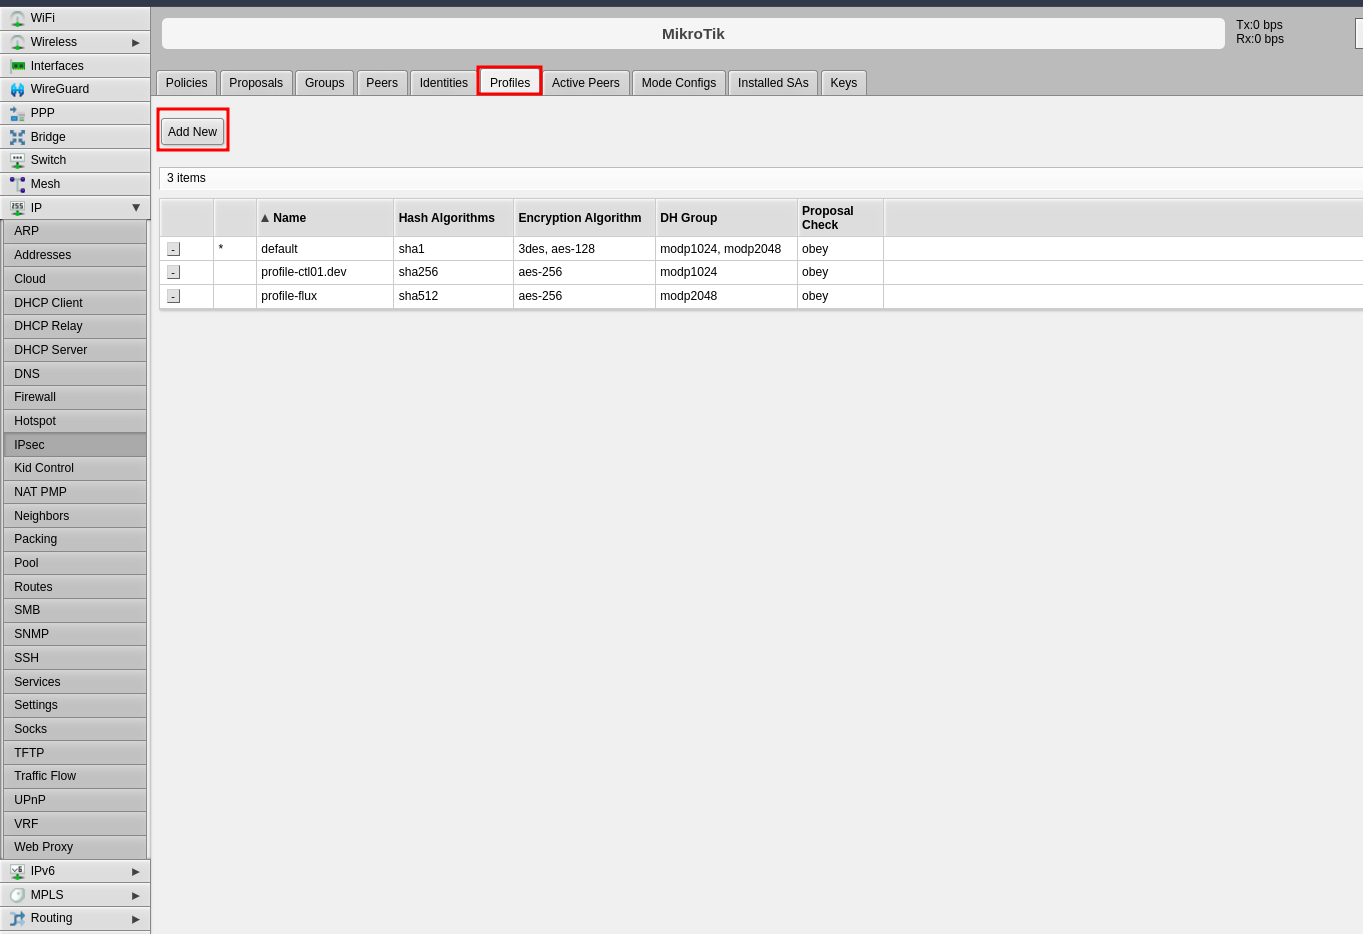
Step 1: Configure Profiles (Phase 1)
The profile defines Phase 1 parameters for the IPsec connection.
- Click the Profiles tab in the center panel
- Click Add New to create a new profile
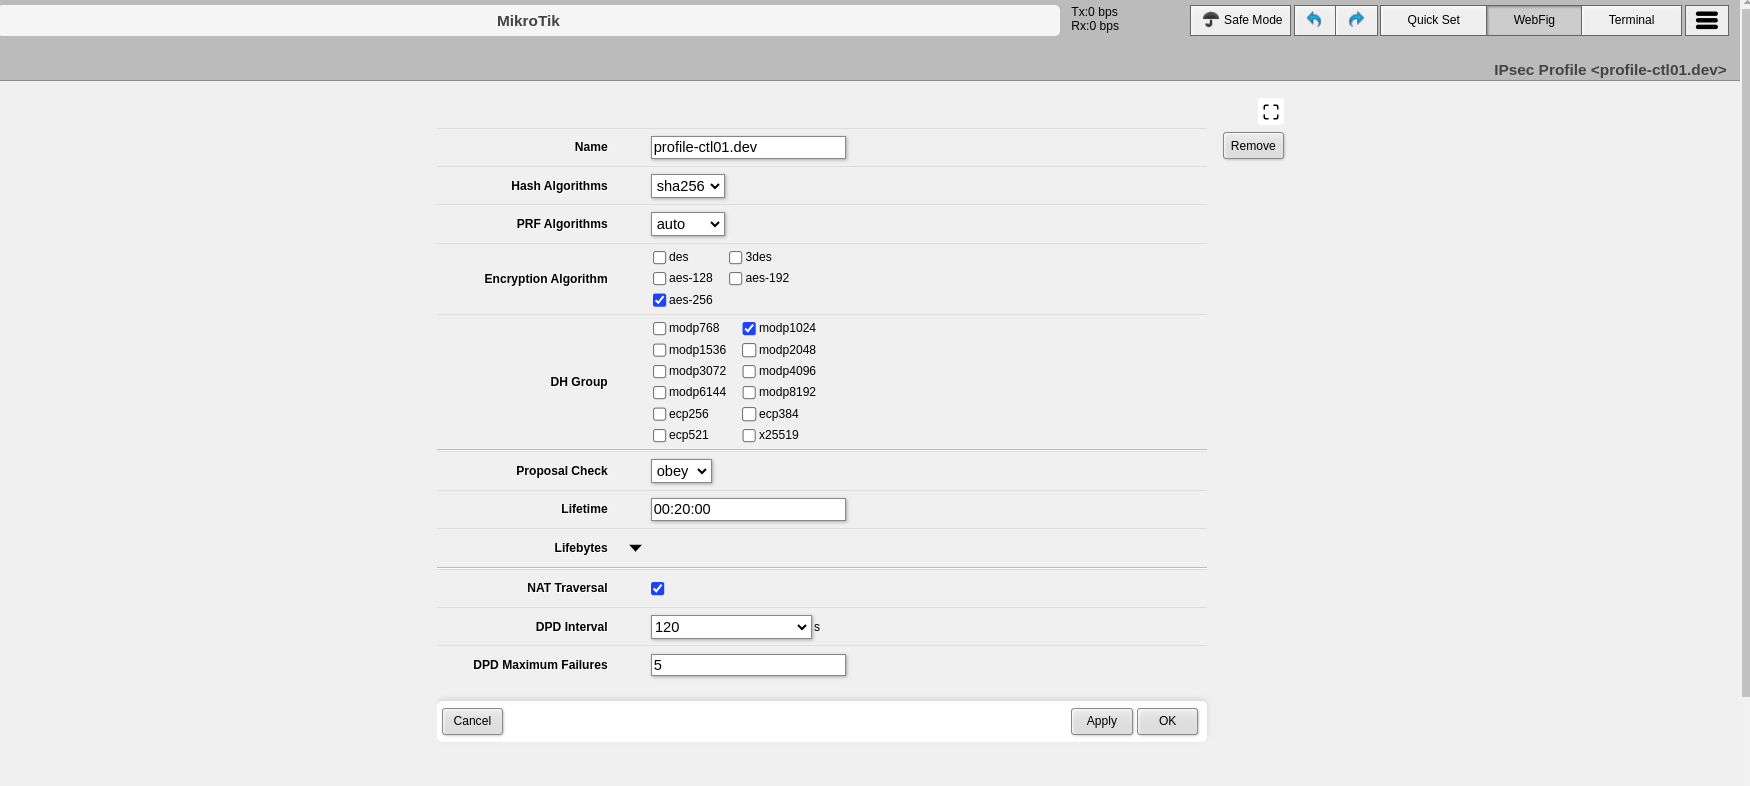
-
Configure the following Phase 1 parameters:
-
Click Apply, then click OK
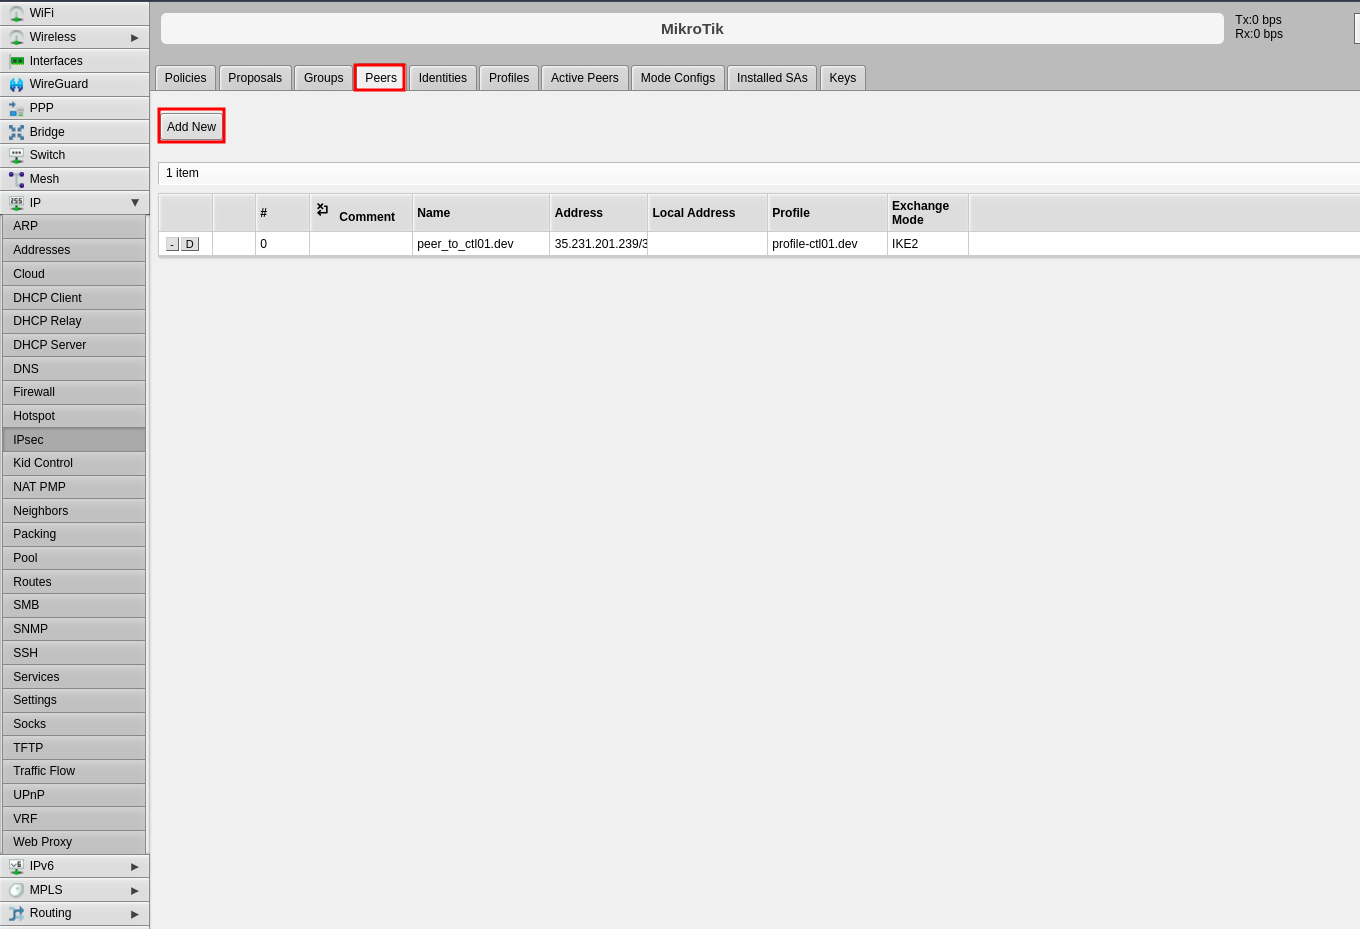
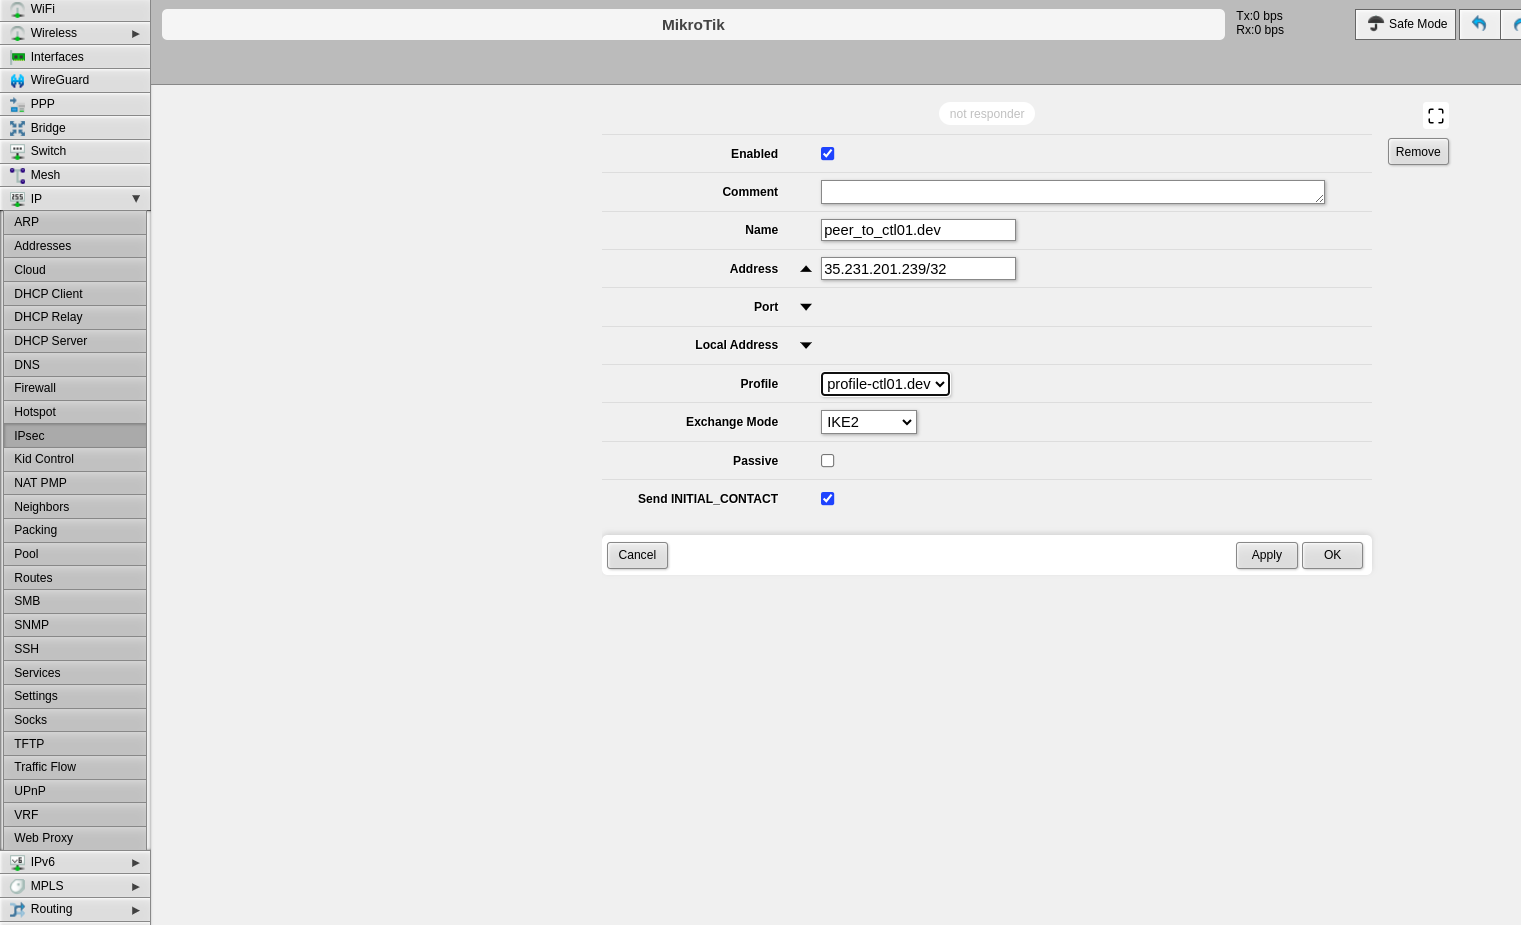
Step 2: Configure Peers
The peer configuration defines the remote VPN endpoint.
- Click the Peers tab
- Click Add New
-
Configure the following fields:
-
Click Apply, then click OK
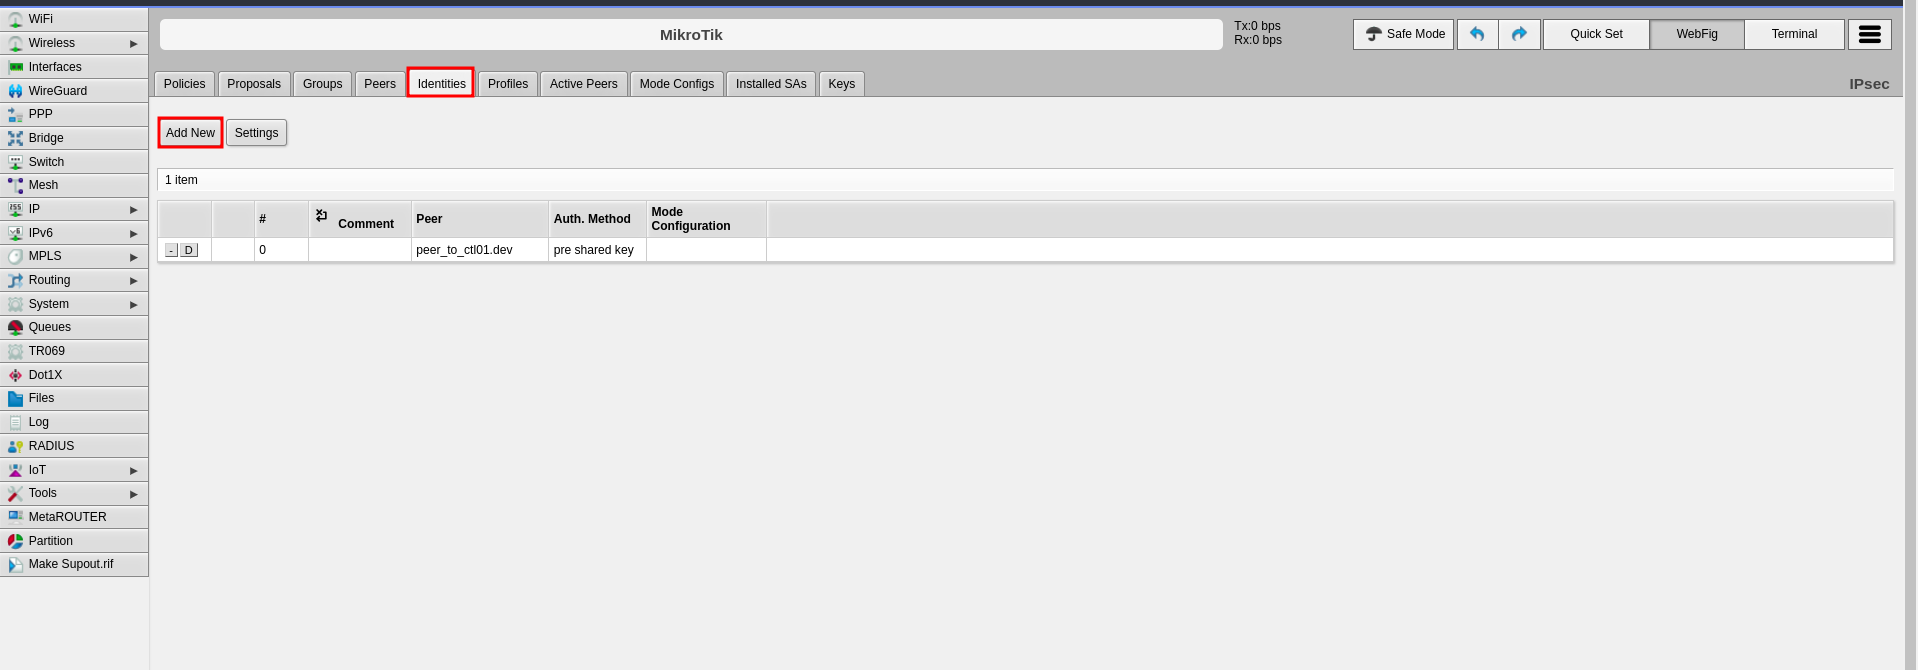
Step 3: Configure Identities
The identities configuration defines authentication credentials.
- Click the Identities tab
- Click Add New
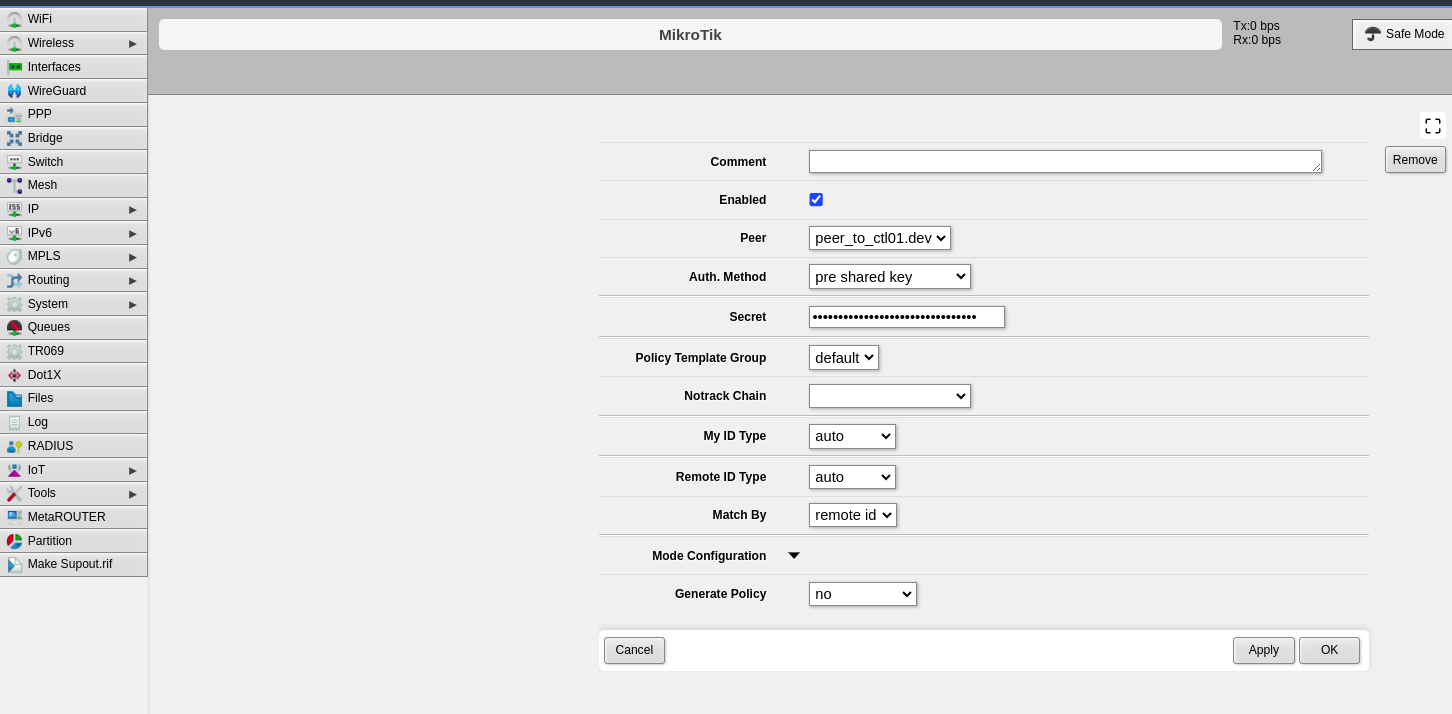
-
Configure the following fields:
-
Click Apply, then click OK
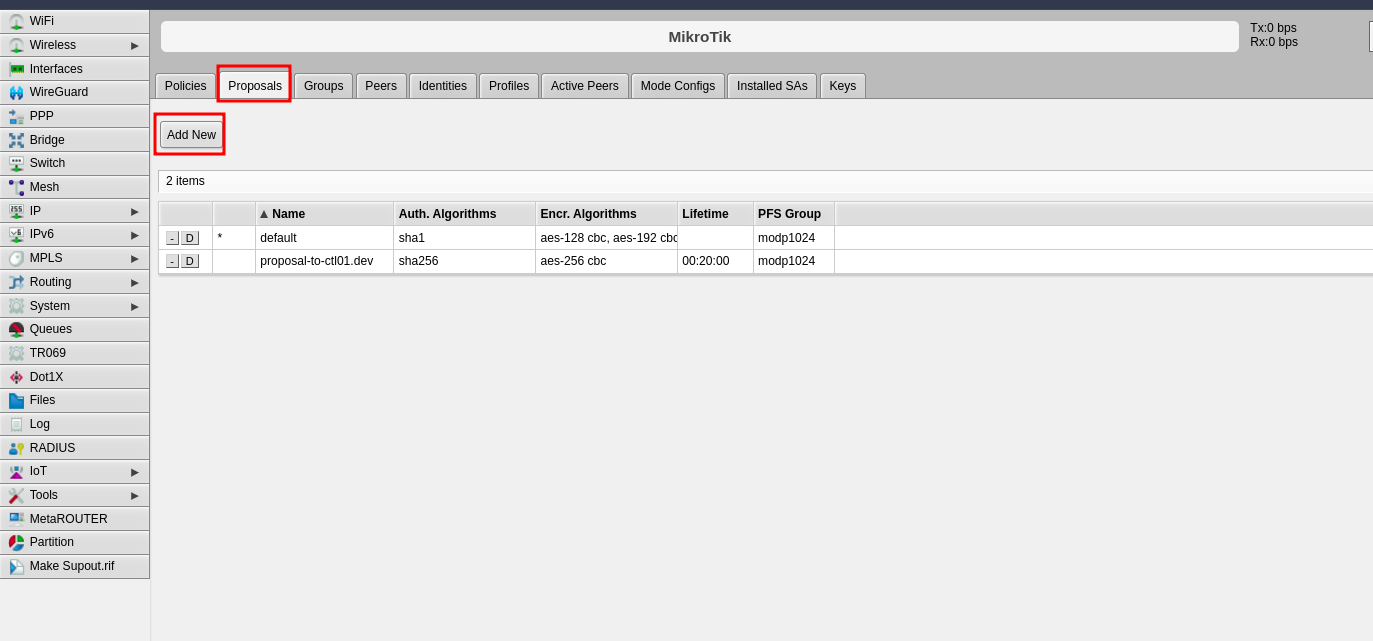
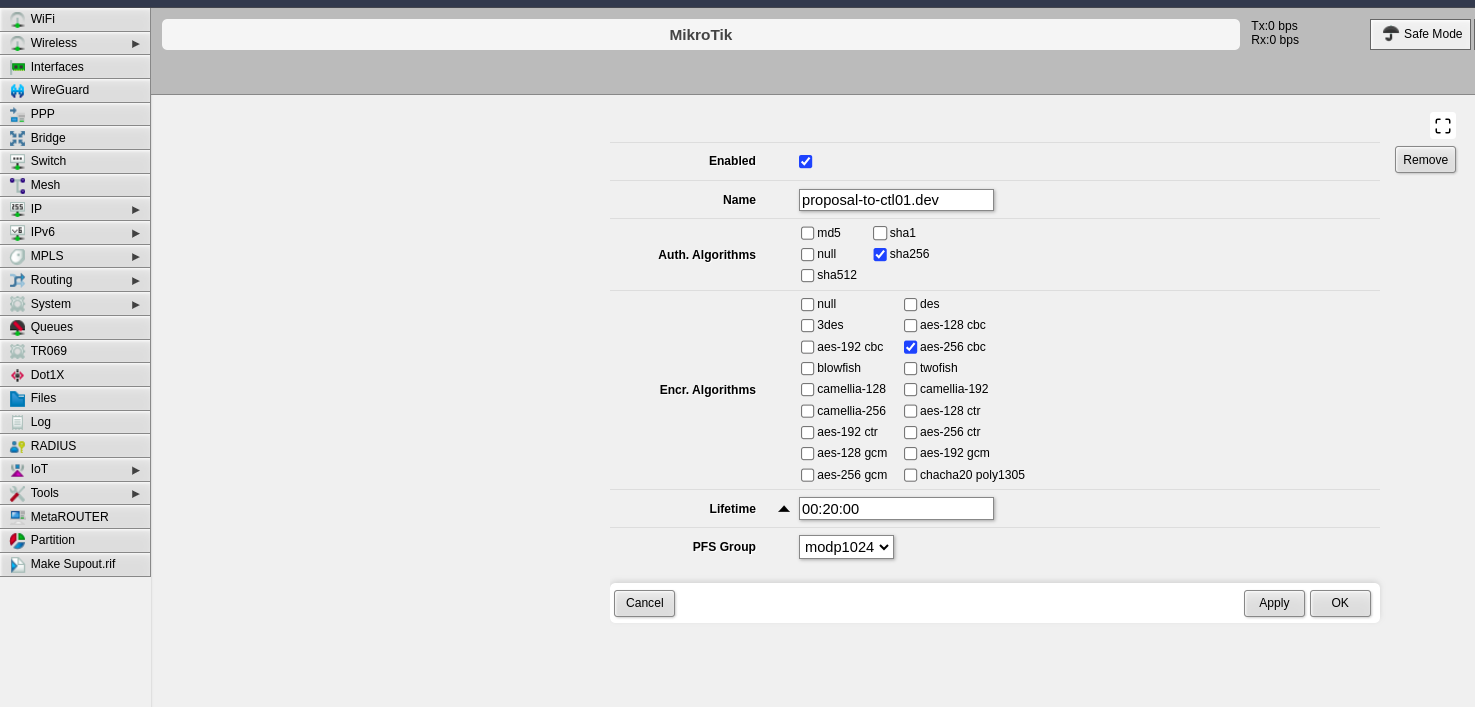
Step 4: Configure Proposals (Phase 2)
The proposal defines Phase 2 parameters for the IPsec connection.
- Click the Proposals tab
- Click Add New
-
Configure the following Phase 2 parameters:
-
Click Apply, then click OK
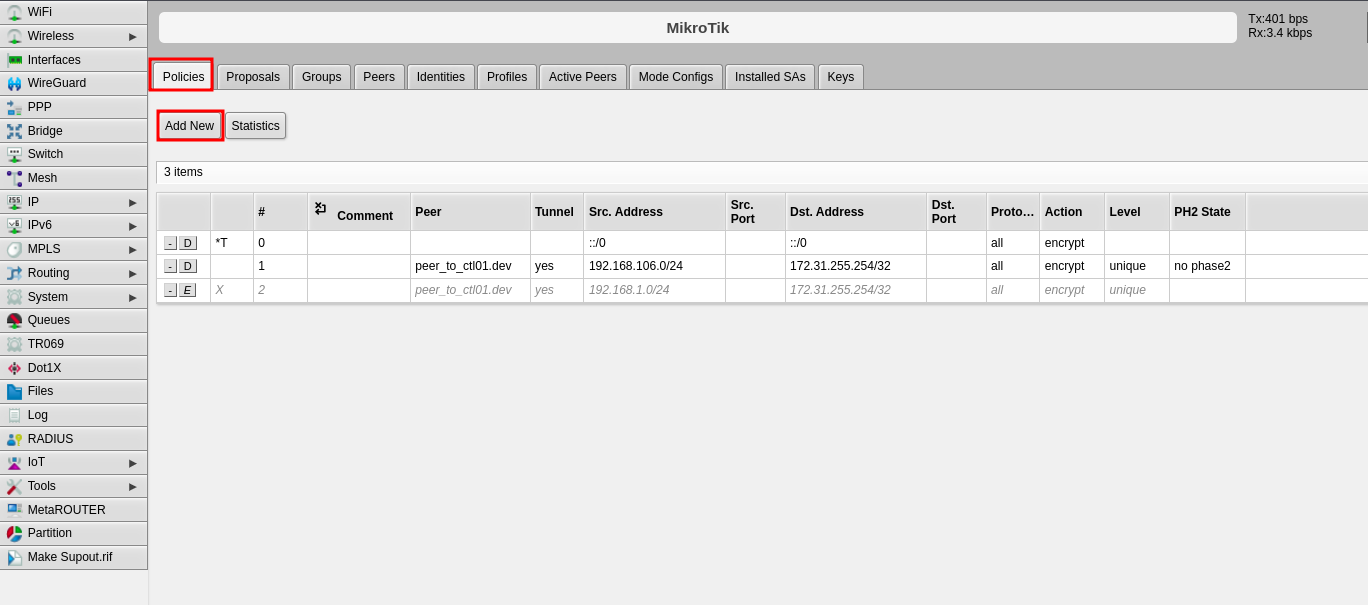
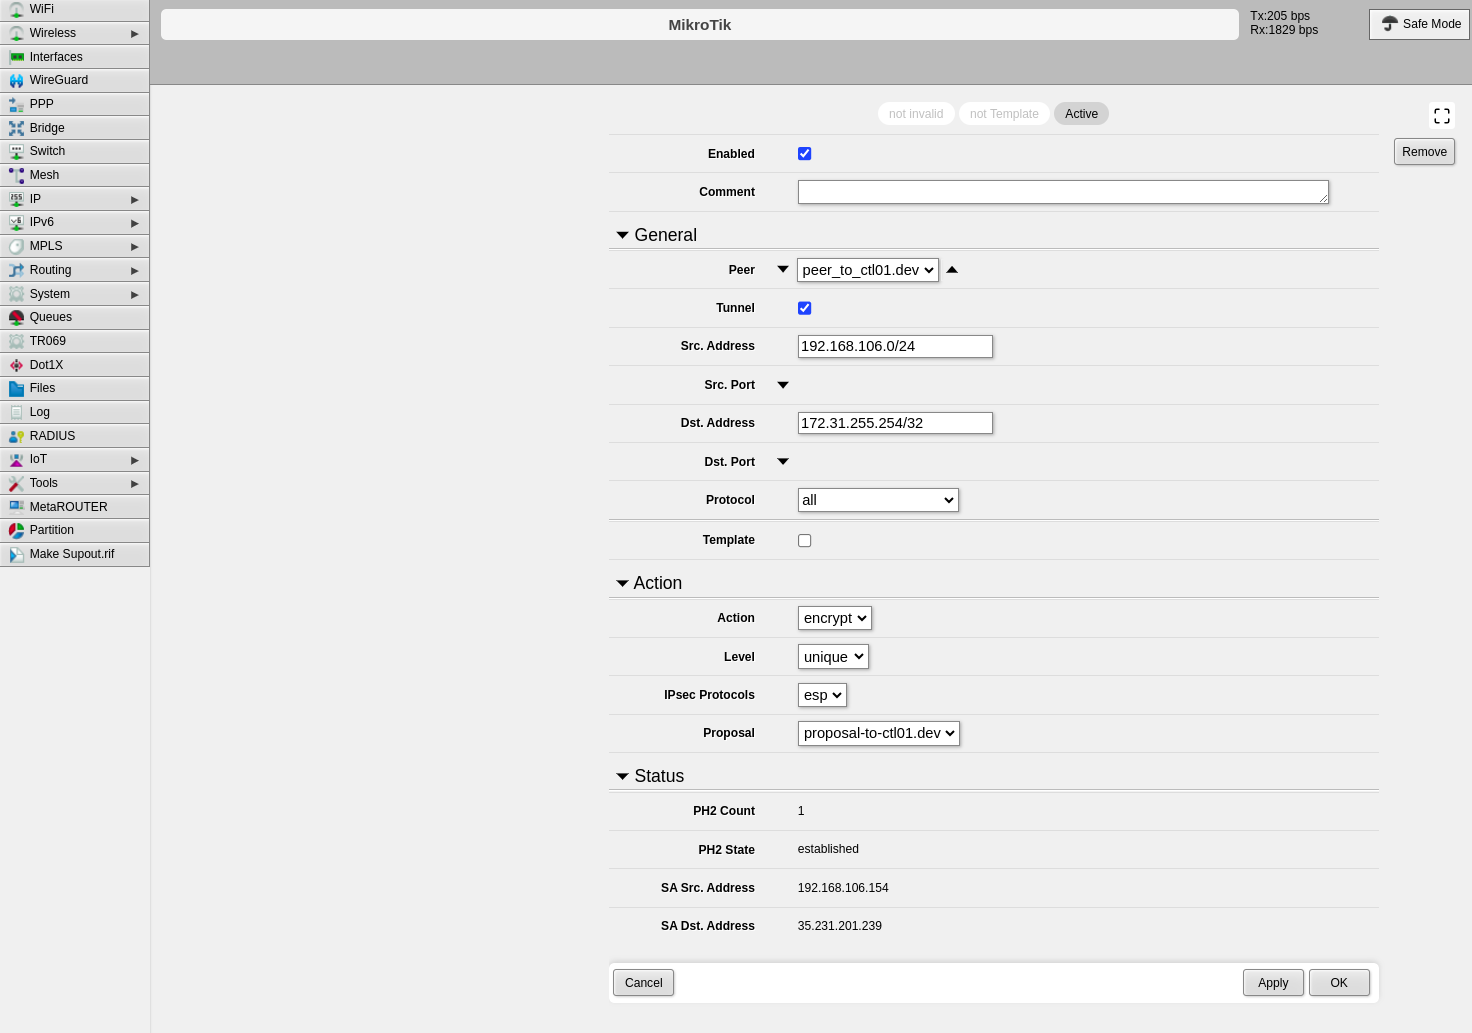
Step 5: Configure Policies
The policy defines which traffic should pass through the VPN tunnel.
- Click the Policies tab
- Click Add New
-
Configure the following fields:
-
Click Apply, then click OK
Part 2: CONTROL Configuration
Initial Navigation

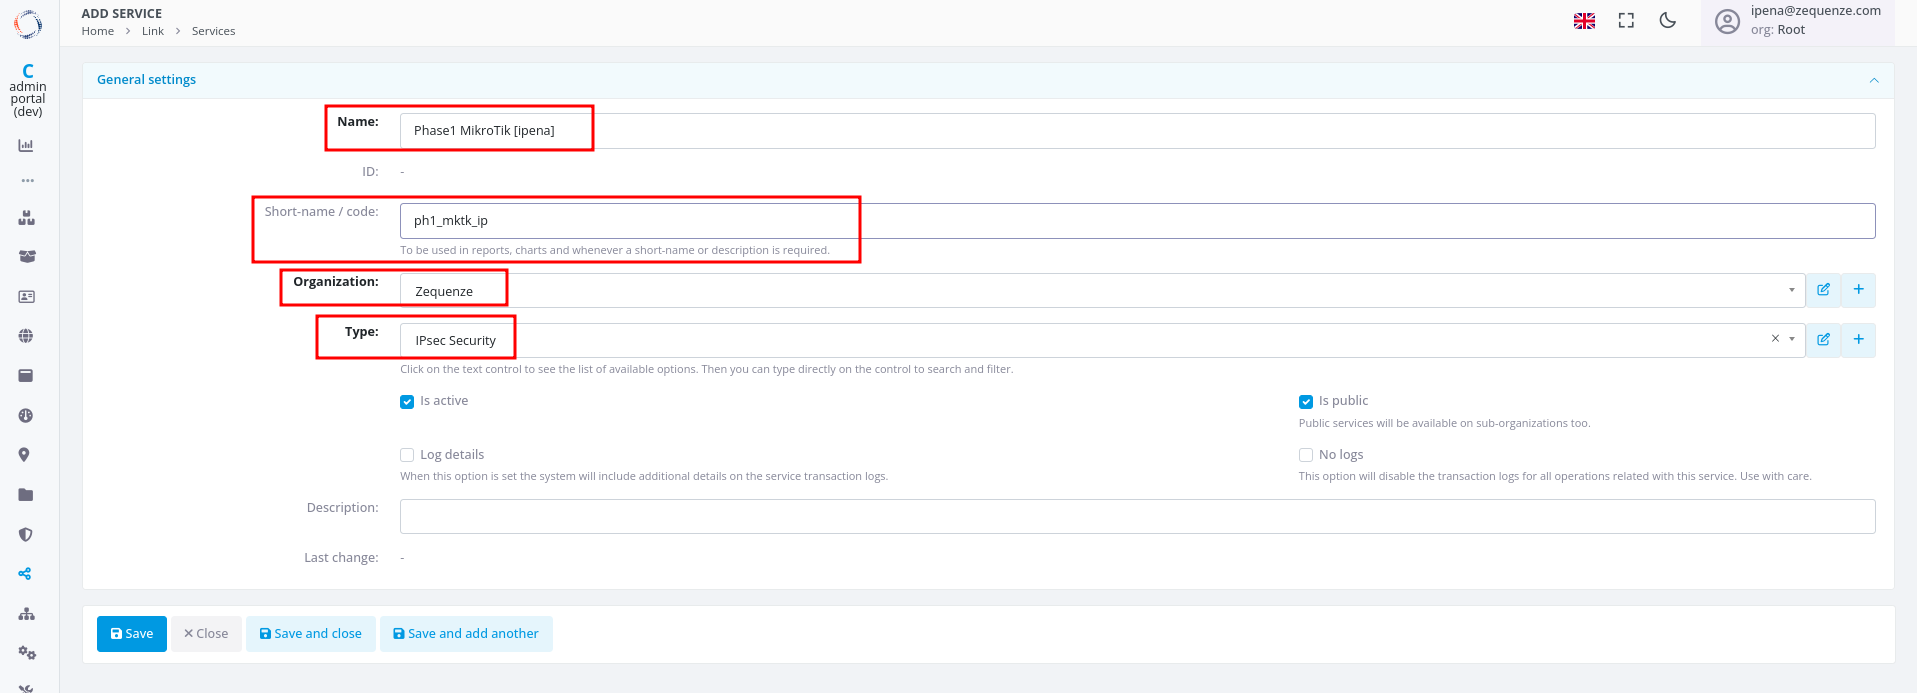
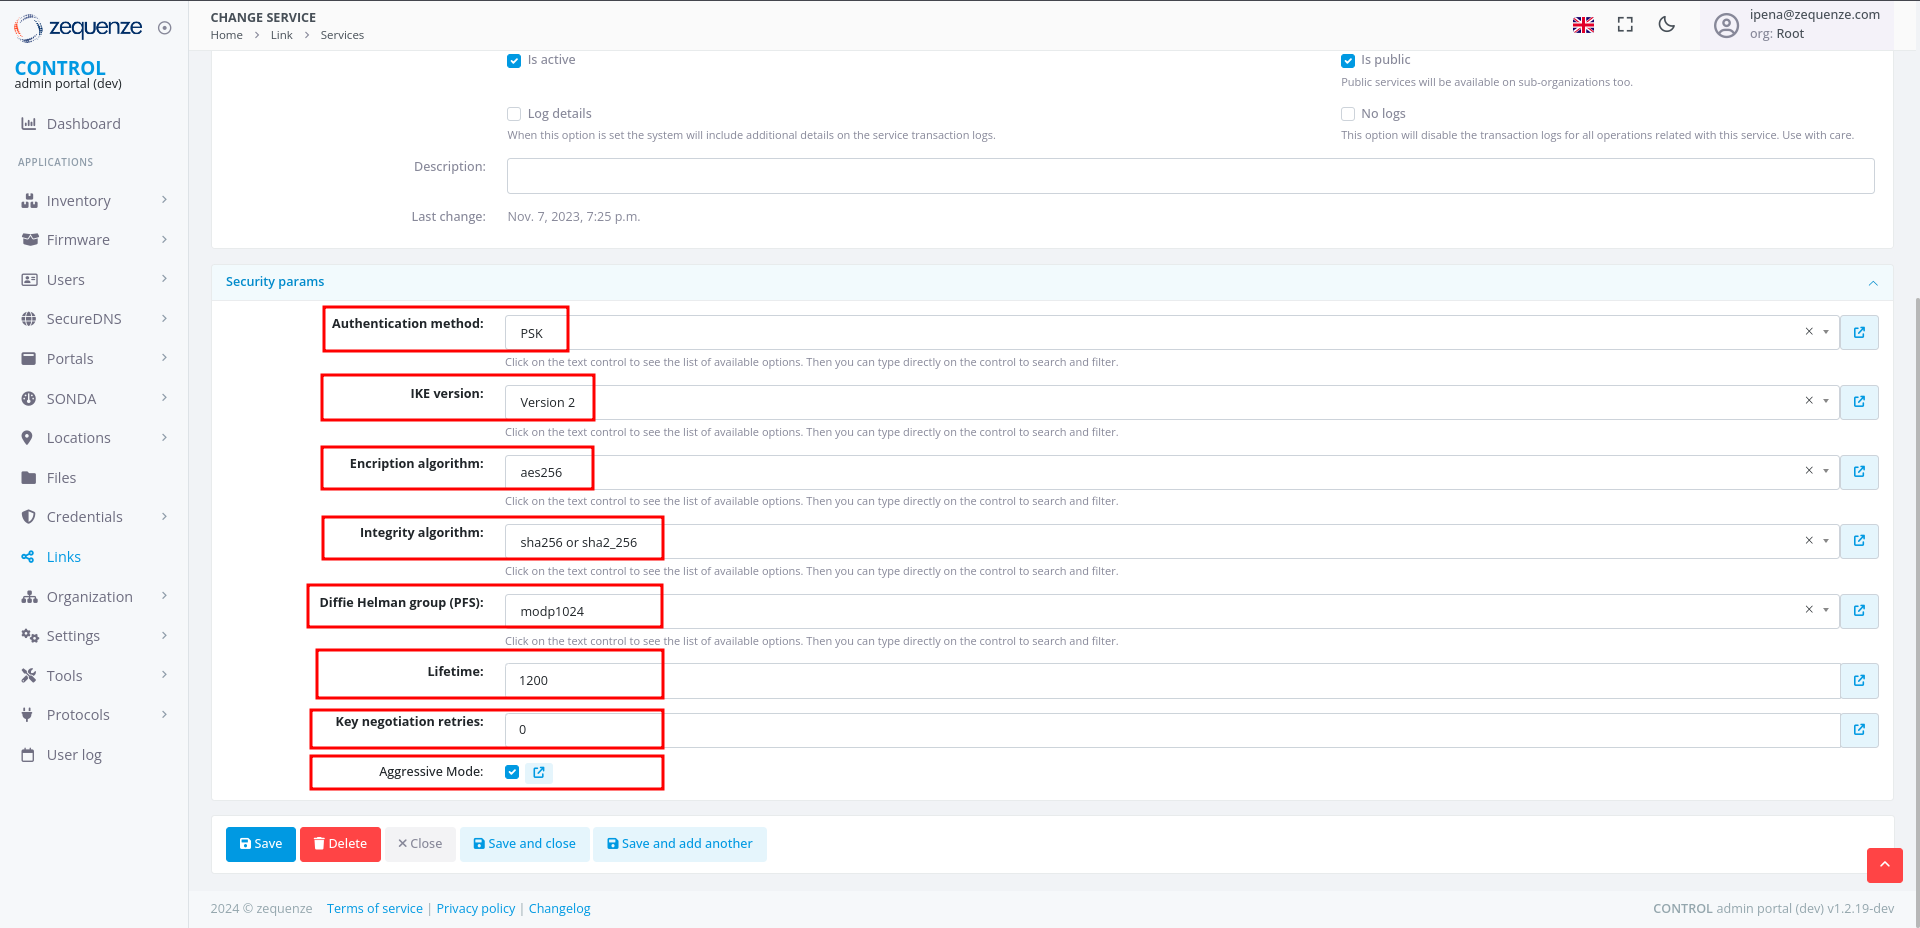
Step 1: Create IPsec Security Service (Phase 1)
-
Configure the basic information:
-
Click Save at the bottom
-
Configure the Phase 1 parameters to match your RouterOS configuration:
-
Click Save and close at the bottom
Step 2: Create IPsec Configuration Service (Phase 2)
-
In the Services tab, click +Add again to create another service
-
Configure the basic information:
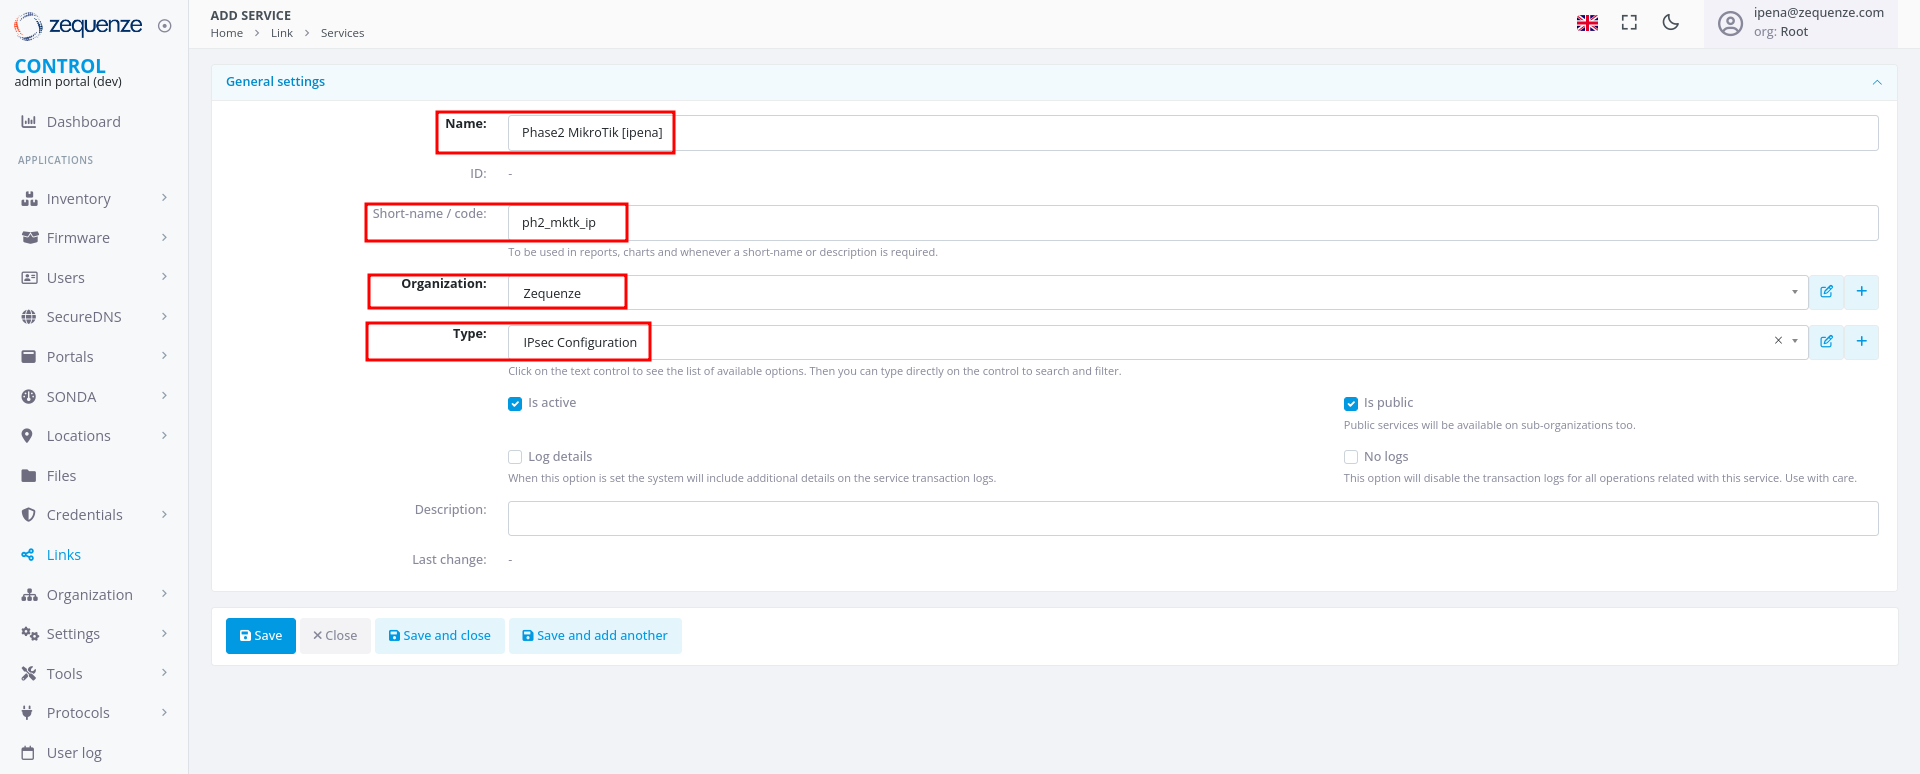
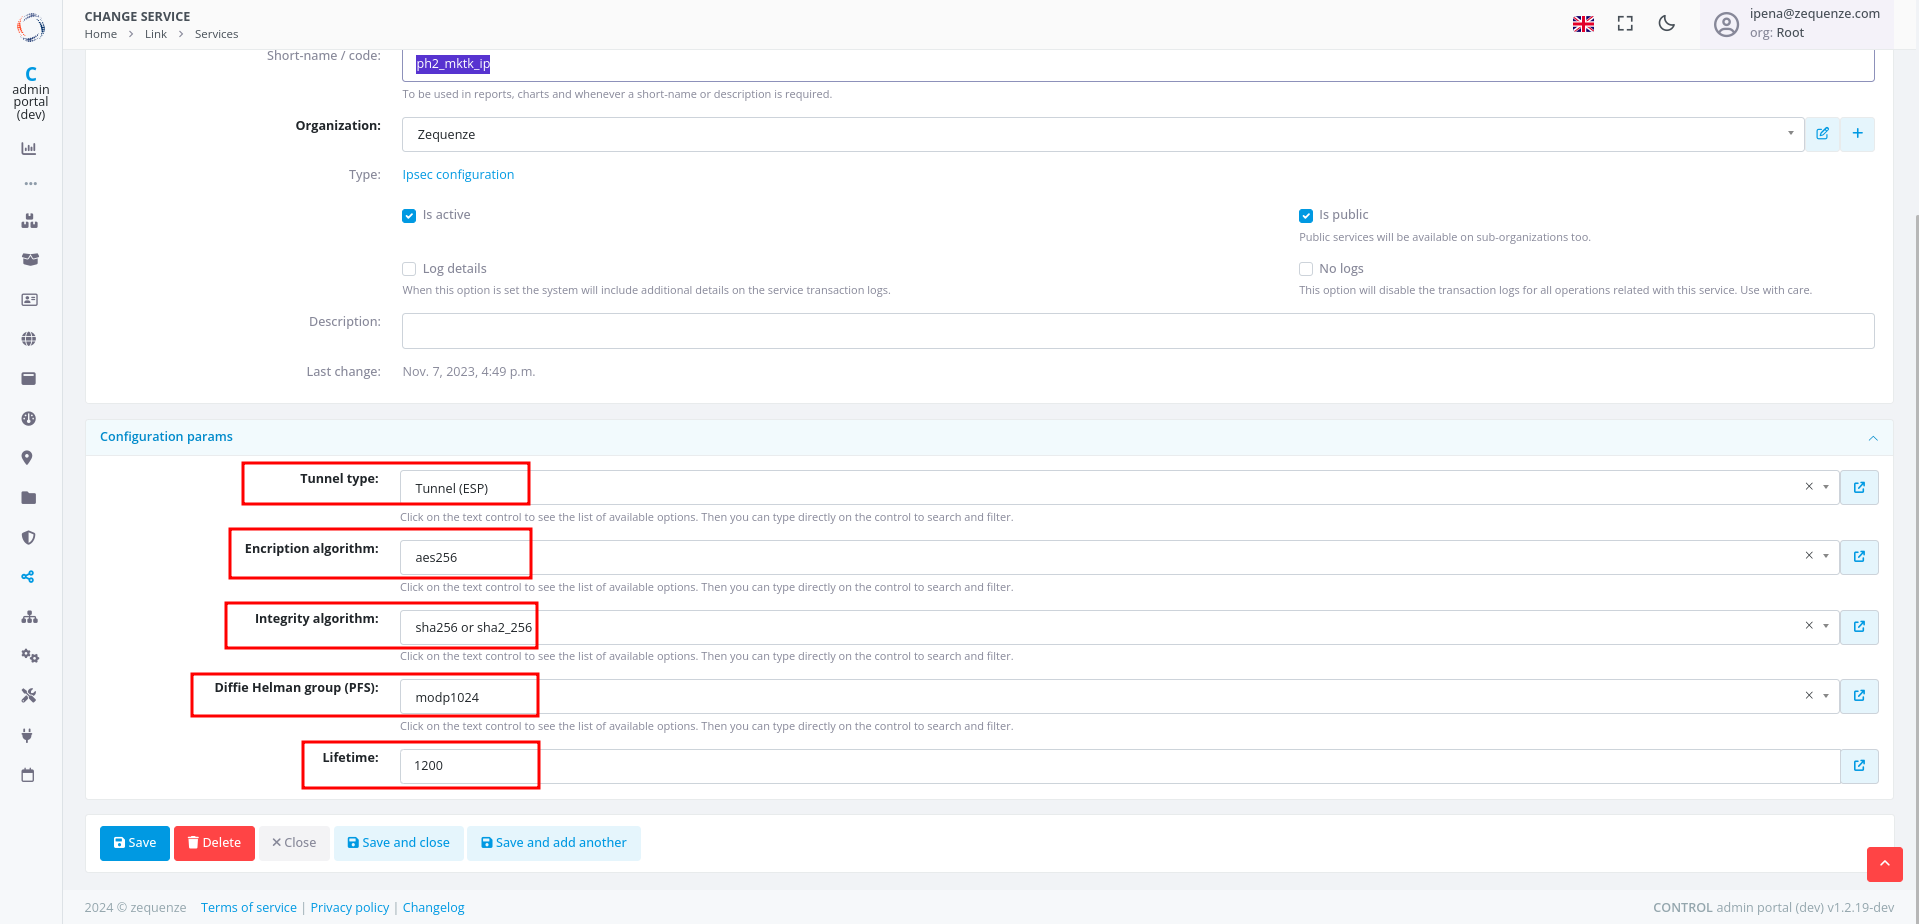
-
Configure the Phase 2 parameters to match your RouterOS configuration:
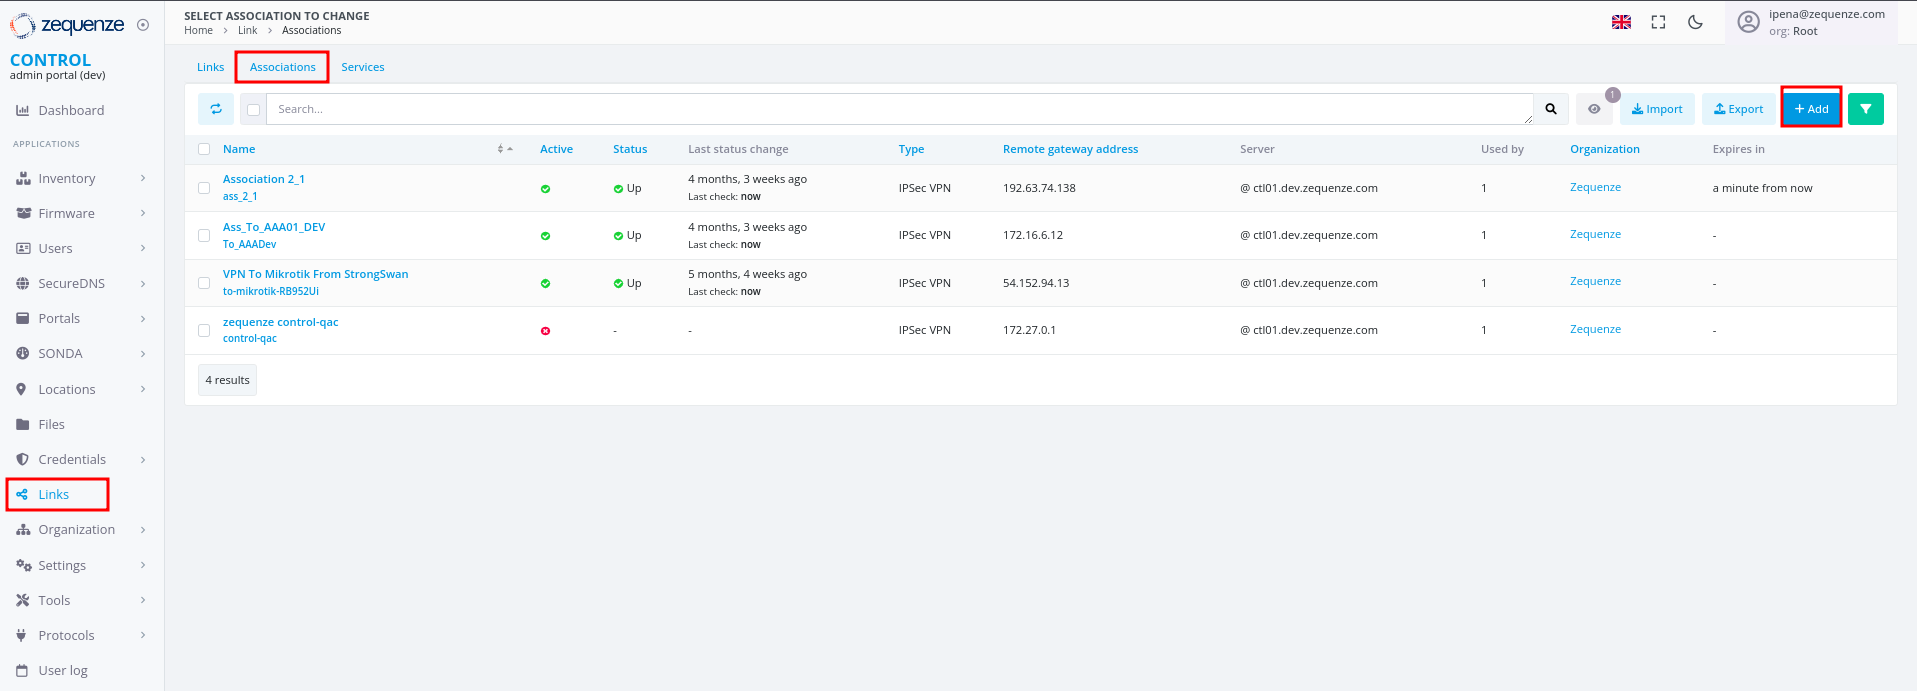
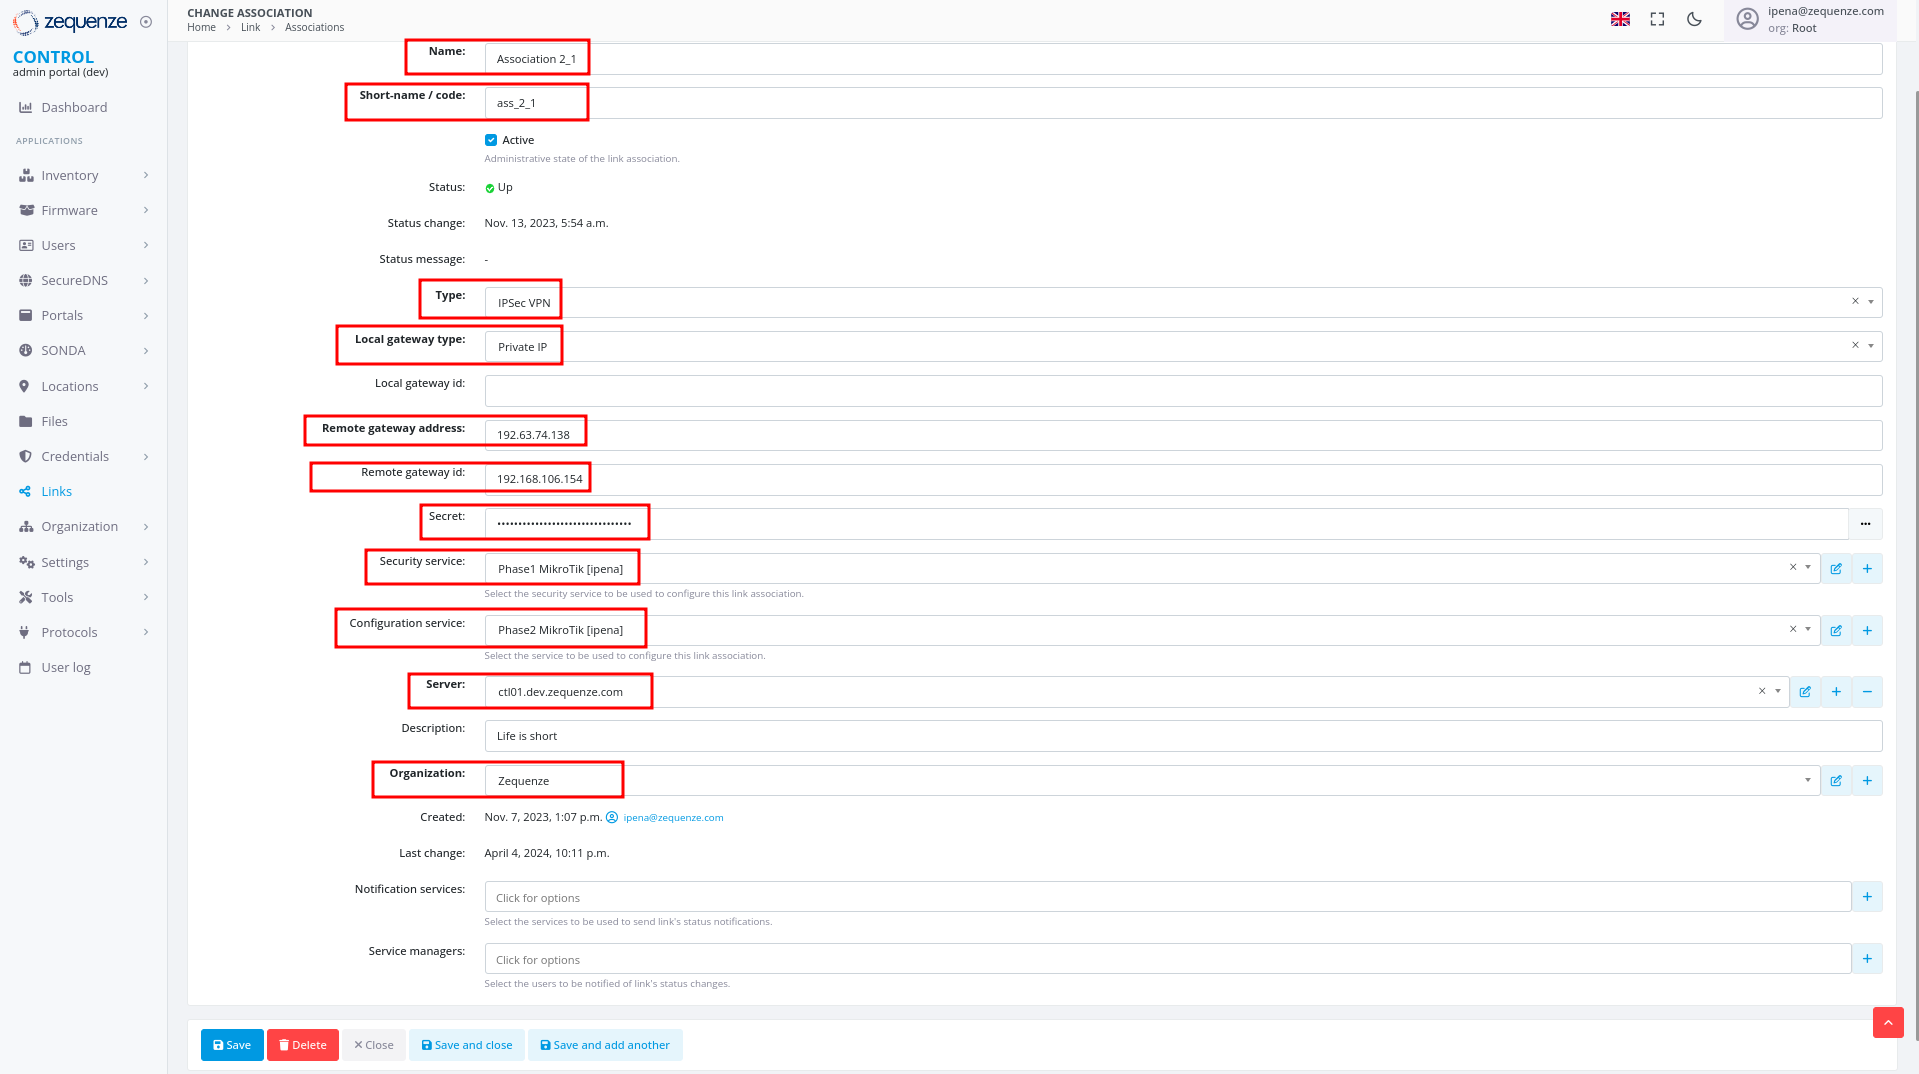
Step 3: Create Association
- In the Links section, select the Association tab
- Click the +Add button
-
Configure the following fields:
Step 4: Create Link
- In the Links section, ensure you are on the Links tab
- Click the +Add button
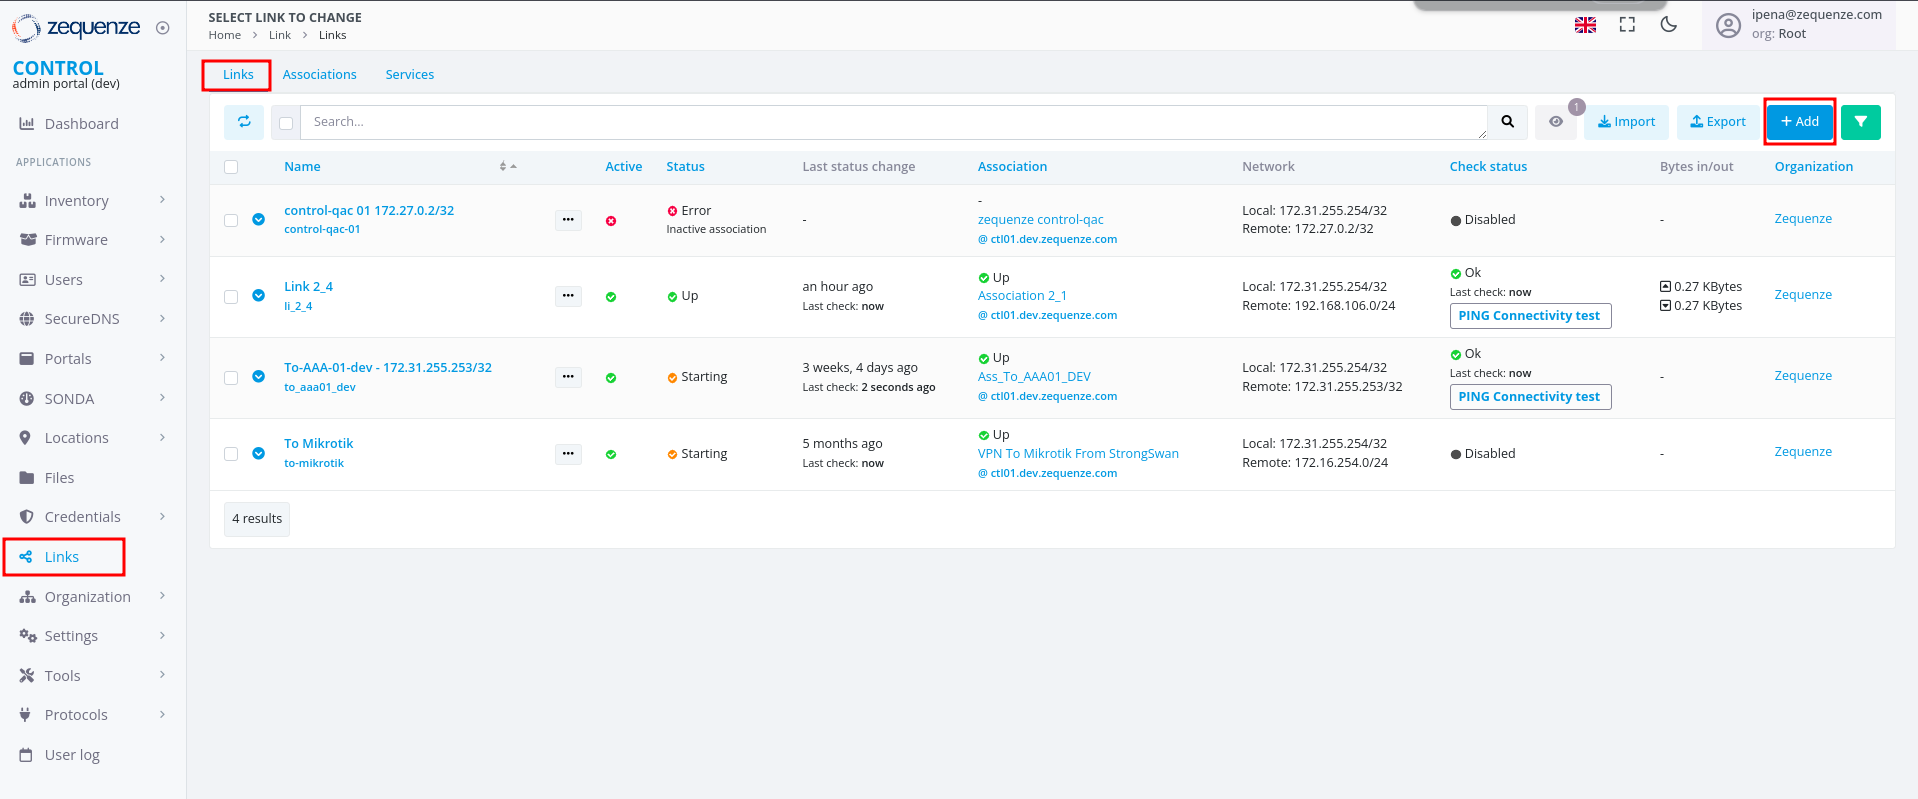
-
Configure the following fields:
- For CONTROL: typically
172.31.255.254/32 - For GATE: typically
172.31.255.253/32 - (Verify the correct IP internally before configuring)
- For CONTROL: typically
Verification and Summary
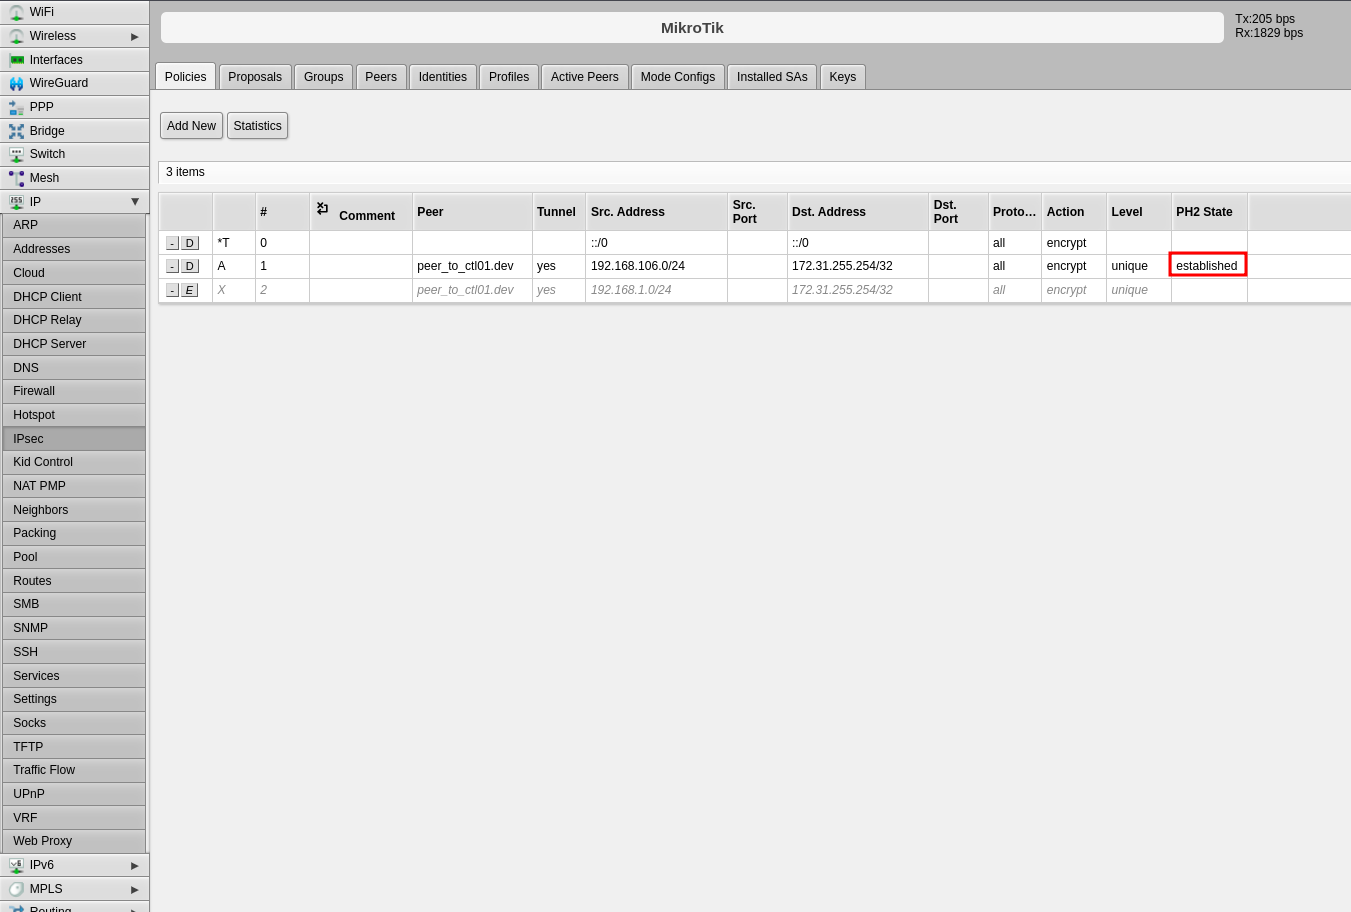
RouterOS Connection Status
Once the configuration is complete, you should see the connection established in RouterOS as shown below:
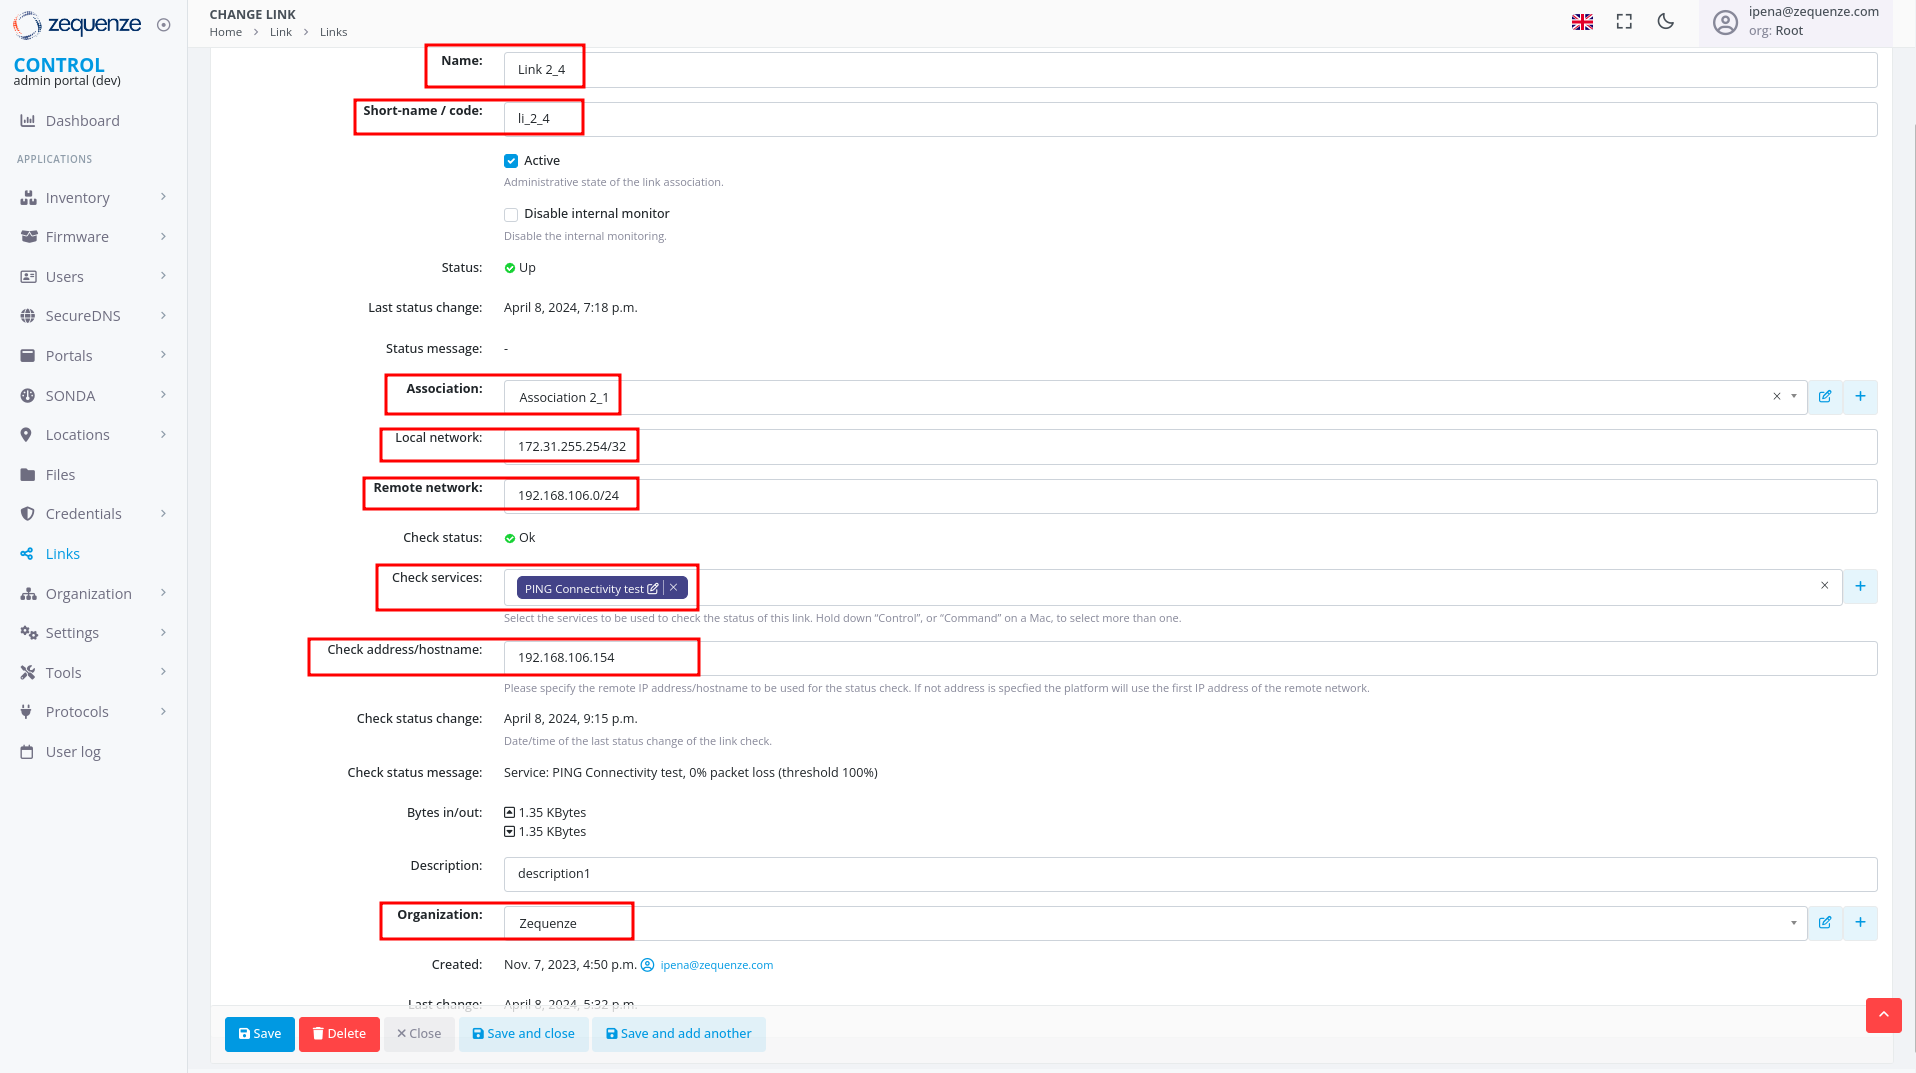
CONTROL Connection Status
The Link within CONTROL should appear as follows when successfully established:

This completes the IPsec VPN tunnel configuration between RouterOS and CONTROL. The tunnel should now be active and passing traffic between the configured networks.